Setting the notification email for the main voicemail box
-
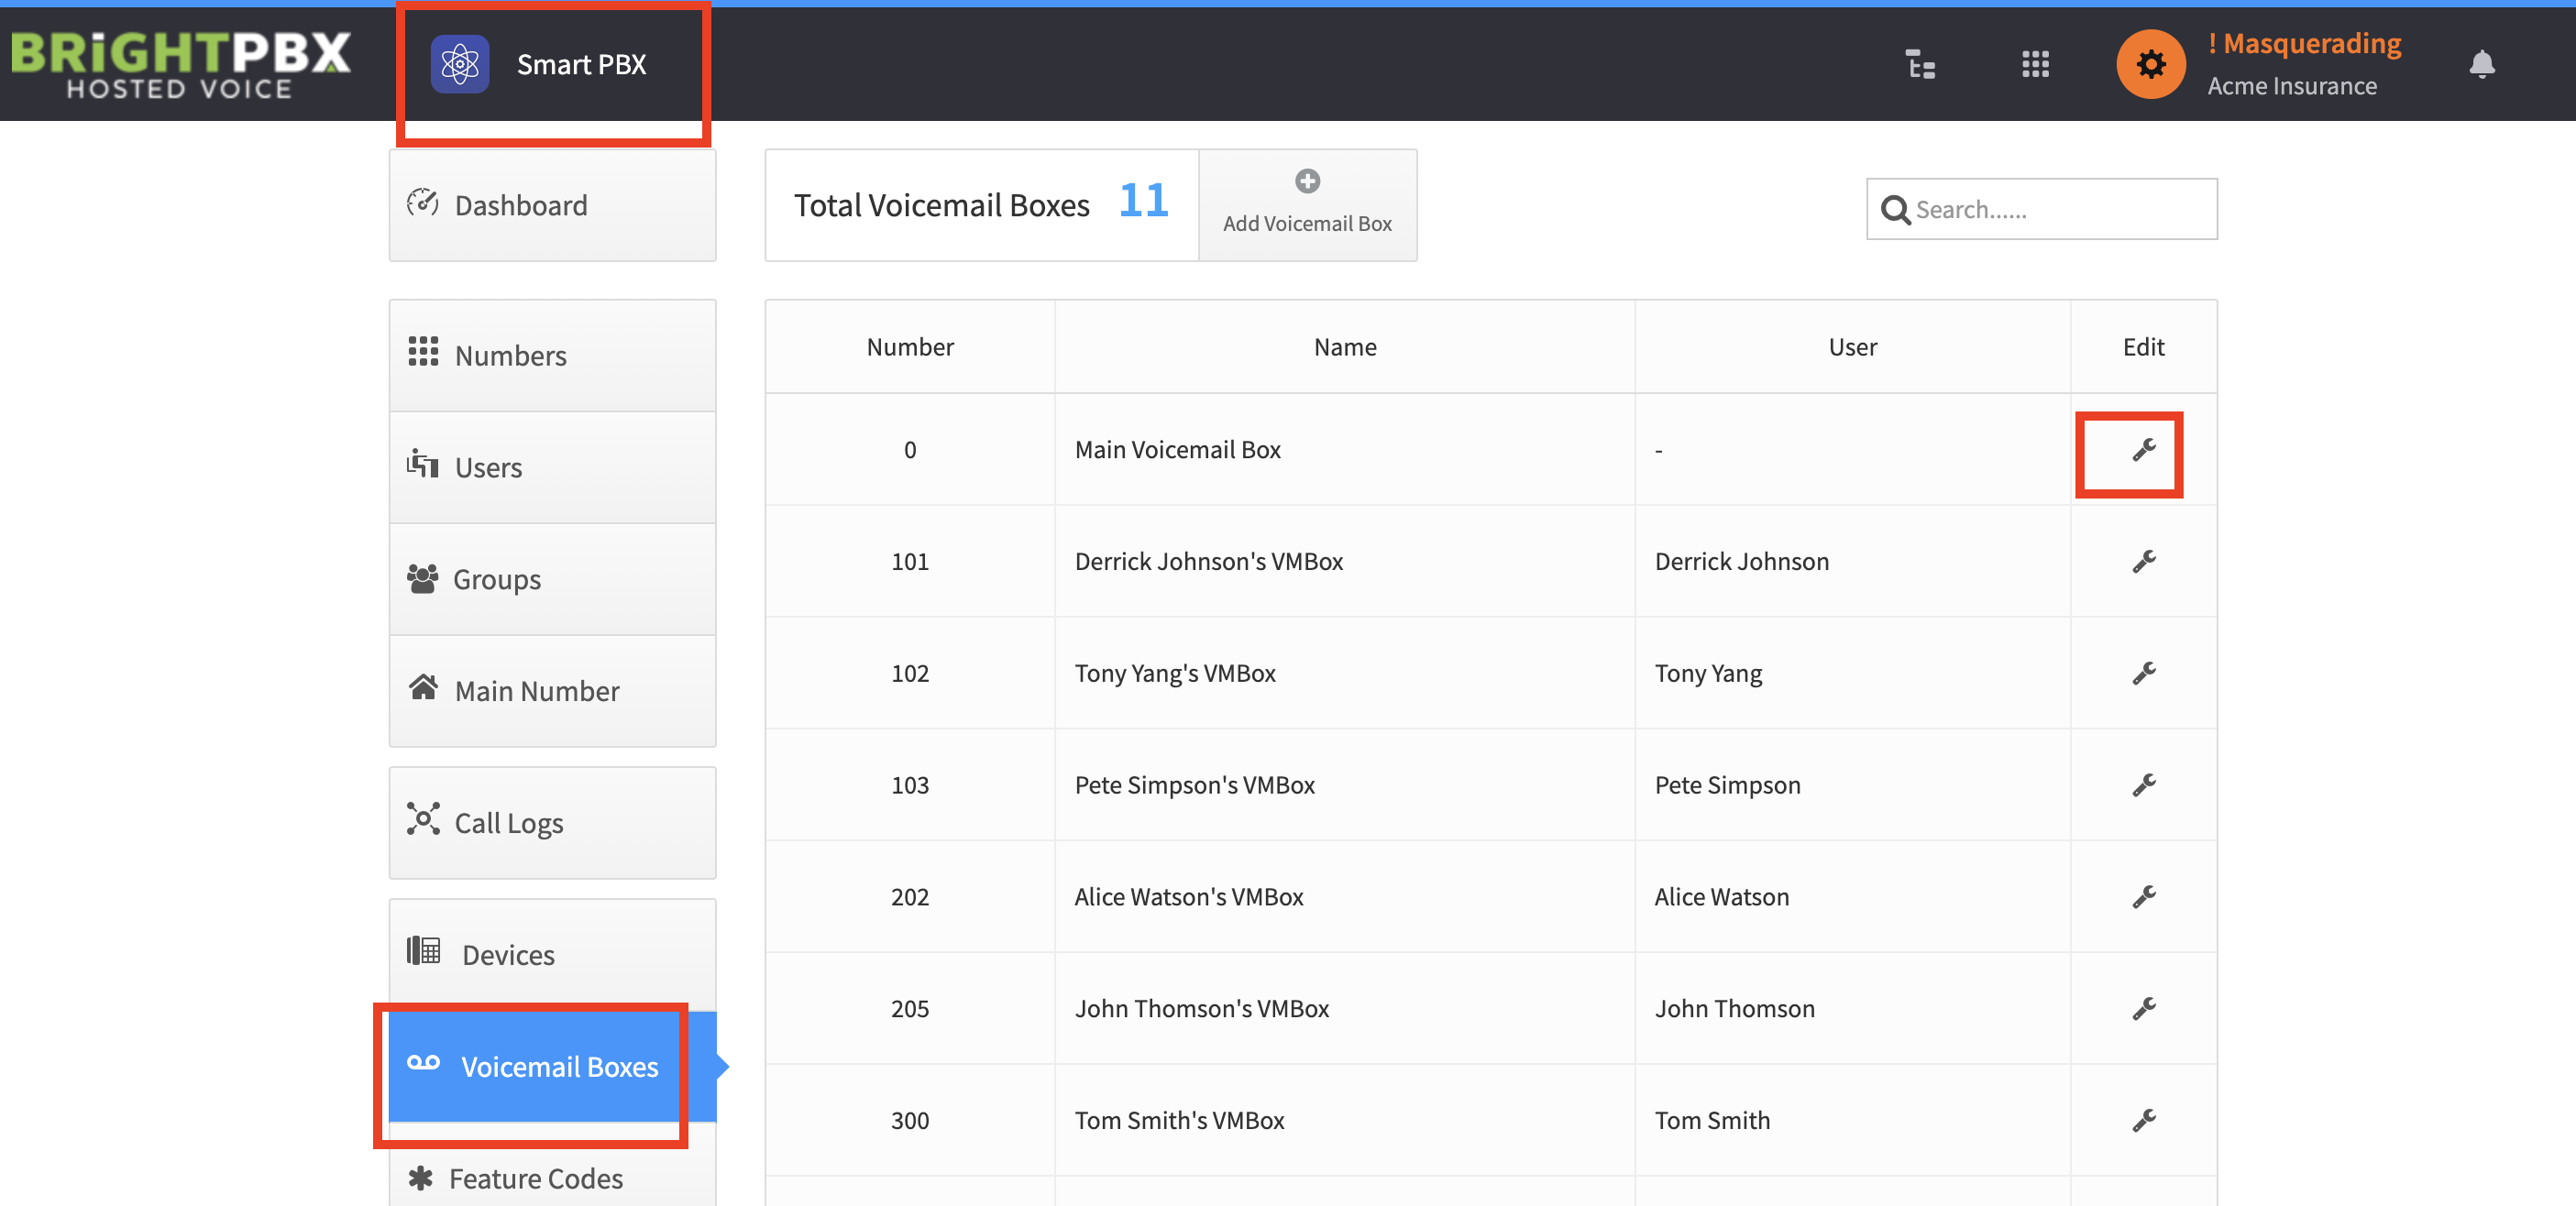
From Smart PBX, choose Voicemail, and click the wrench icon for the Main Voicemail box. This is usually the first row, numbered 0.
-
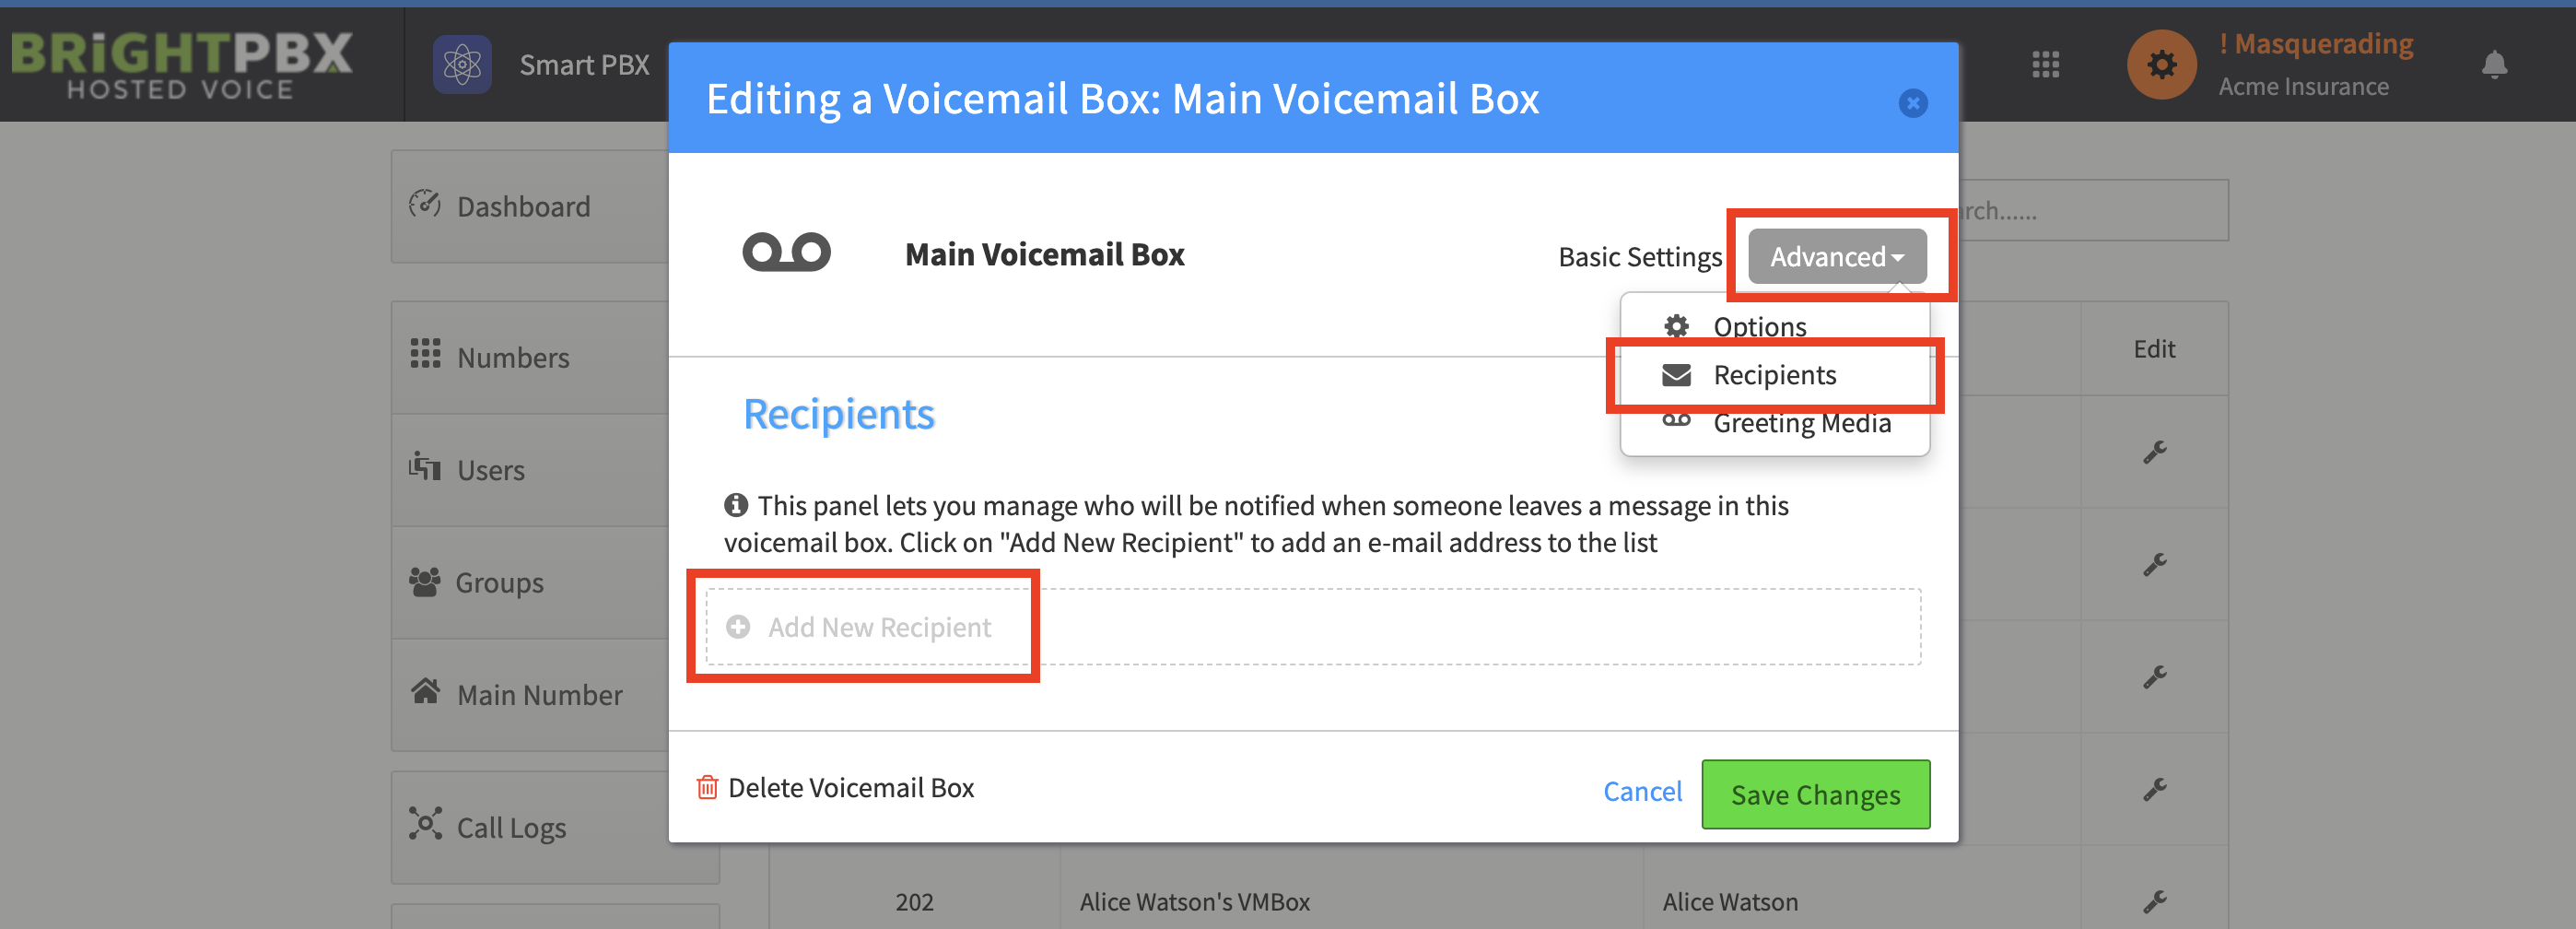
From the Advanced menu, choose Recipients, and click the Add New Recipient text field
-
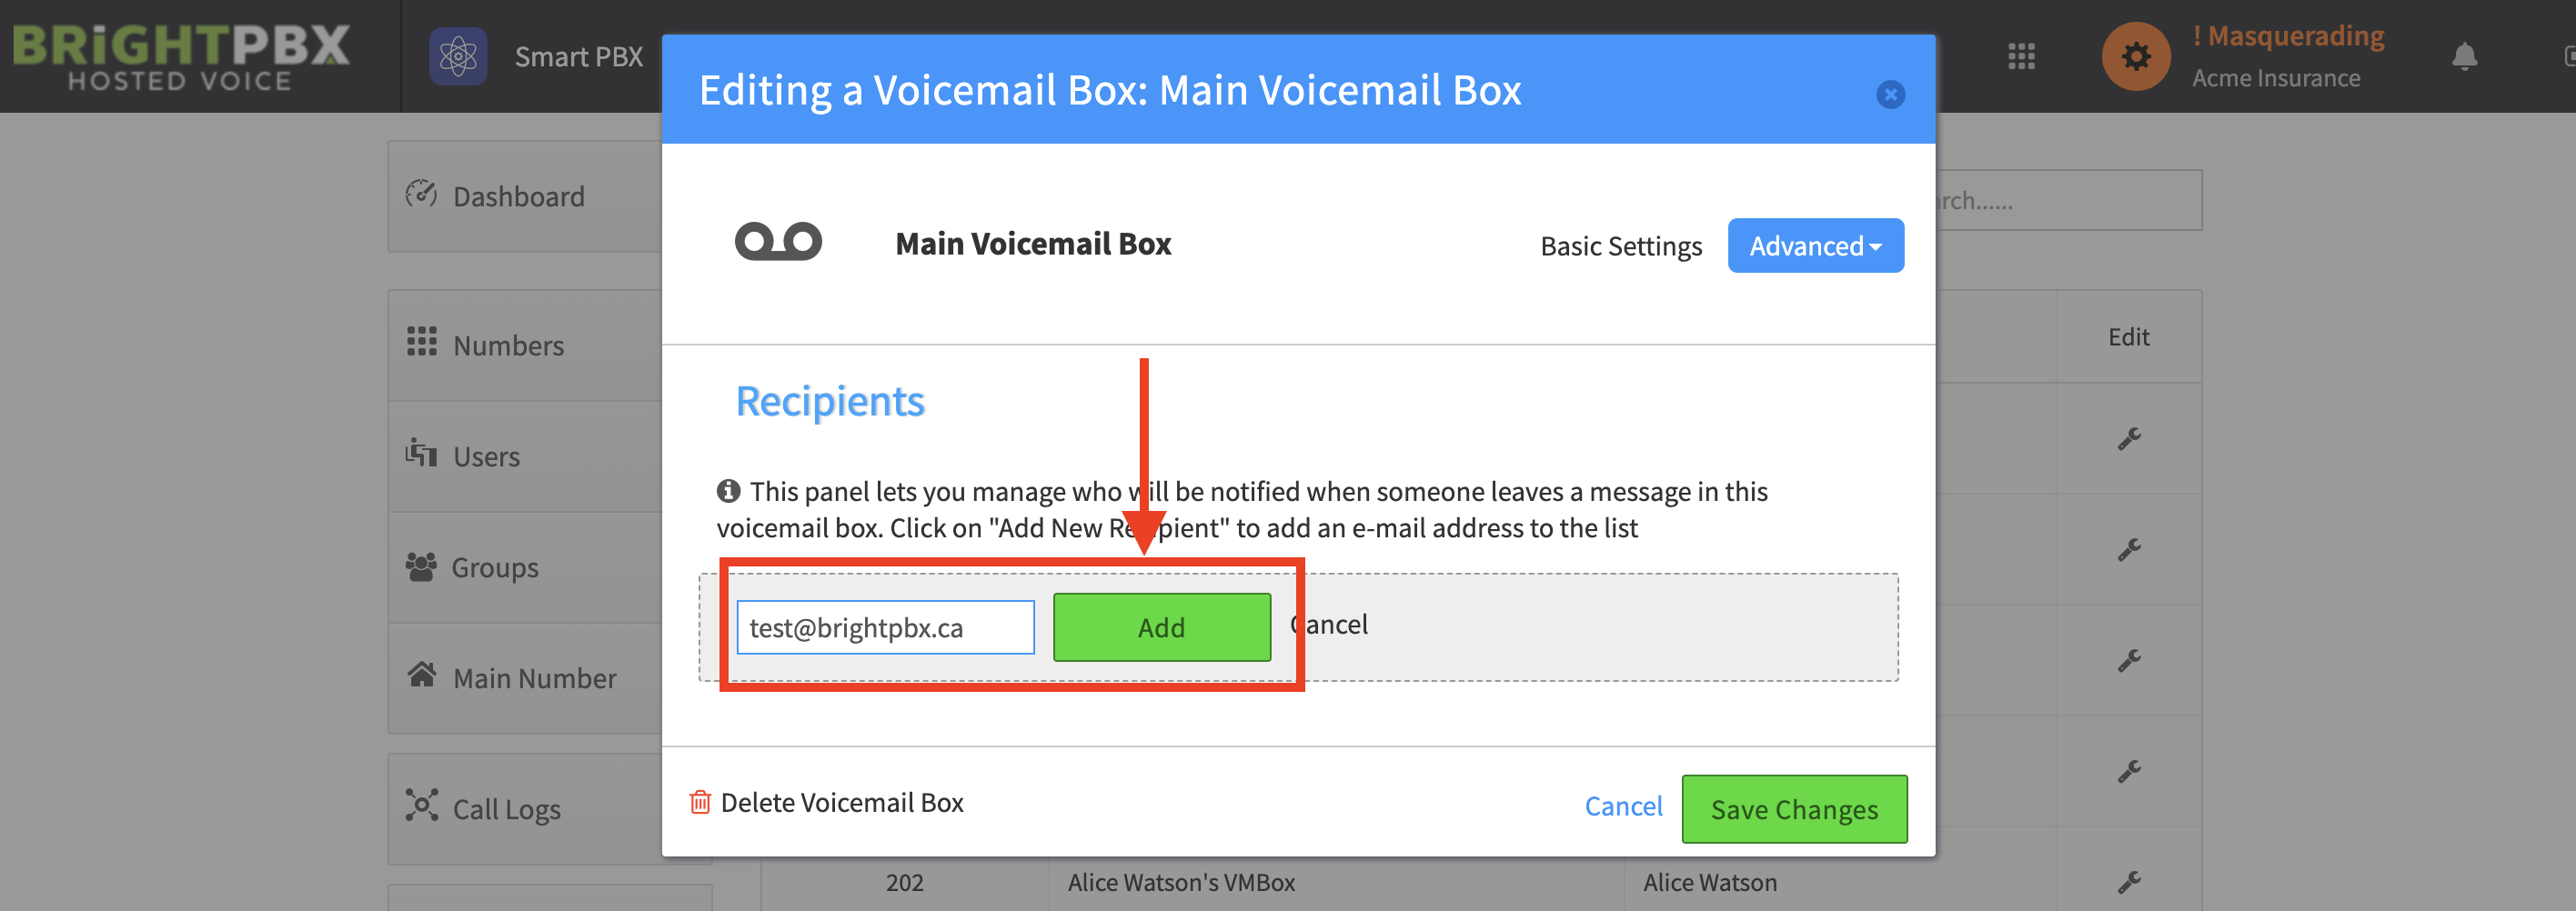
Enter your desired email, and click Add. Repeat for any other emails.
-
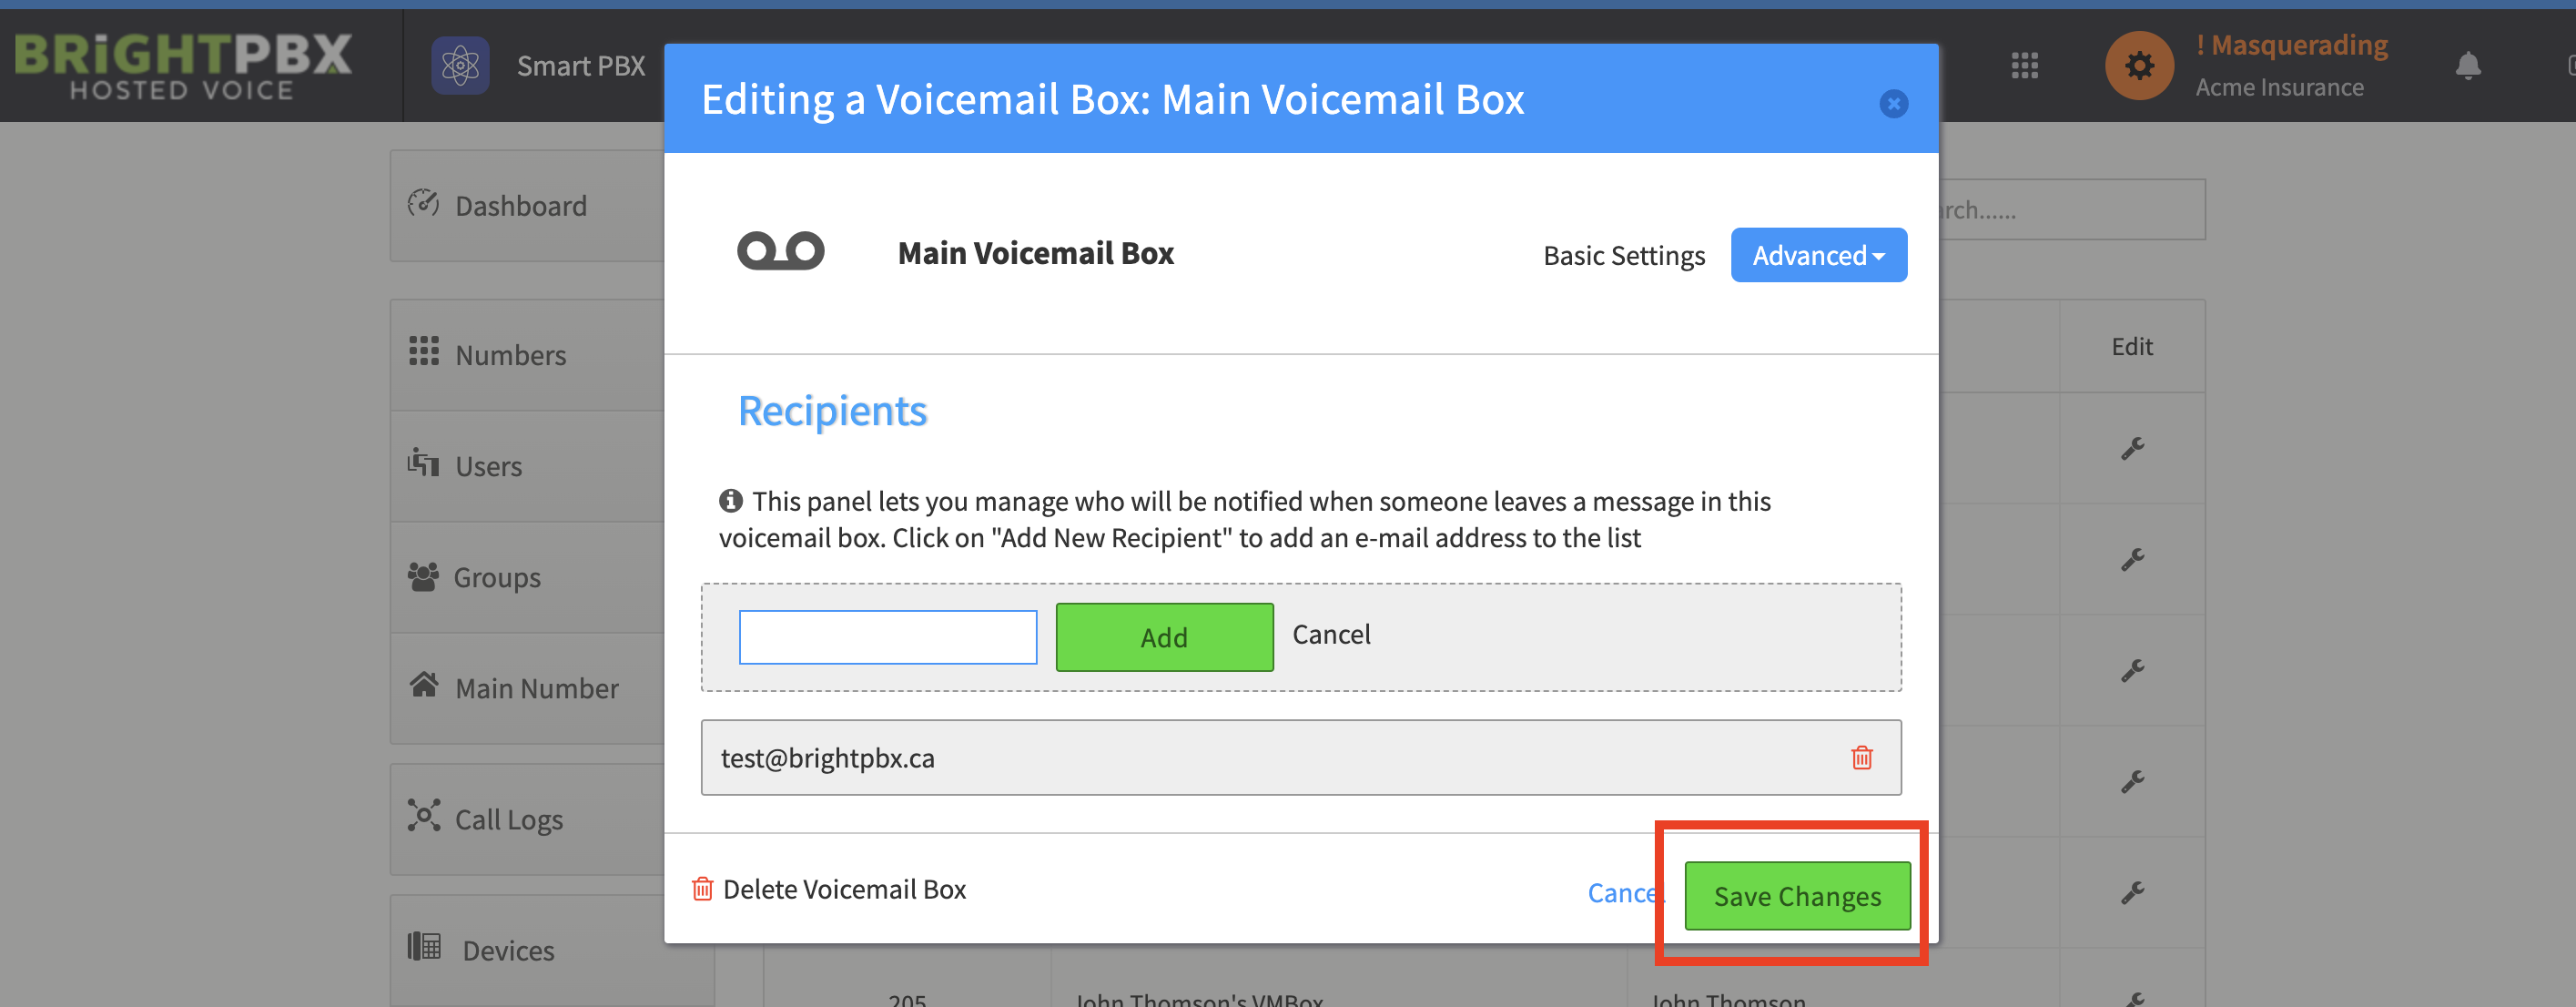
Once you have entered all emails, click Save Changes in the bottom right