Configuring the Virtual Receptionist (IVR)
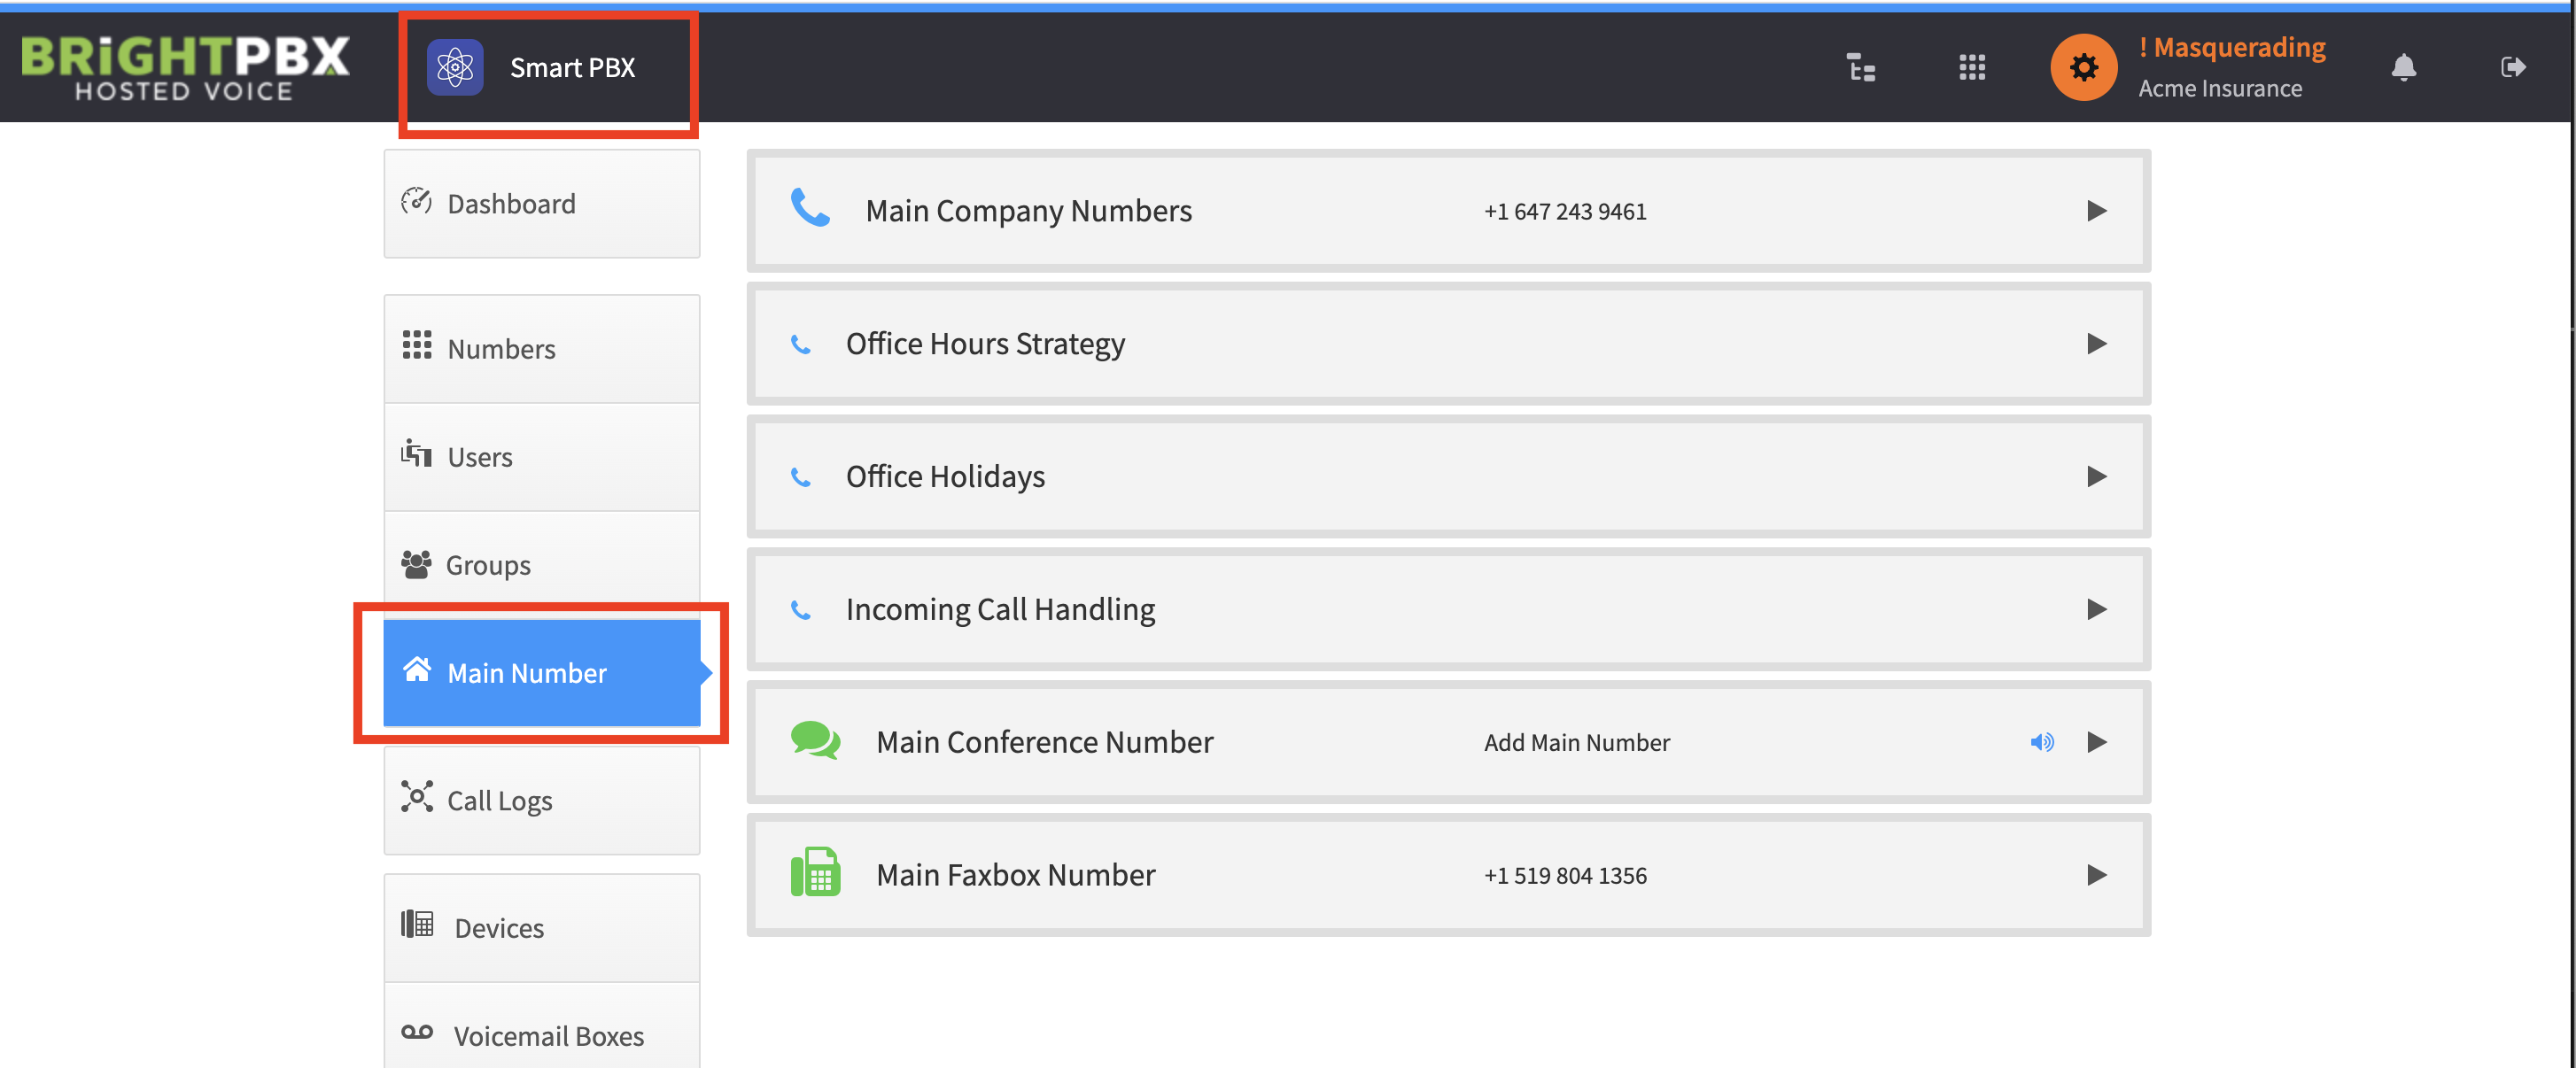
From the Smart PBX app, choose Main Number.
Setting up your office hours
Section titled “Setting up your office hours”If you want to handle open and closed hours differently, choose Office Hours Strategy and configure your day-of-week and time preferences. Otherwise, if you are not configuring separate messages for open versus closed, leave 24 hours Open Office selected.
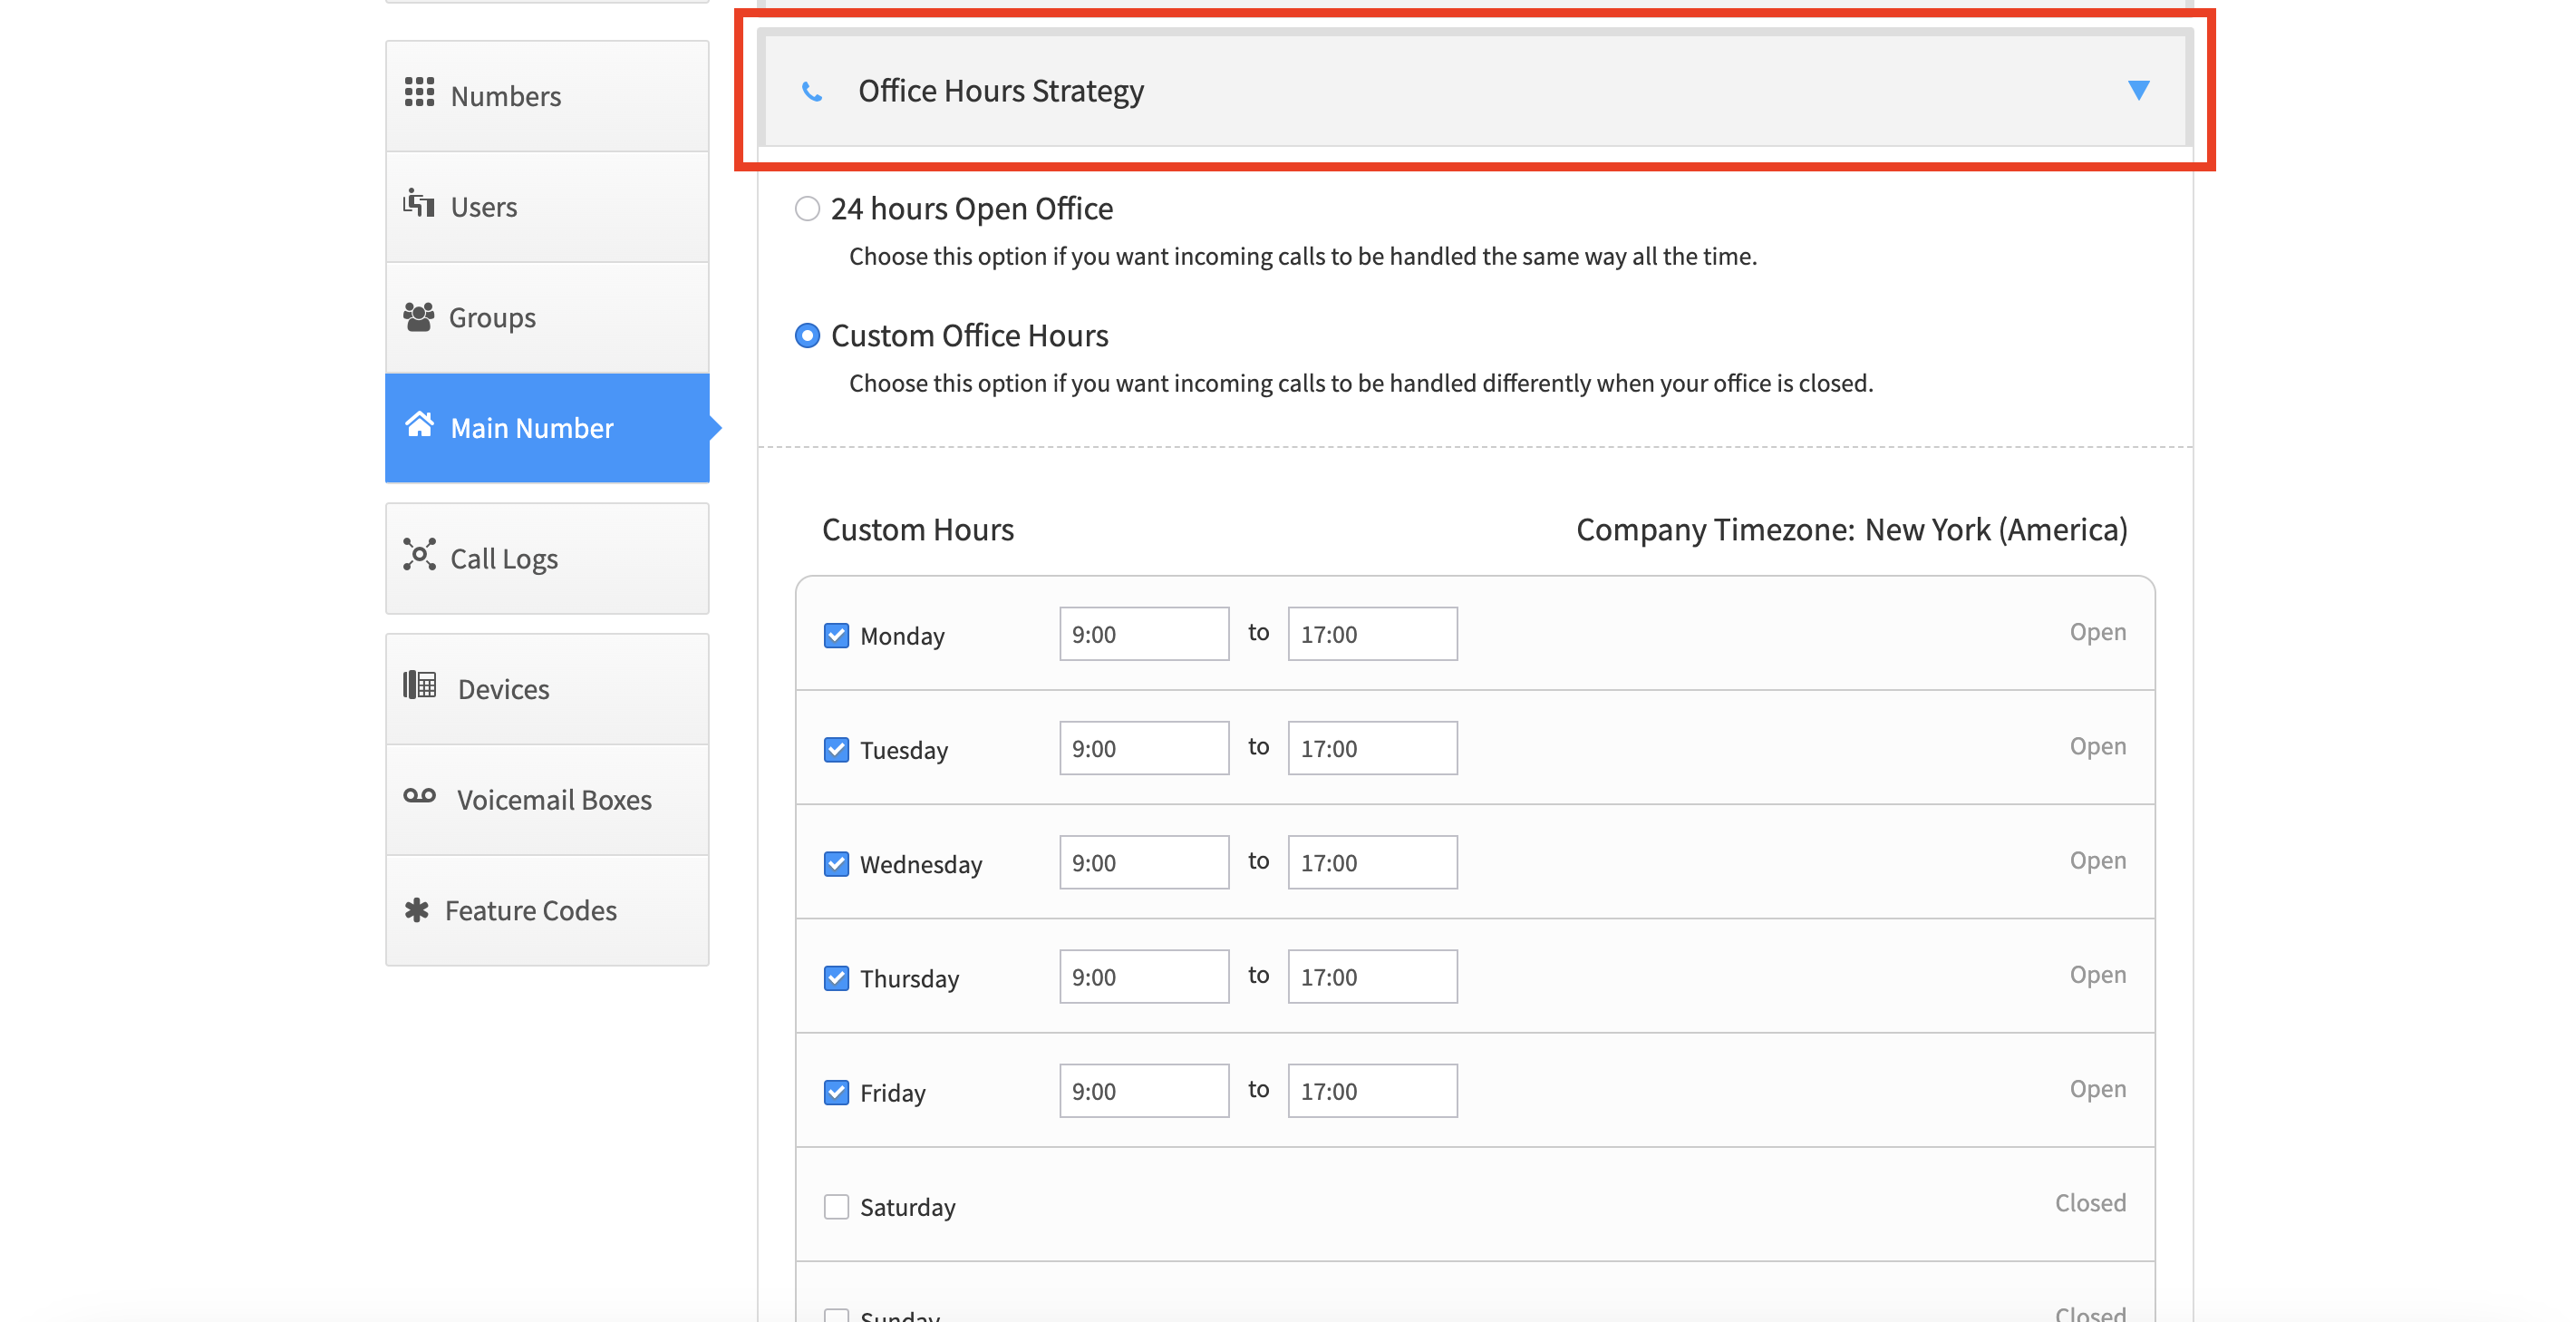
Optionally, repeat for Office Holidays if you want separate holiday routes.
Setting up how calls are routed
Section titled “Setting up how calls are routed”-
Expand the Incoming Call Handling panel
-
If you set up separate Open, Closed or Holiday routes, click the appropriate panel — Open Hours, After Hours, or Holidays — depending on which route you want to configure
-
Choose Virtual Receptionist
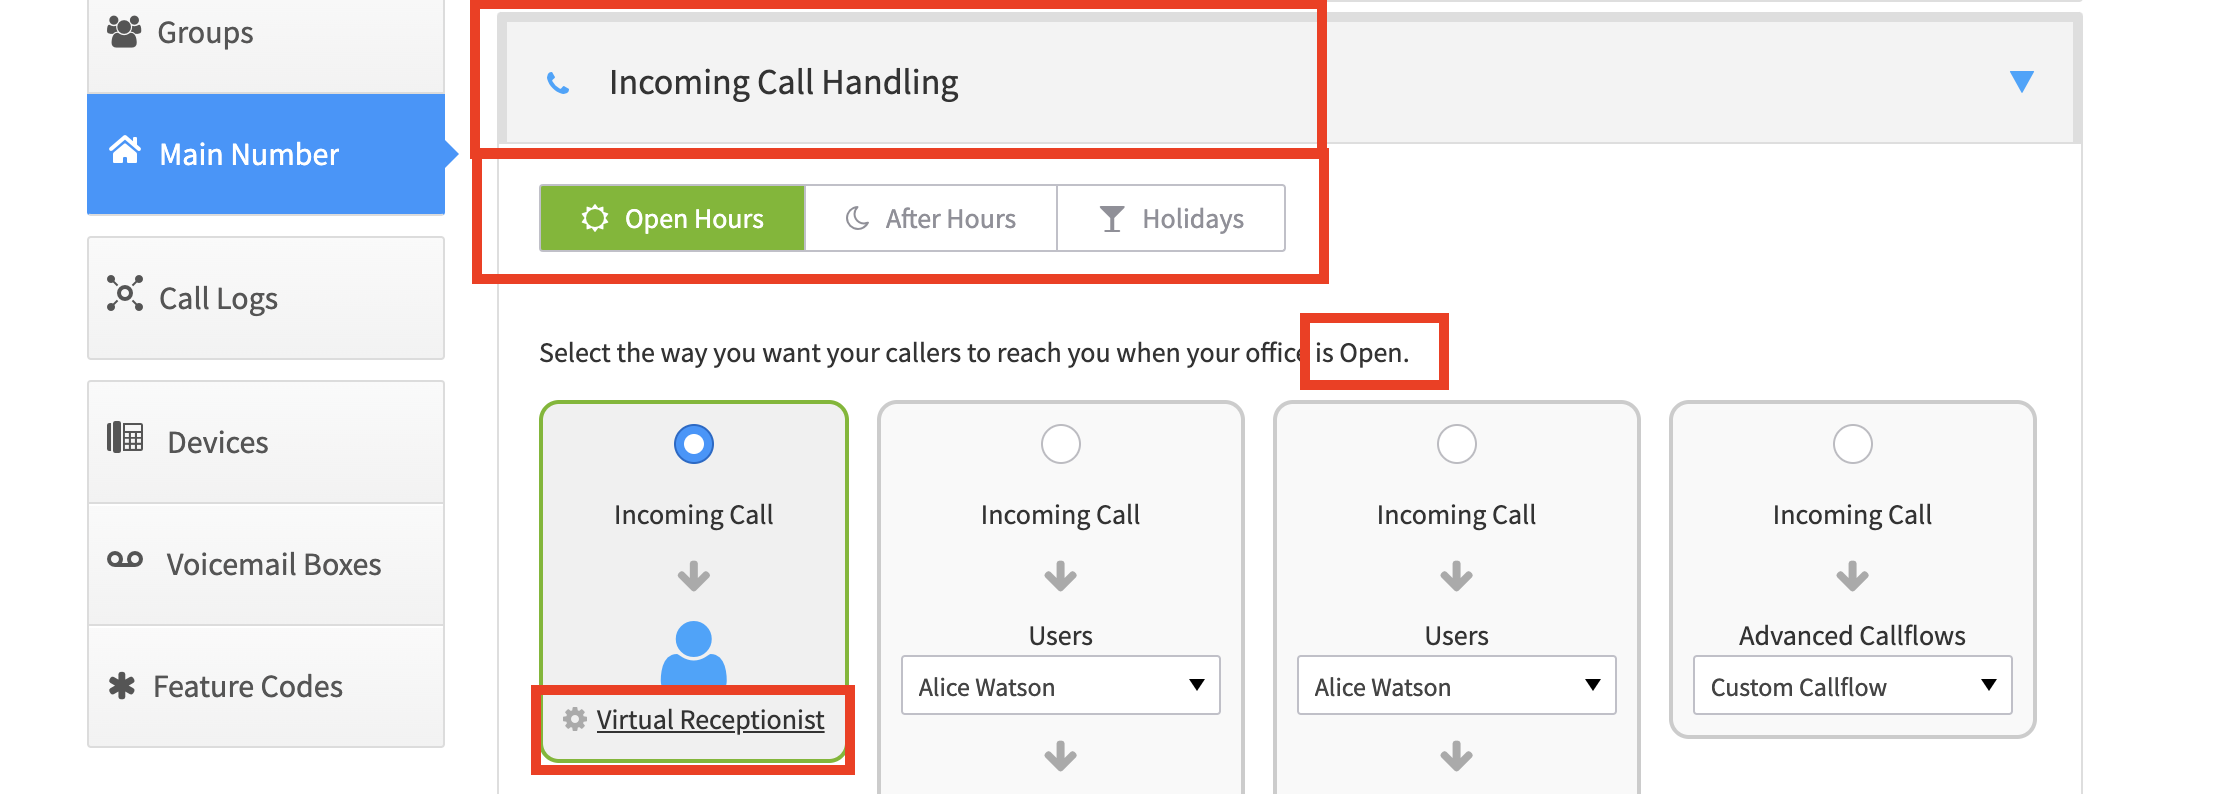
You will be presented with the Virtual Receptionist configuration page.
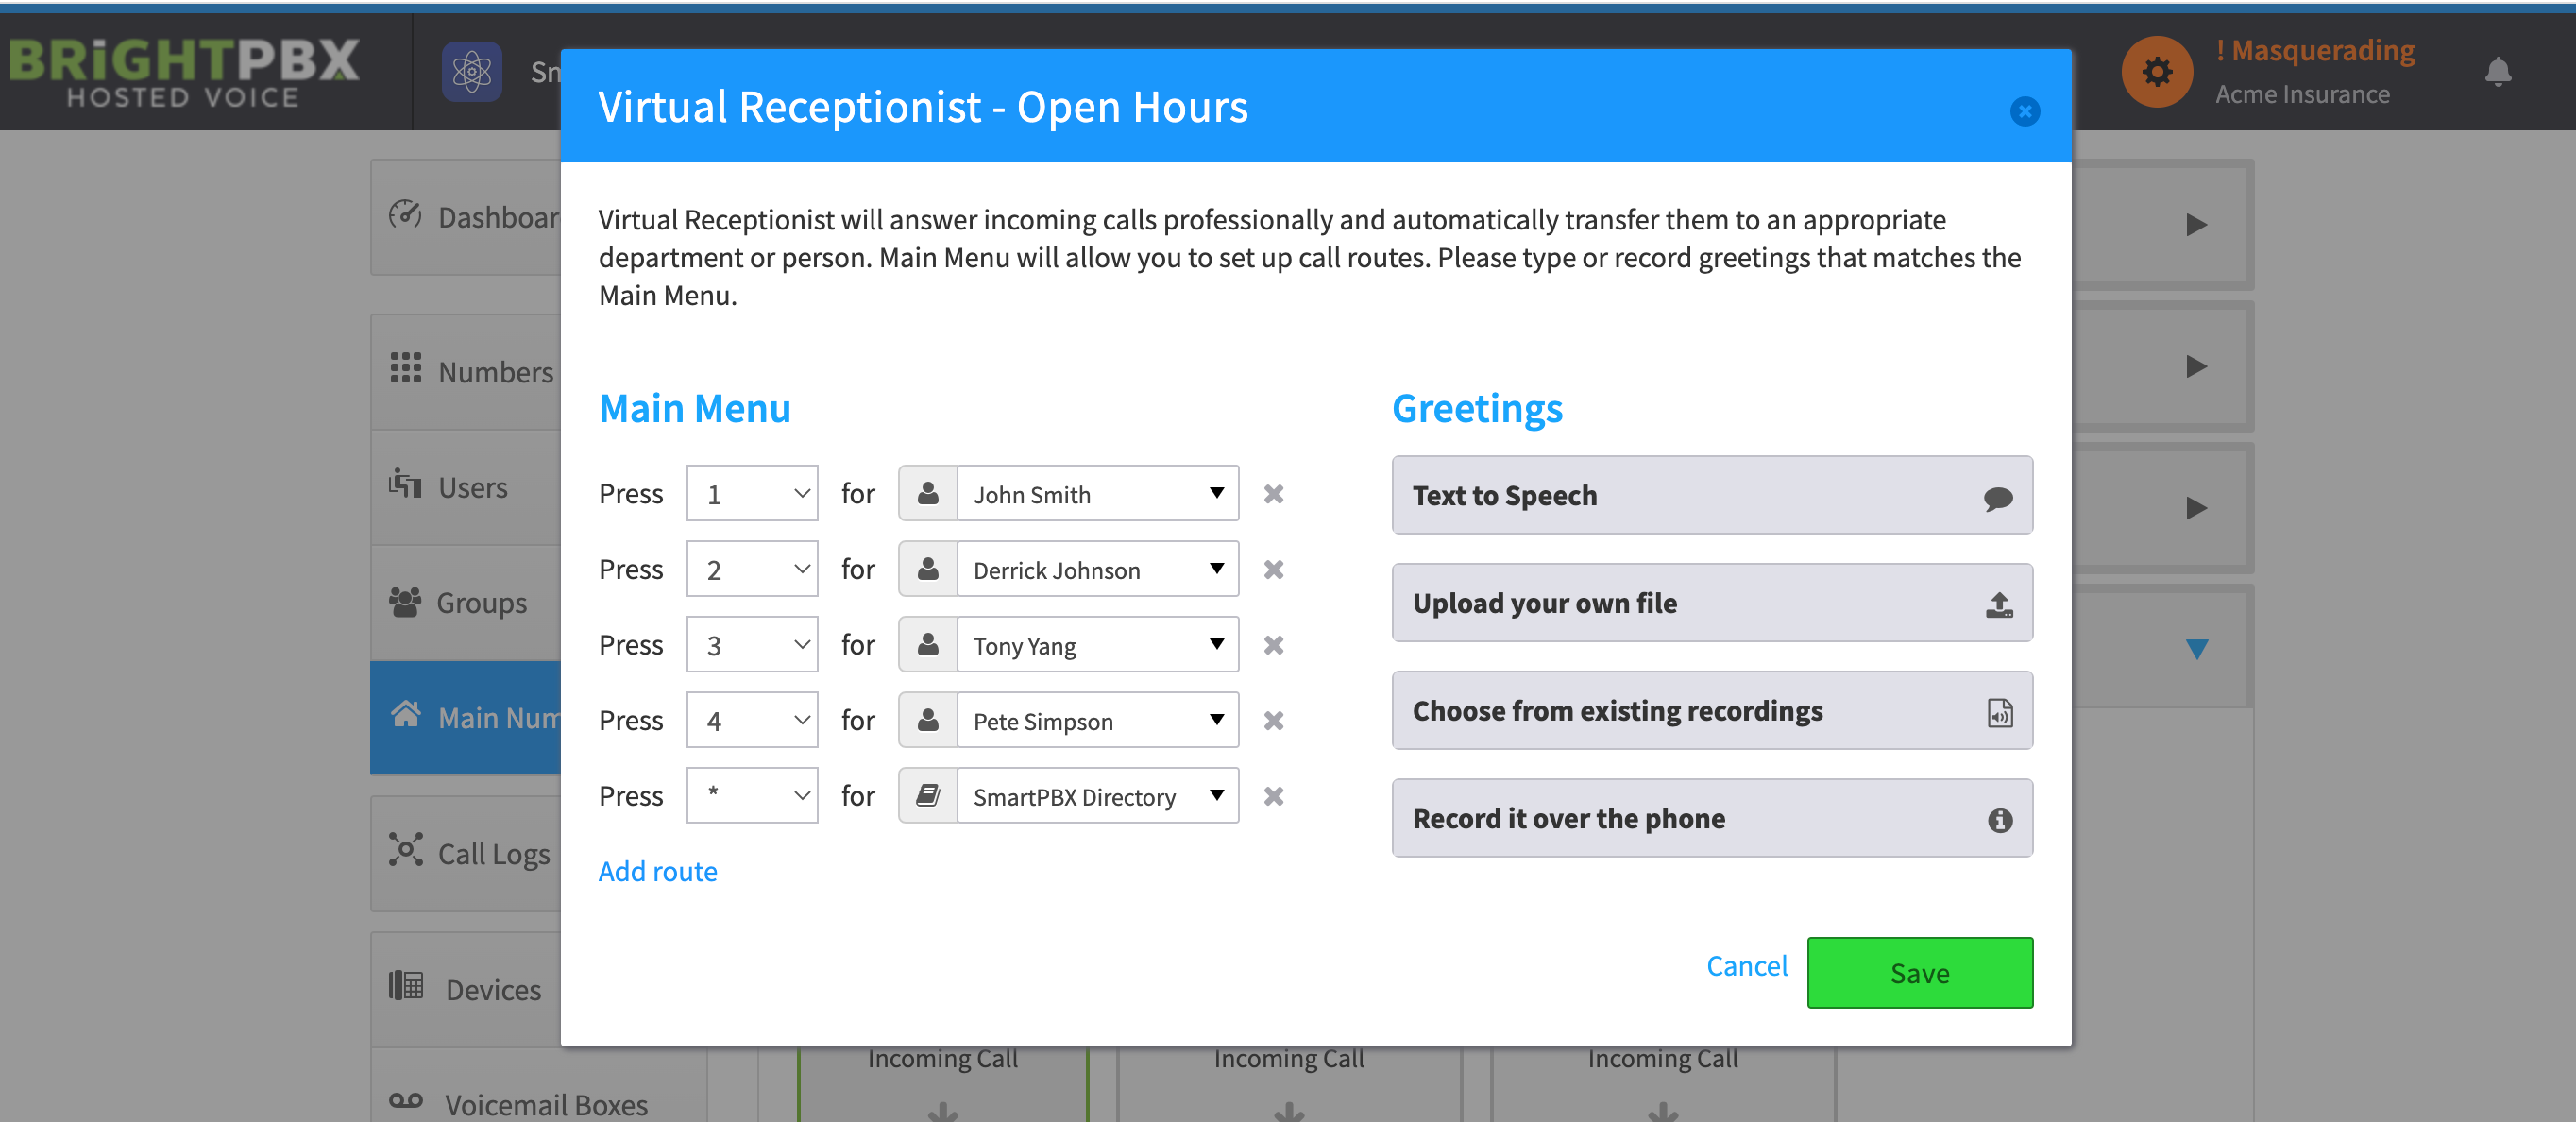
Adding routes
Section titled “Adding routes”To add menu options, click Add route and follow the prompts. You are not limited to users — you can set the destination to a ring group, voicemail, or even another IVR.
The Smart PBX Directory is a special option that lets the caller type the first few letters of any user’s name and be directed to them. See Include a user in the company directory for adding users to it.
Configuring the greeting
Section titled “Configuring the greeting”There are three ways to install a greeting:
| Method | Notes |
|---|---|
| Text to Speech | Type the greeting and the system speaks it |
| Upload your own recording | MP3 or WAV — see the required audio format |
| Record over the phone | Dial into the PBX and record it — see recording from your phone |
The panel under the Greetings section will guide you in all cases.