Provisioning Yealink Series
-
Add the device to Smart PBX
-
Reset to factory settings. Select OK and hold it down for six seconds. The device asks whether you want to reset to factory settings — select OK.
-
Obtain the phone’s IP address. Press the OK button and look for a line such as
IP: 10.10.9.88. -
Enter the IP address and log in. Enter the IP address in your browser. The default username is
adminand the password is alsoadmin.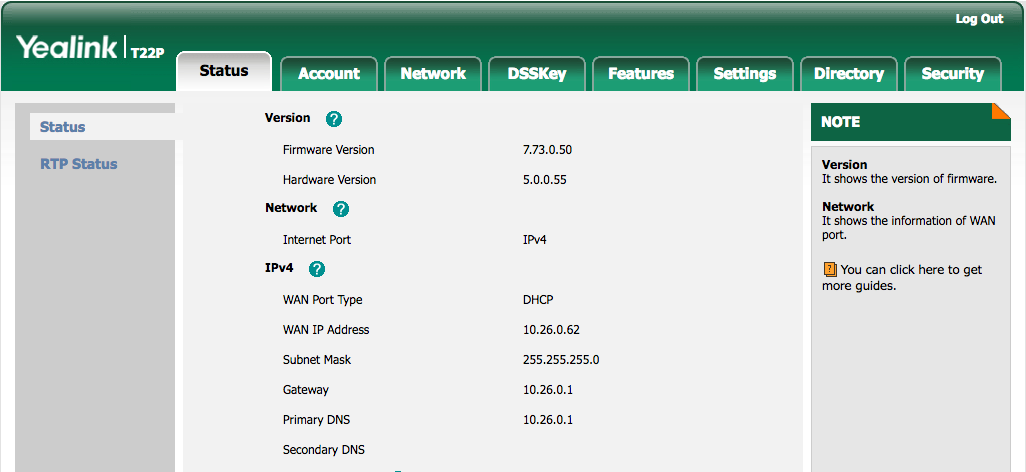
-
Configure auto-provisioning. Choose Settings > Auto Provision, update the Server URL with our provisioning URL
p.zswitch.brightpbx.ca, and click Confirm.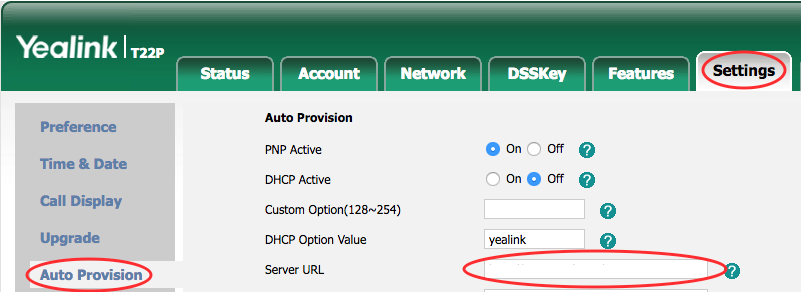
This may take a few minutes, but if done correctly you will notice the device reboot as it provisions. You are now all set up.