Multi-level IVR menus
This article explains how to use the Callflows app to build a multi-level menu.
Create the callflow
Section titled “Create the callflow”-
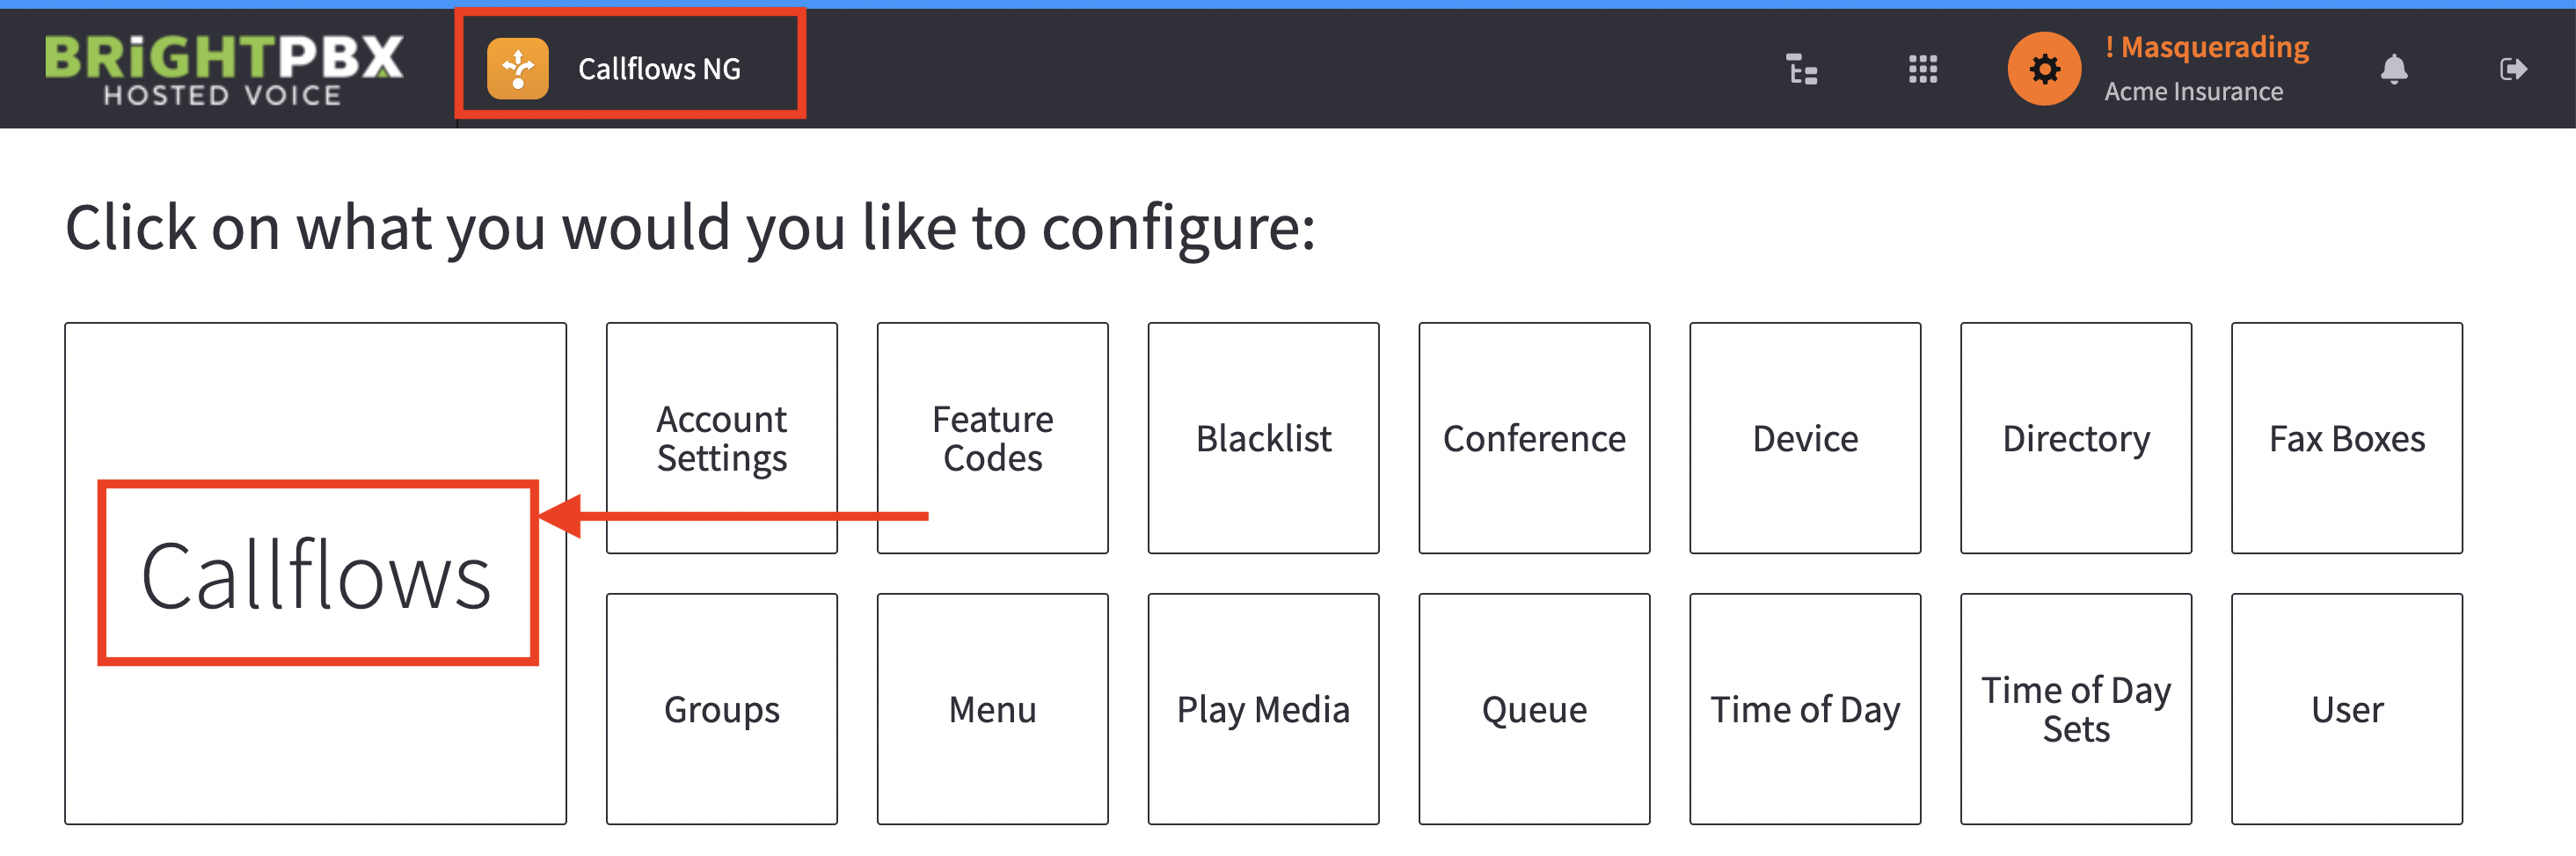
Open the Callflows app, and choose Callflows
-
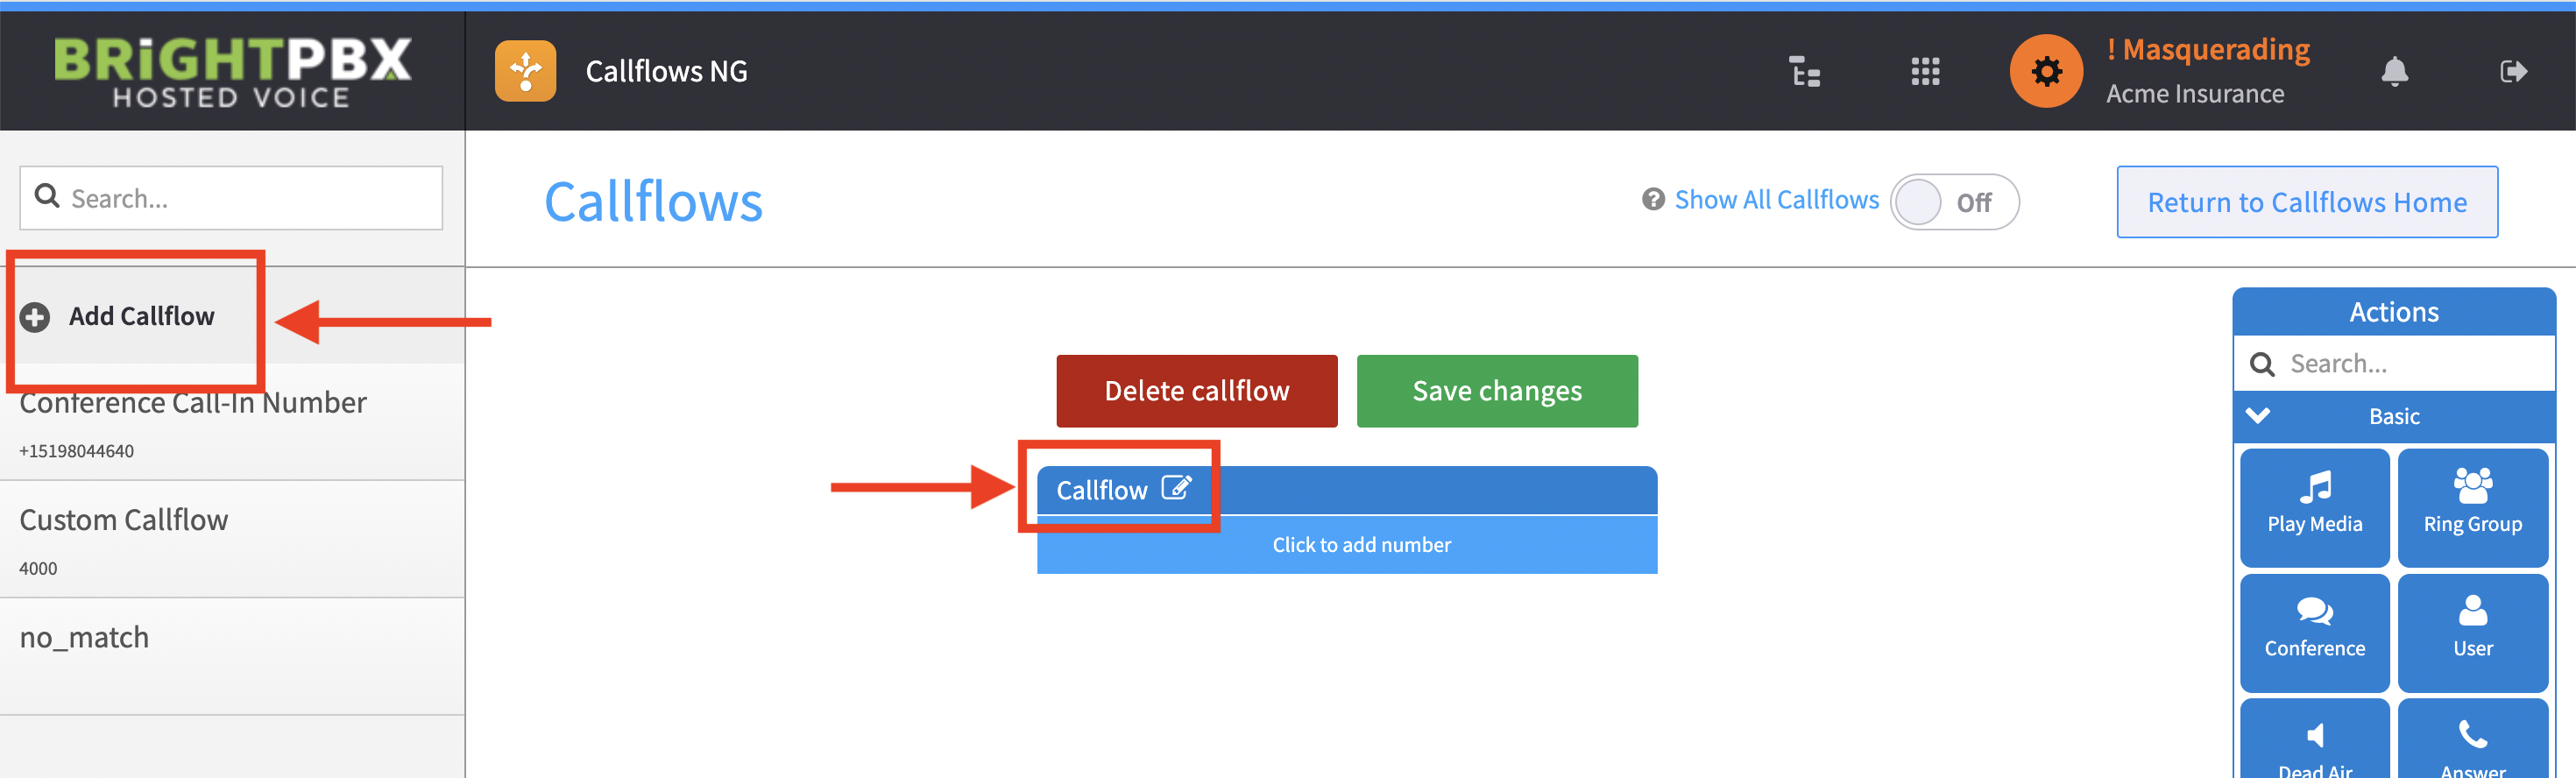
From the left, choose Add Callflow, and then click Callflow edit button in the middle.
-
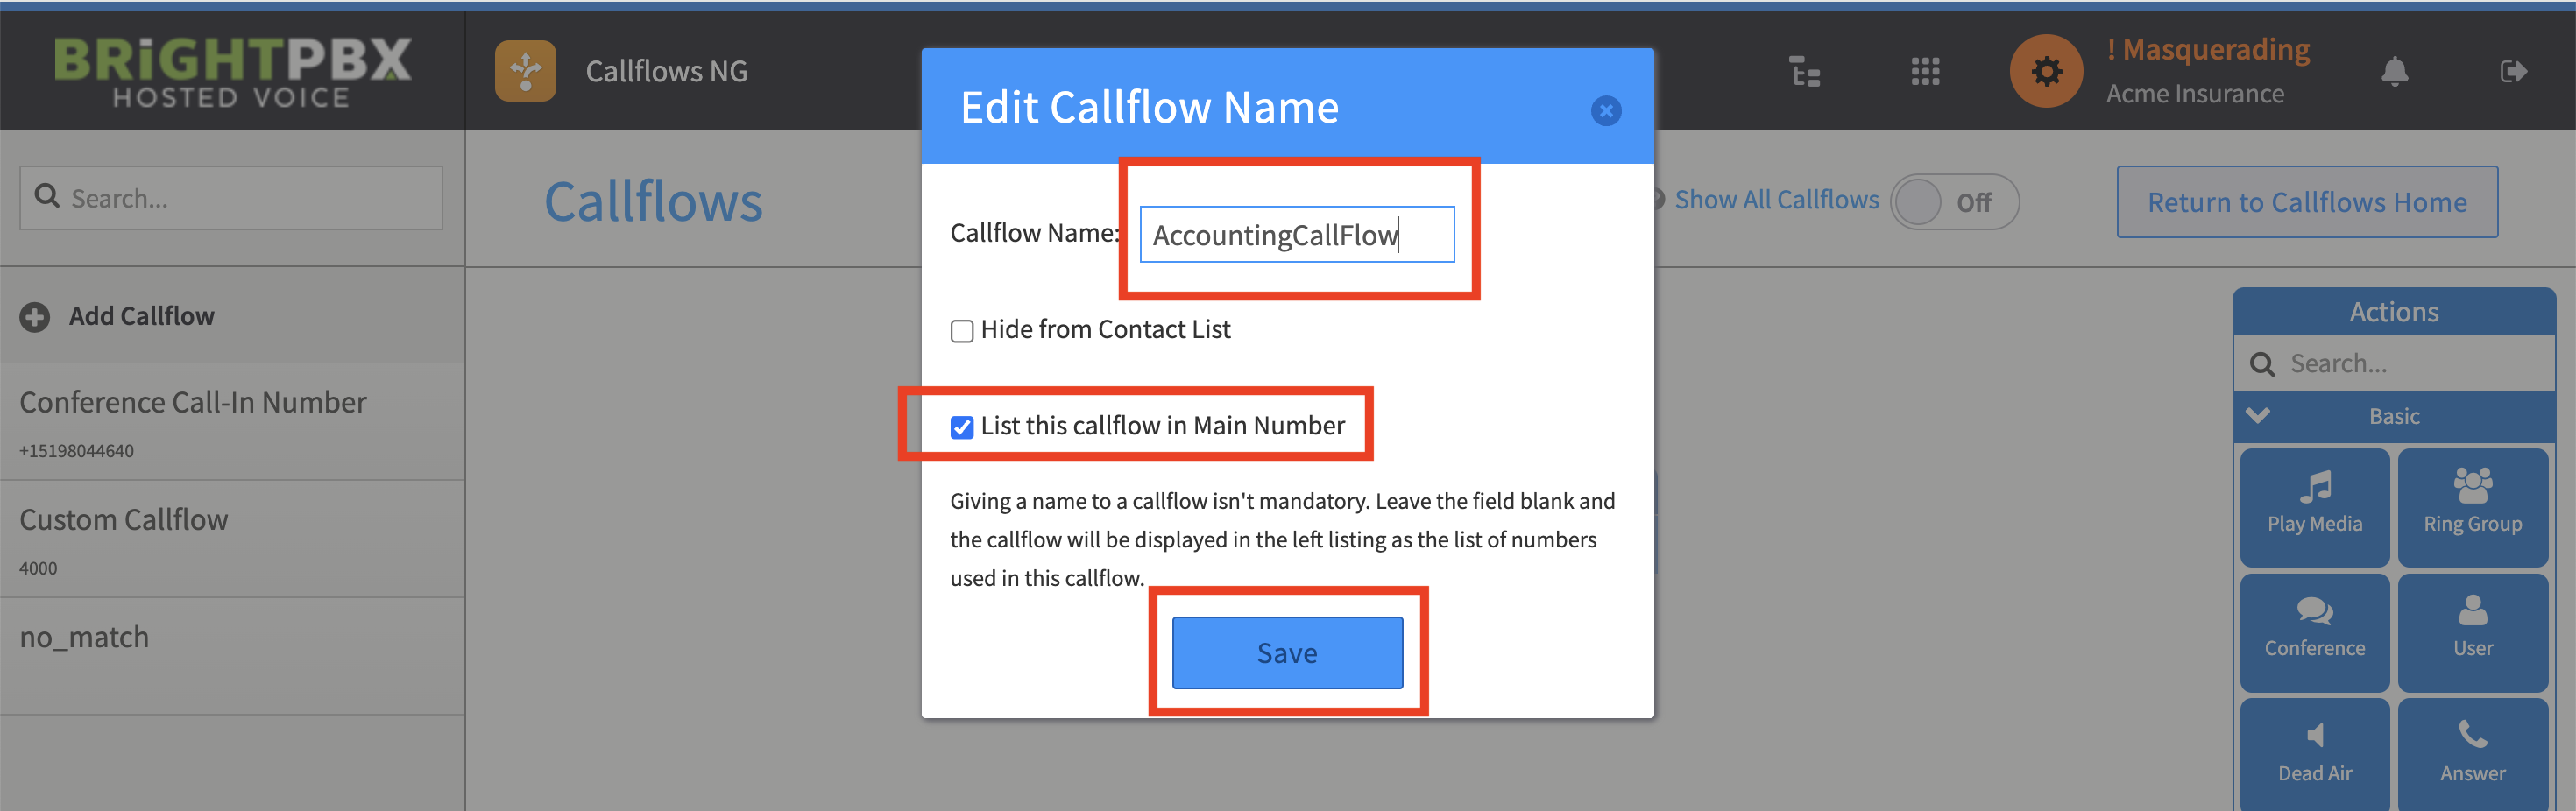
Enter a custom name, check the box for List this Callflow in Main Number, and click Save.
-
Click where it says Click to add a number
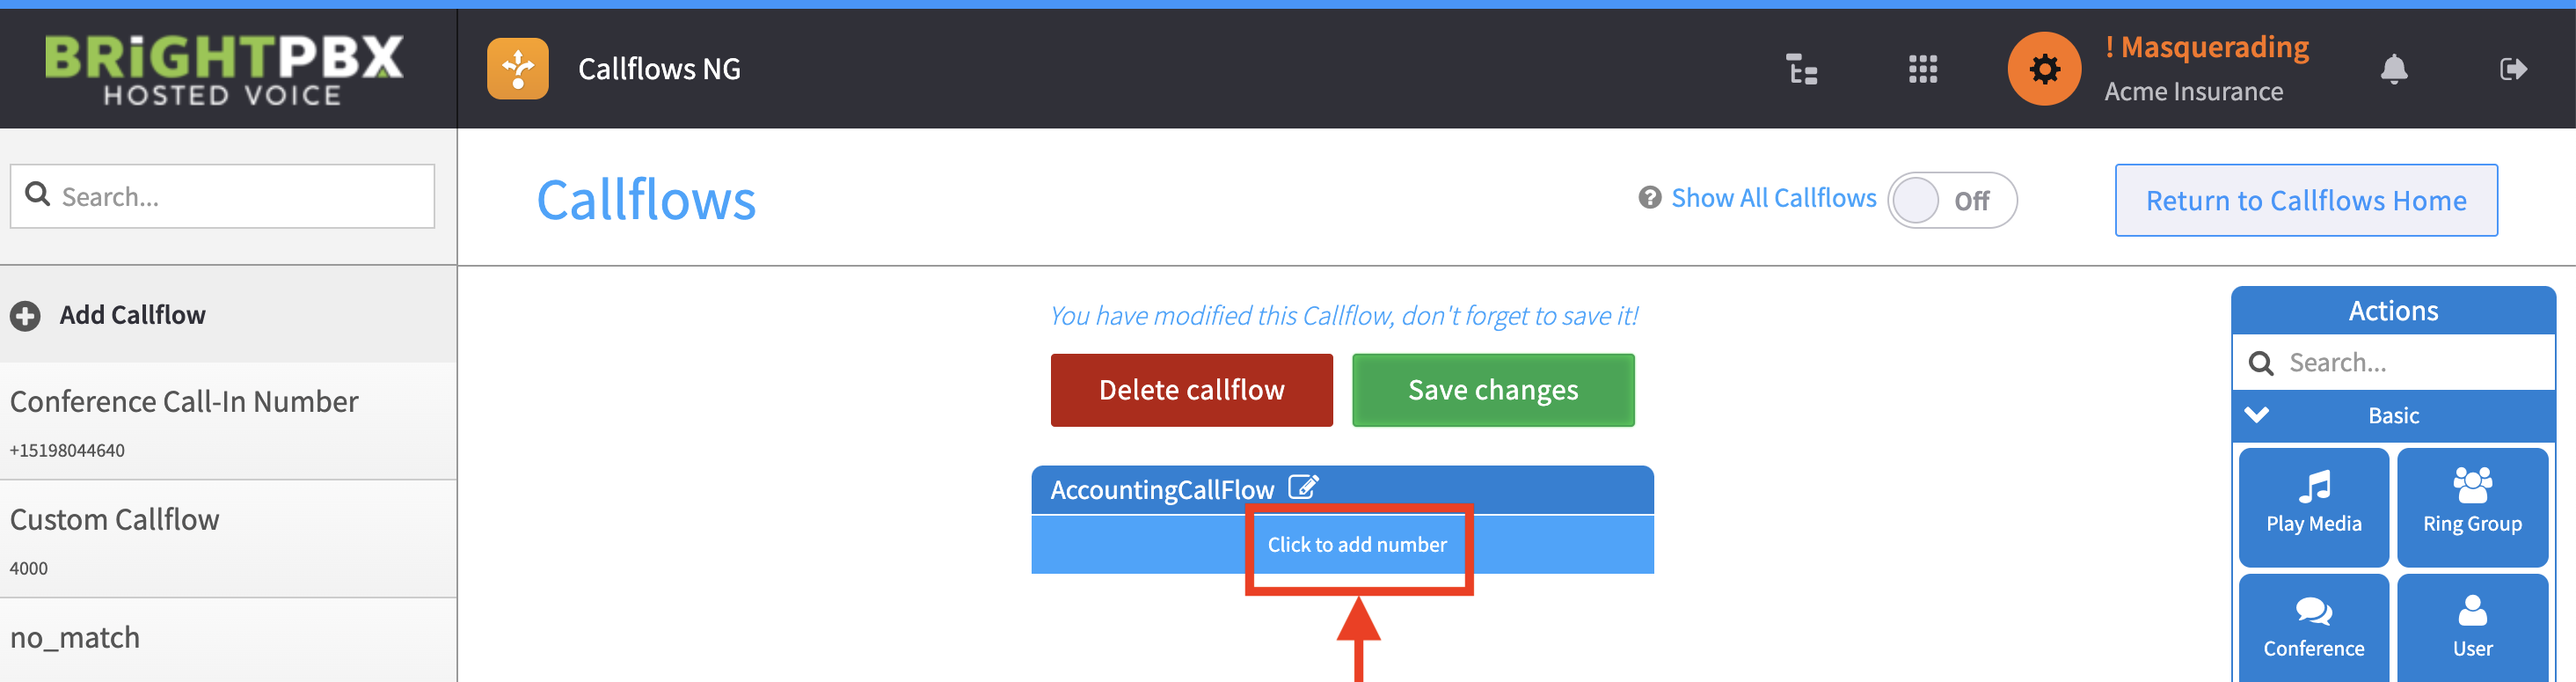
-
Choose Extension, give it an extension (that’s not already in-use), and click Save.
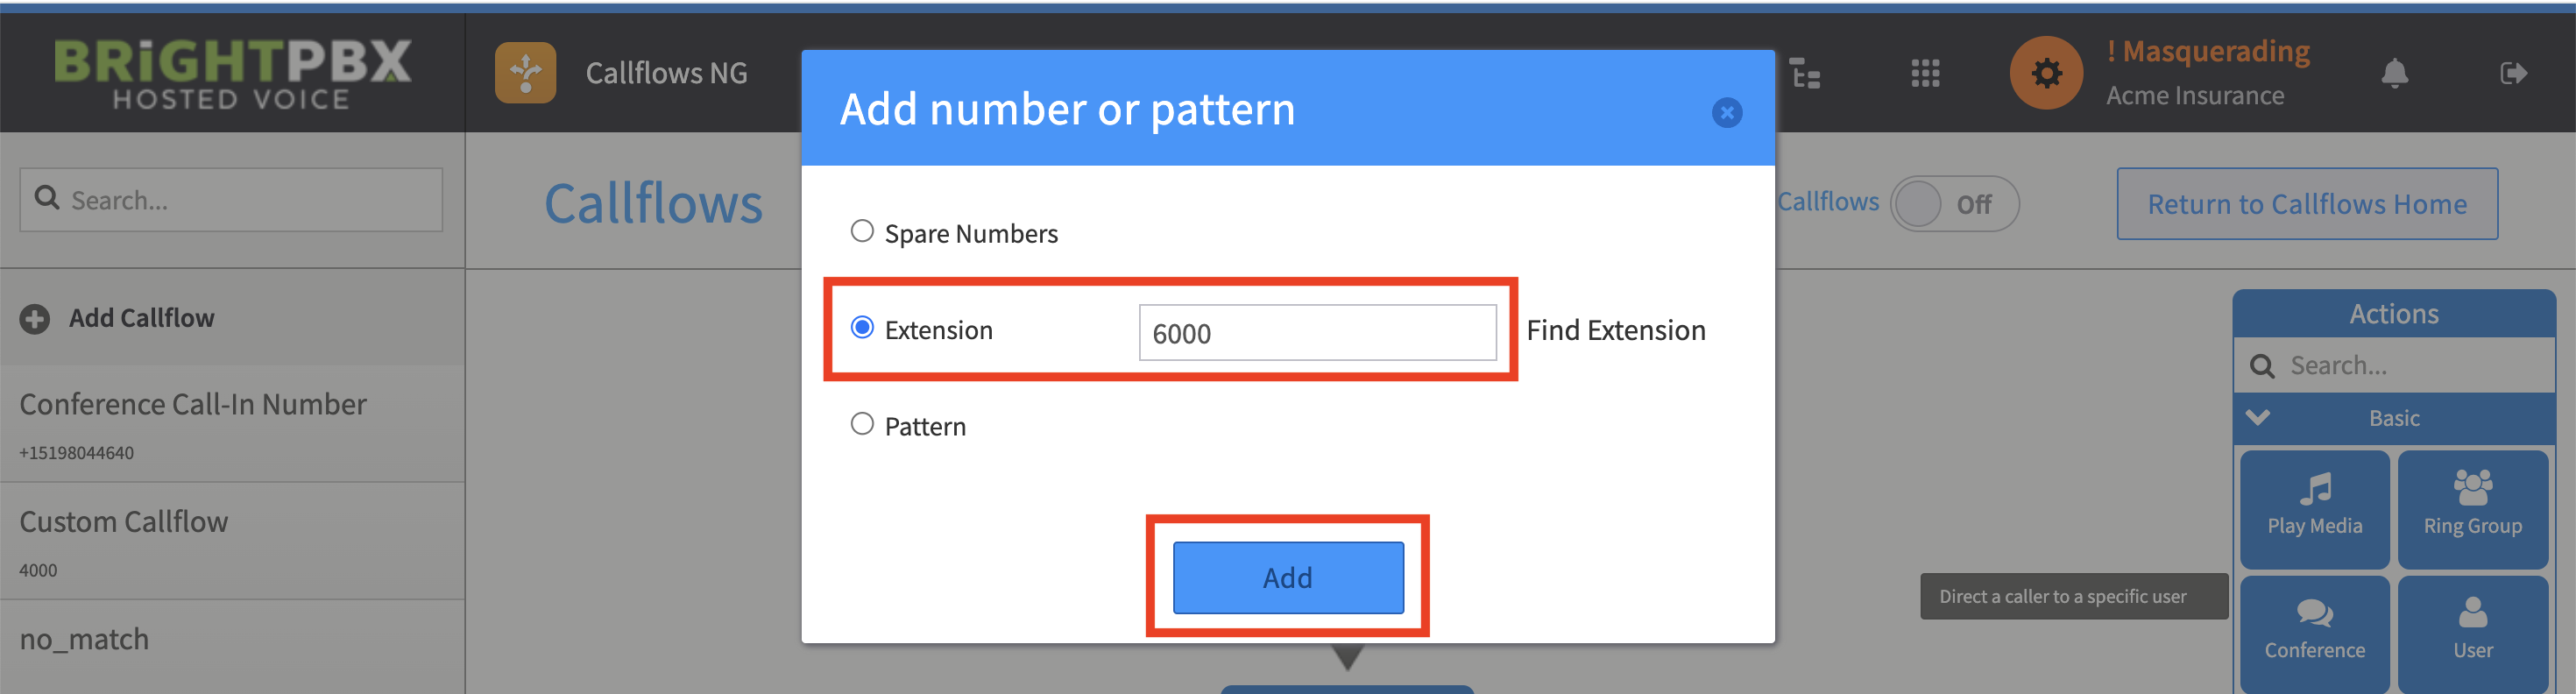
Add the menu
Section titled “Add the menu”-
From the right side, ensure the Basic panel is expanded (it should be expanded by default)
-
Click & drag Menu on top of your Callflow in the middle.
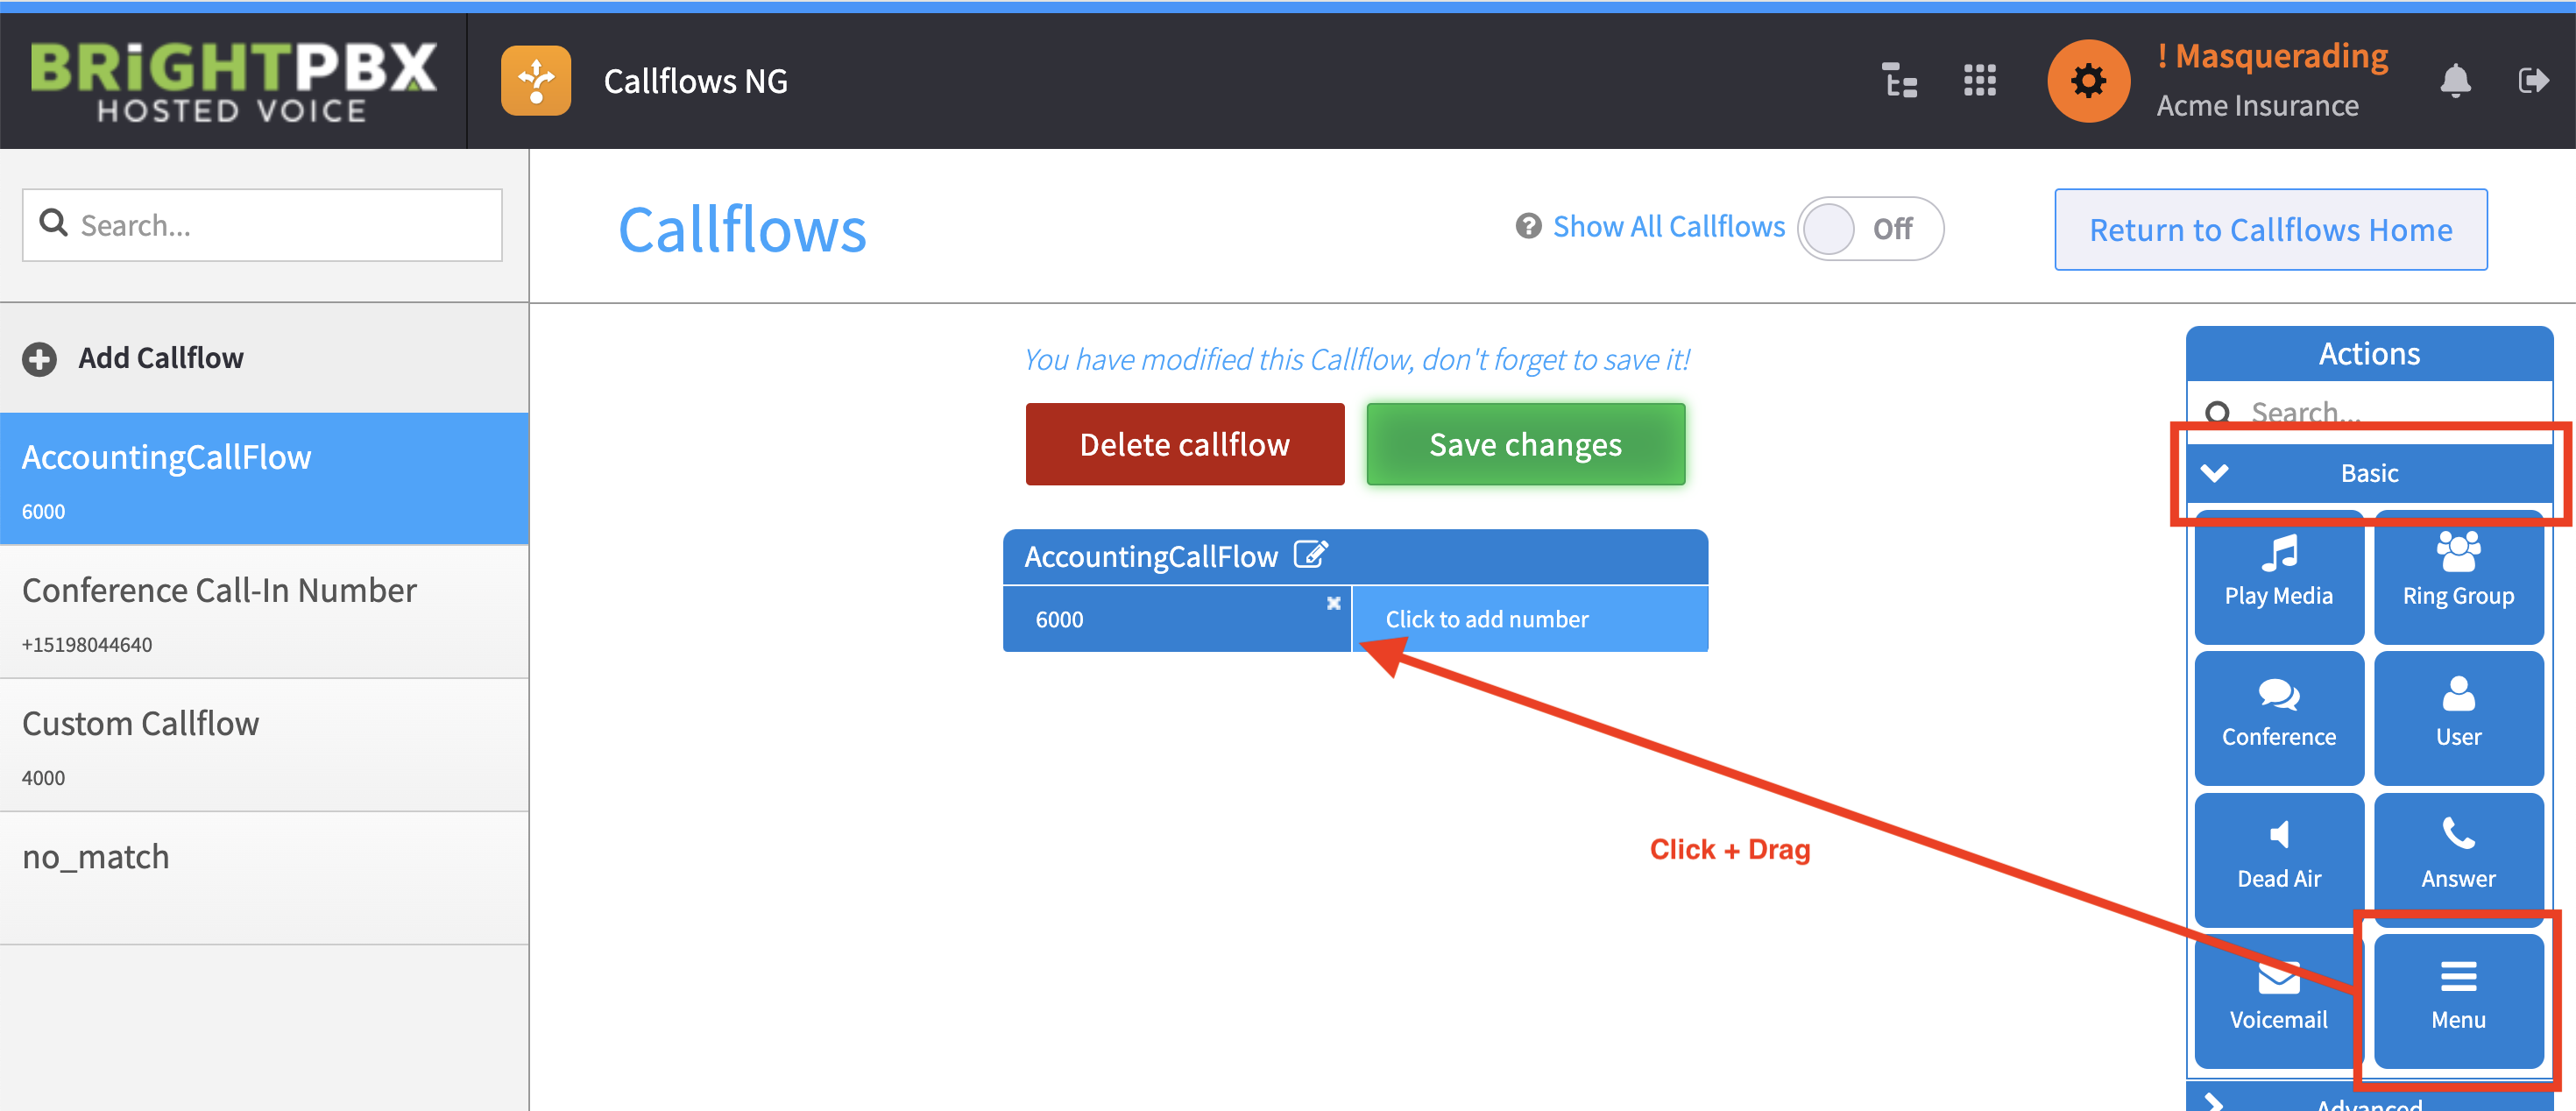
-
From the popup, choose Add new menu.
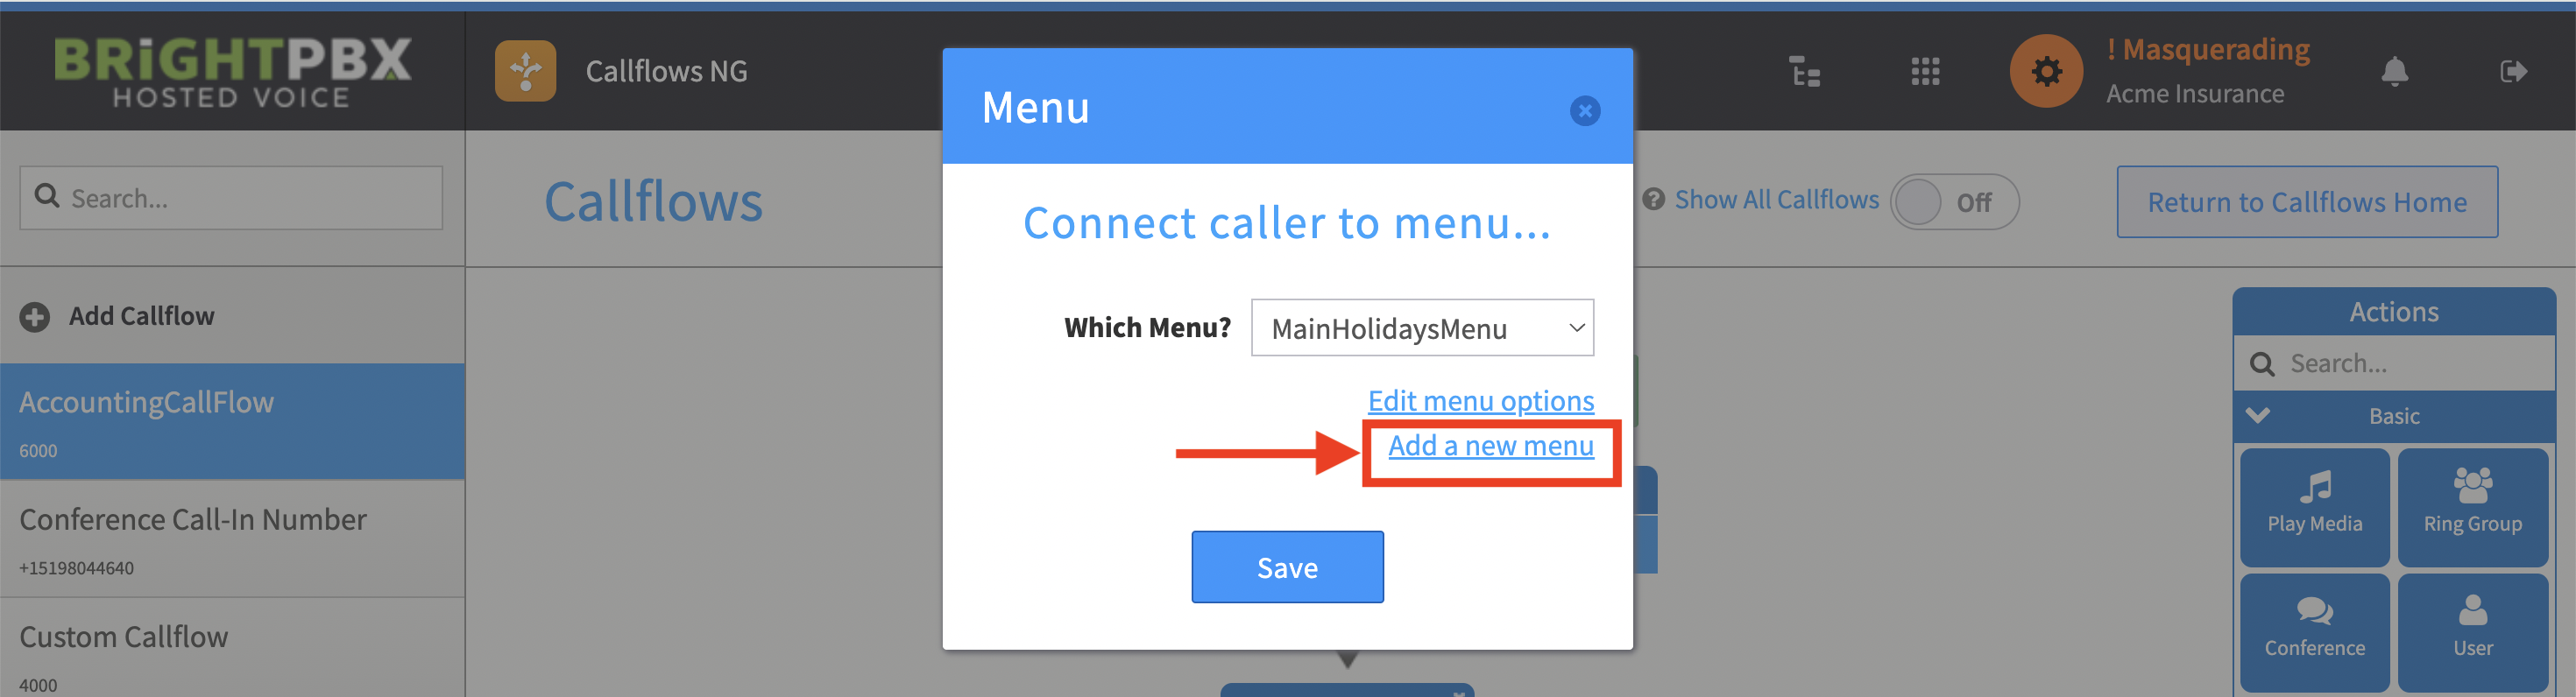
-
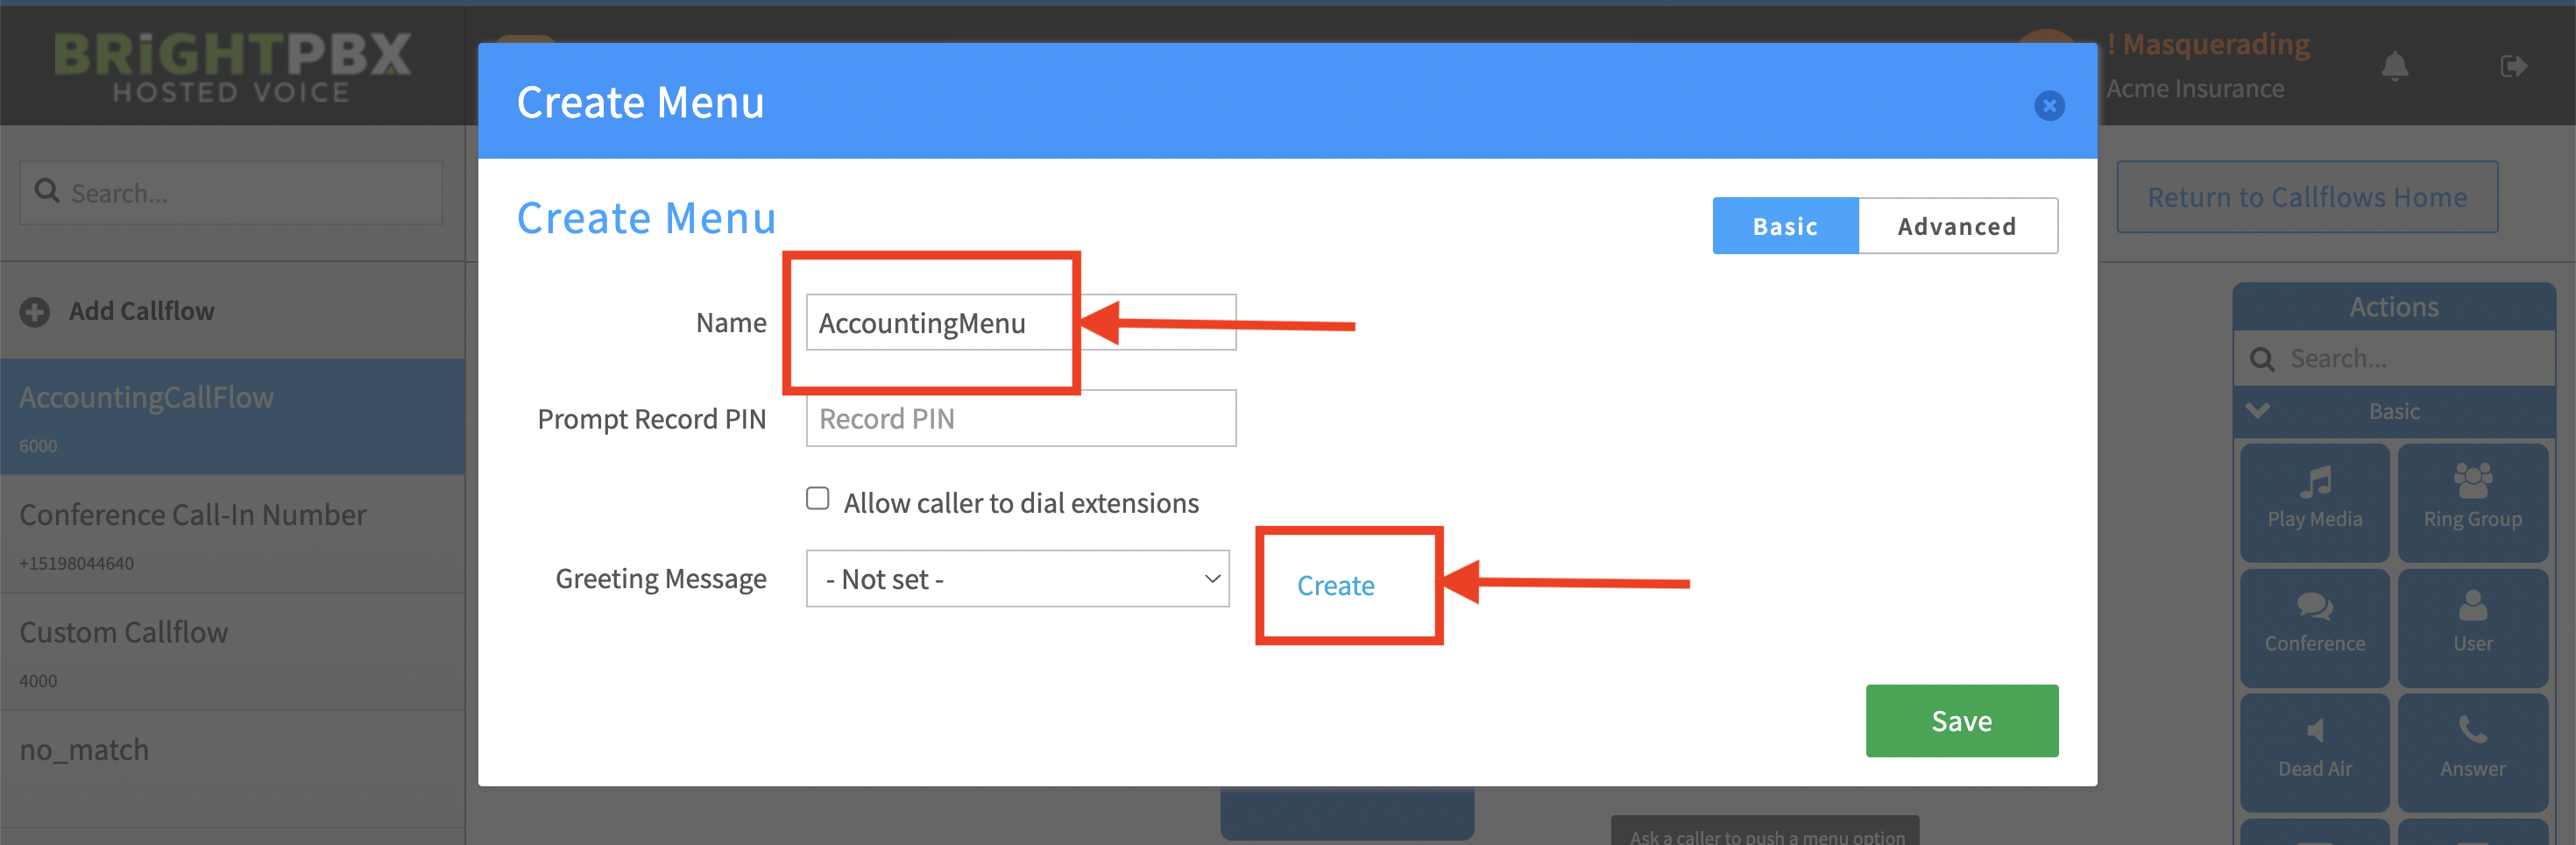
Give your menu a name, and click Create. We will be building a Text-to-Speech (TTS) greeting. Alternatively, if you already have an audio file, you can skip the next step of creating a TTS greeting, and just choose your audio file.
-
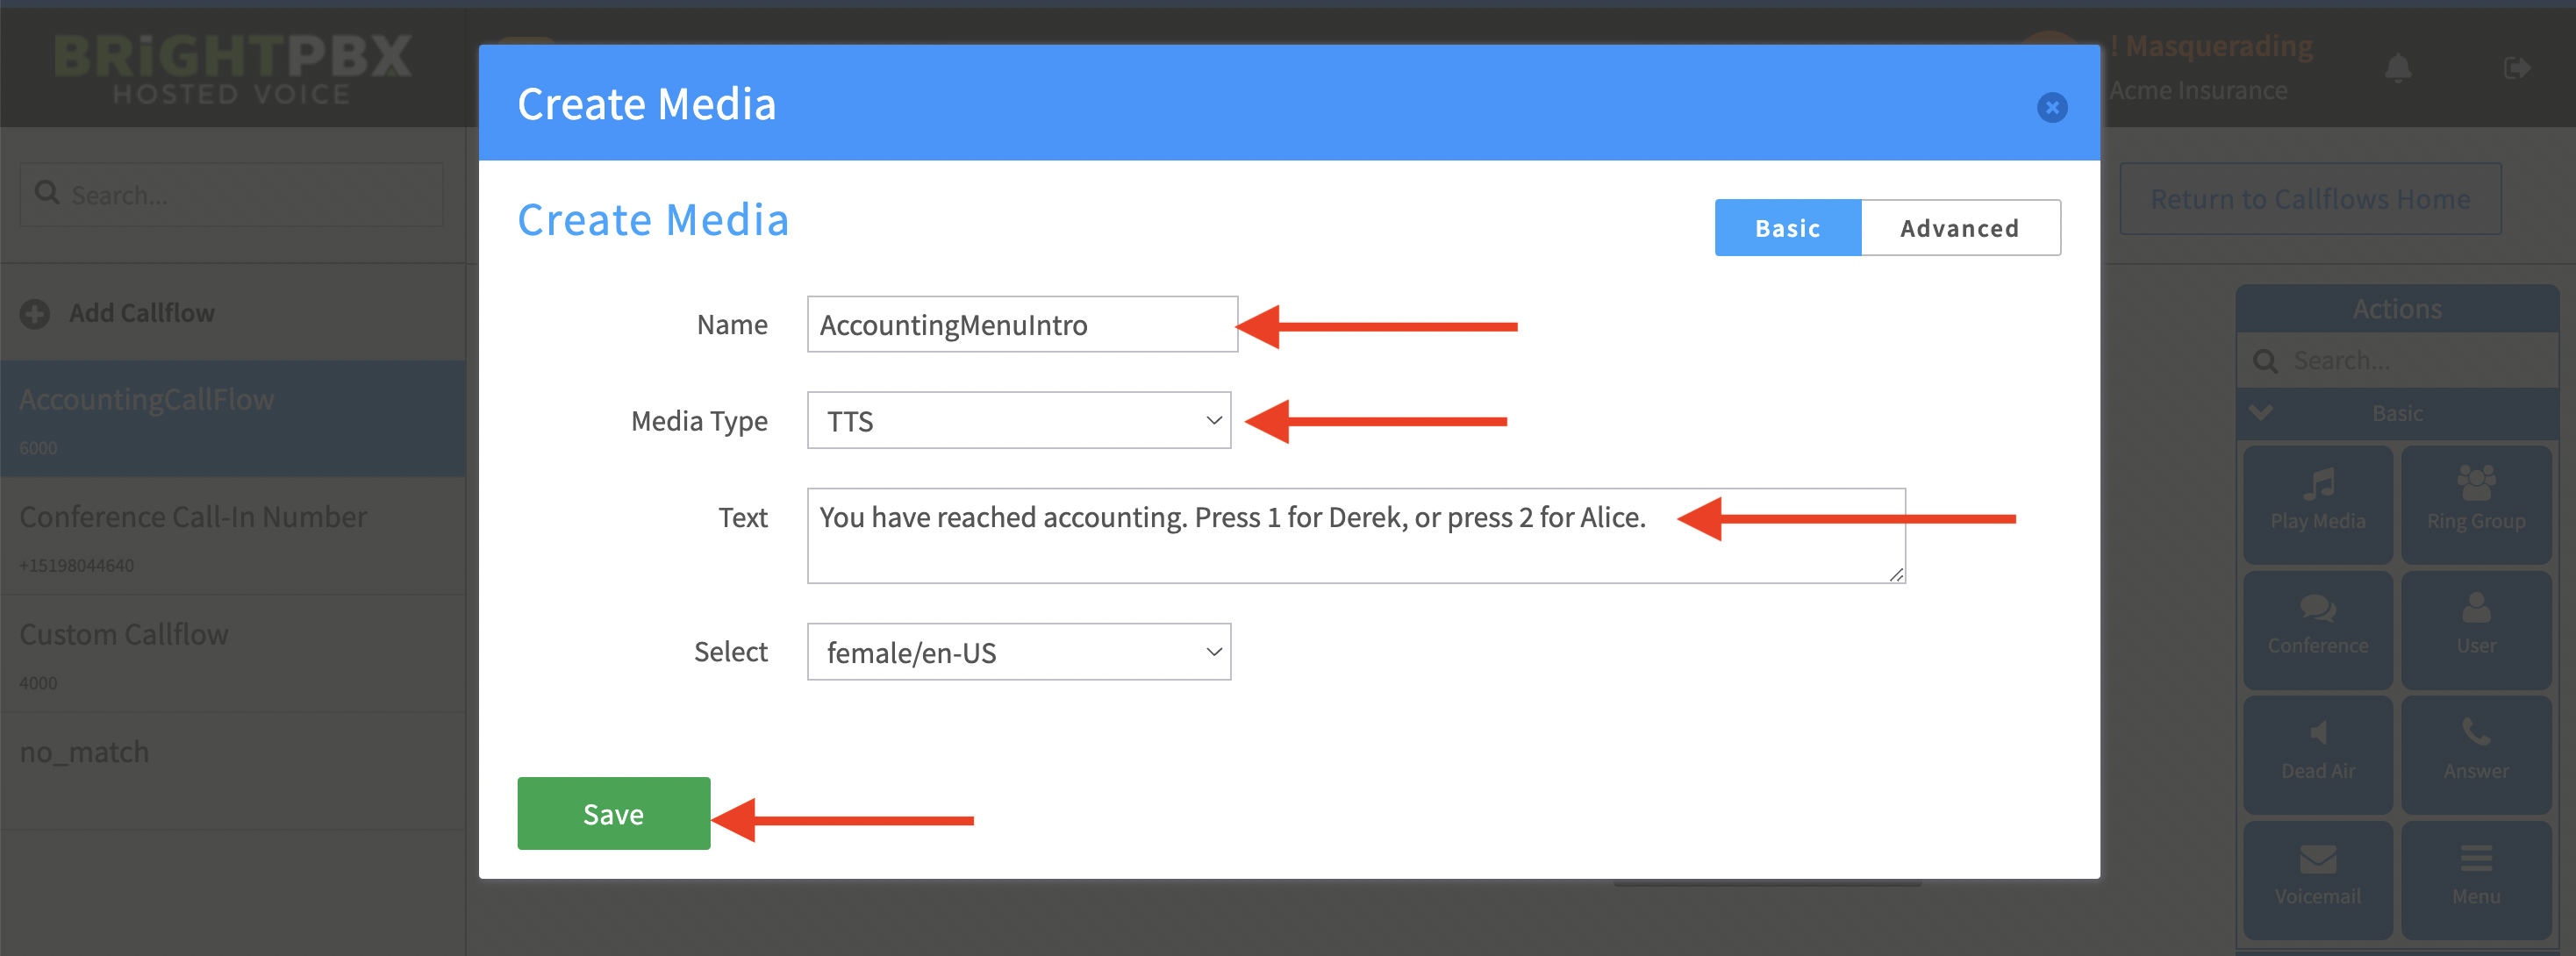
Enter a custom name for your TTS greeting
-
For Media Type, choose TTS
-
Enter your greeting in the Text field
-
When you’re done, click Save.
-
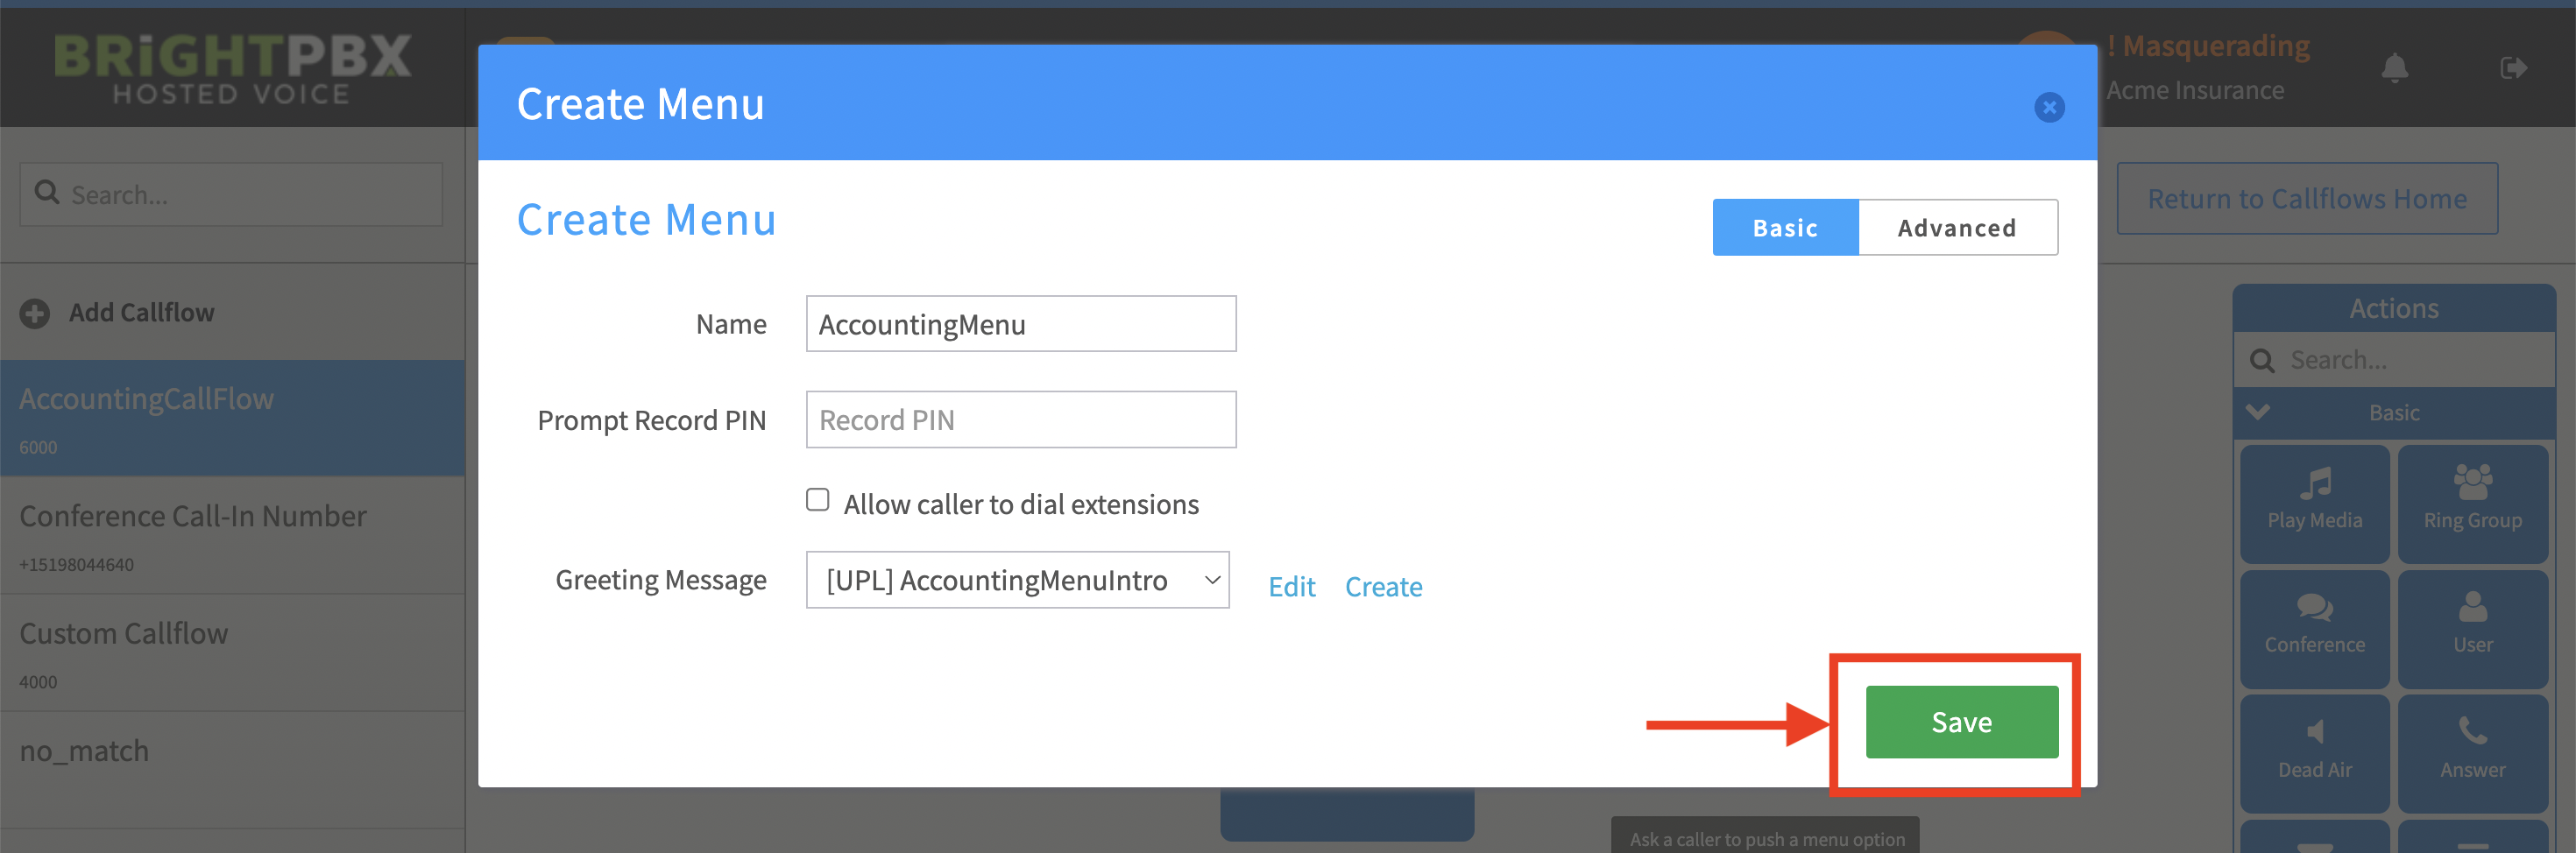
You’ll see your greeting has been added. Click Save
Add the menu options
Section titled “Add the menu options”-
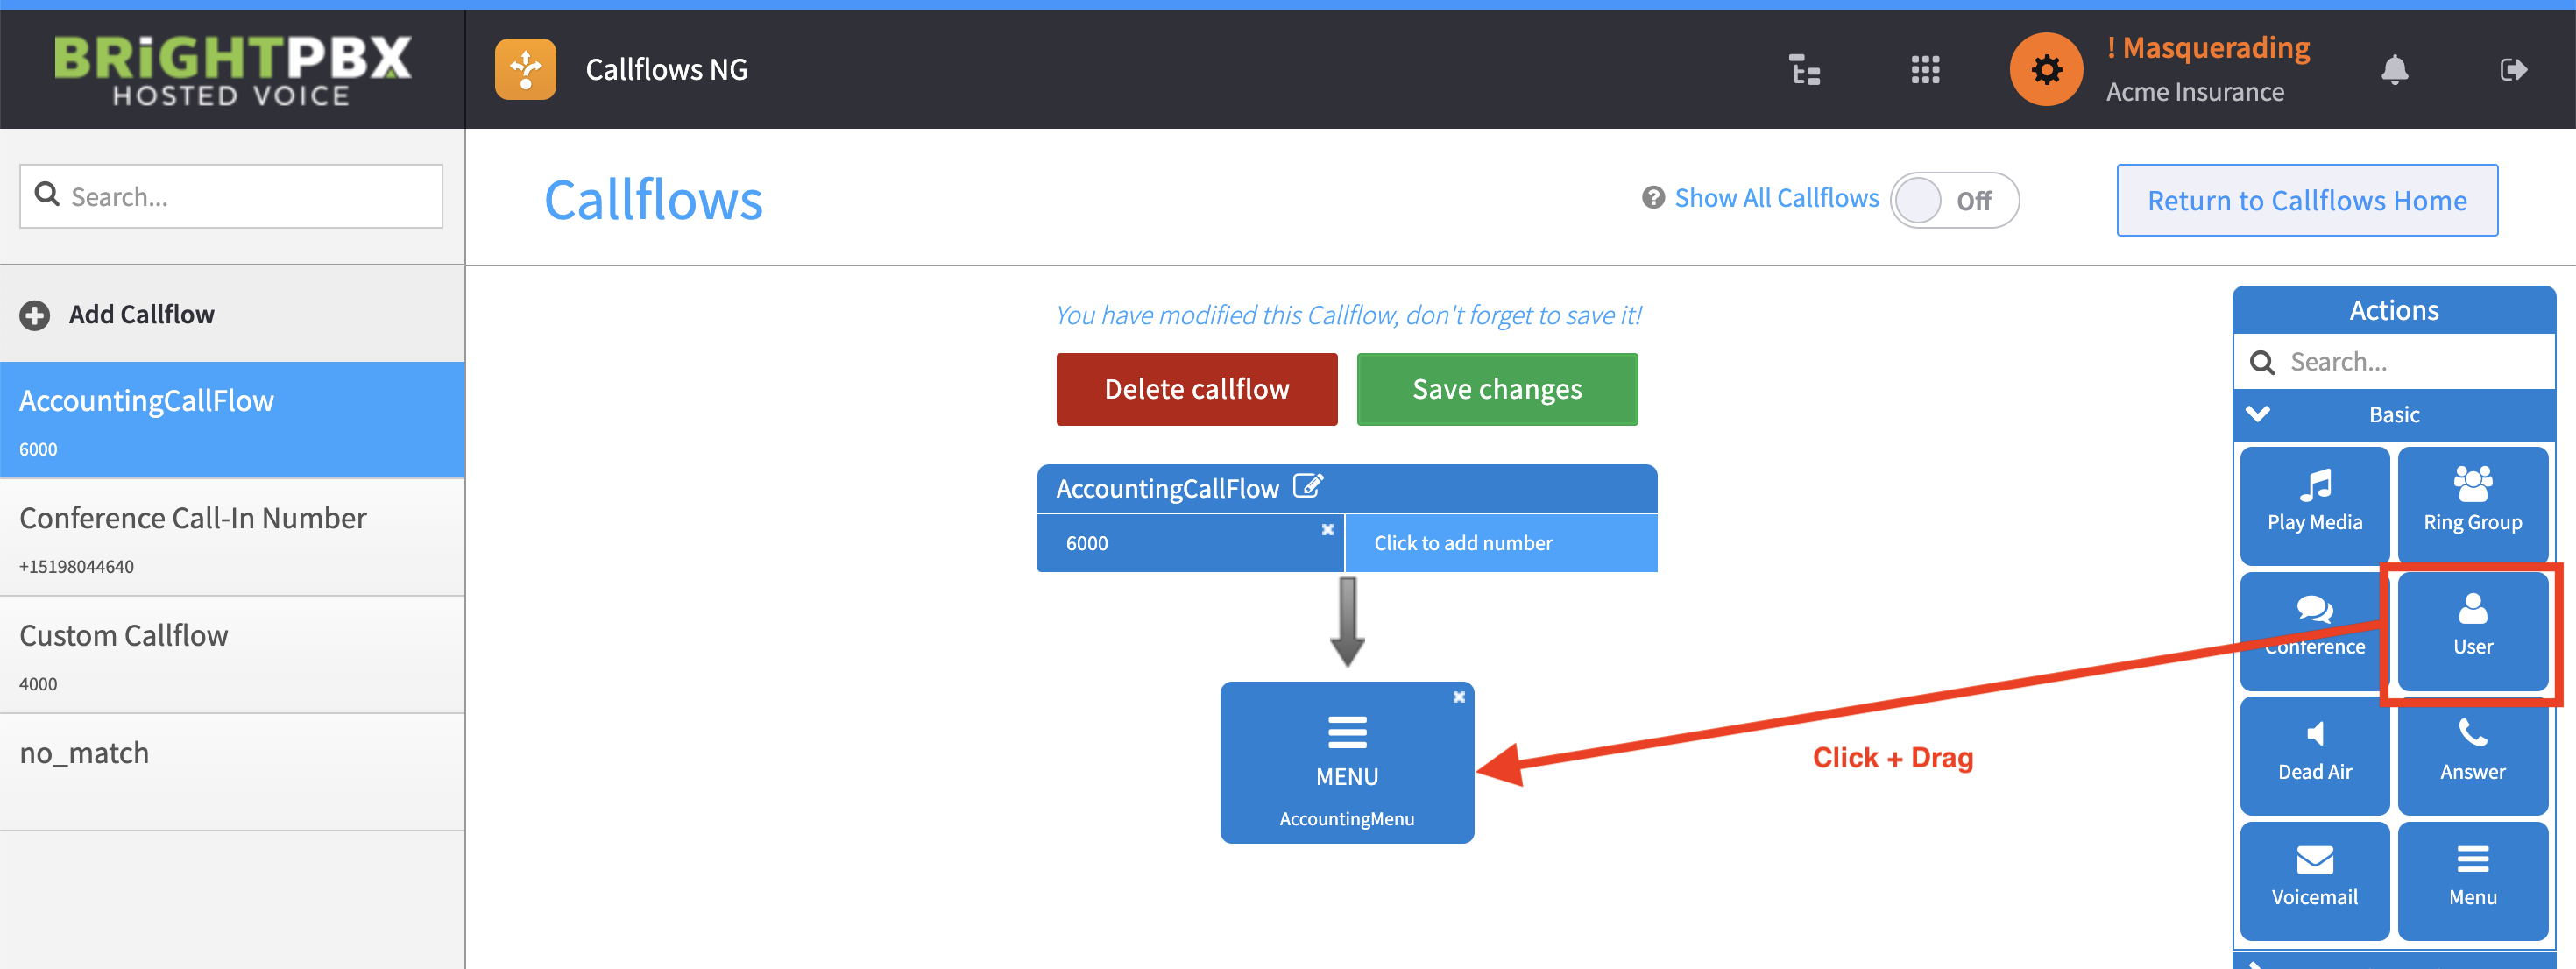
We’ll add two menu options for this menu that will direct to two users. From the right, click & drag the User block to your menu in the middle.
-
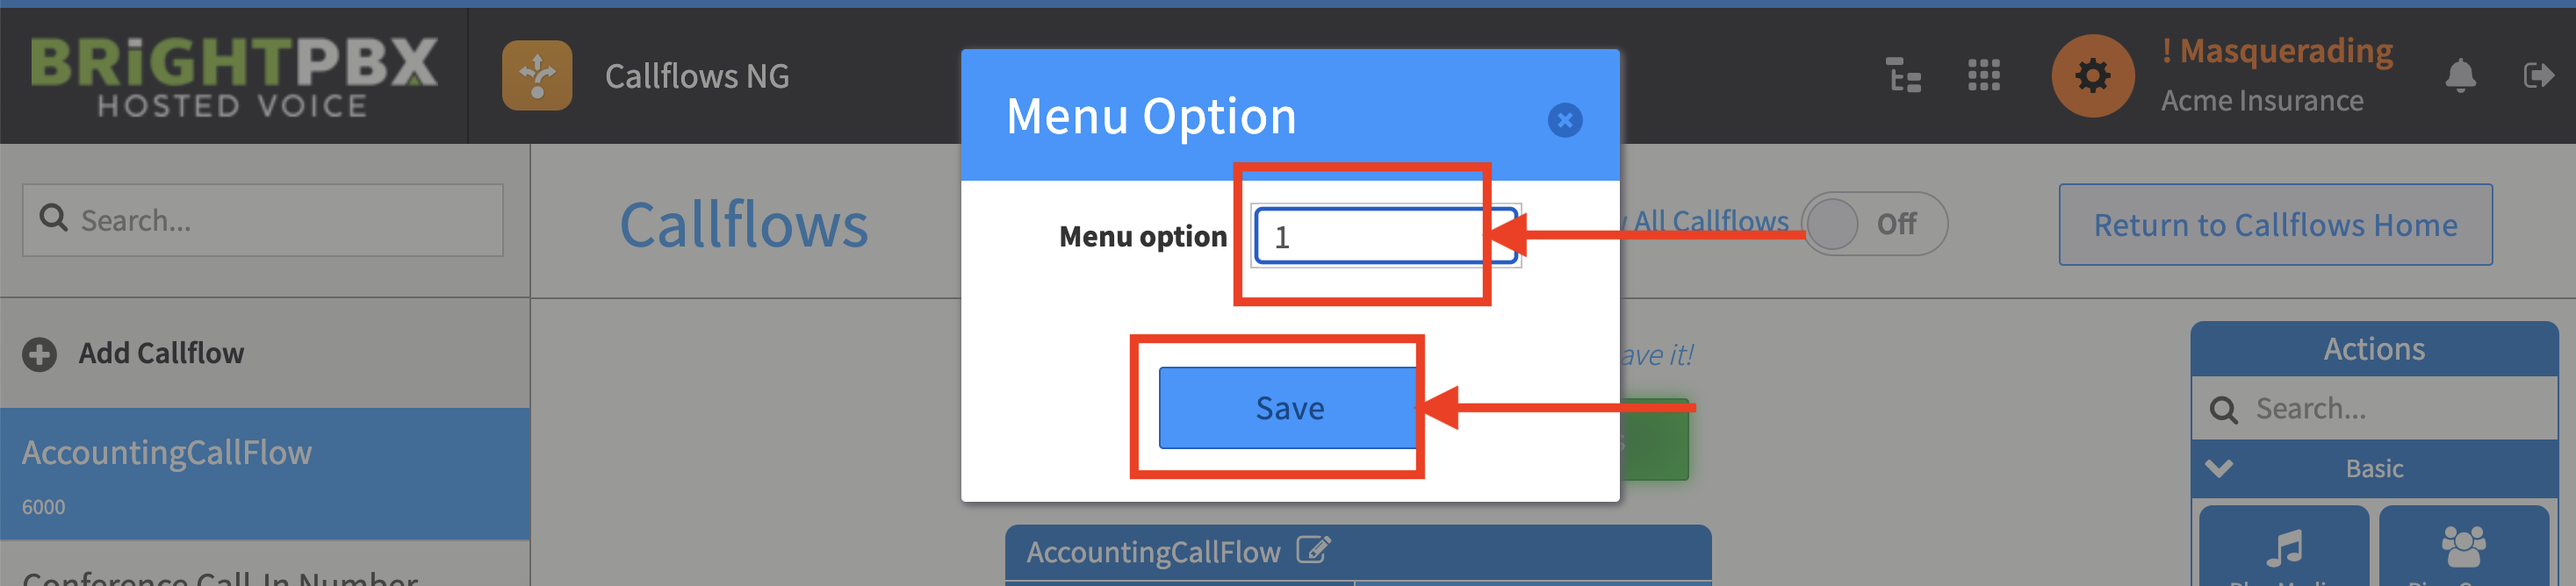
From the popup, choose the number the caller must push to reach your user, and click Save.
-
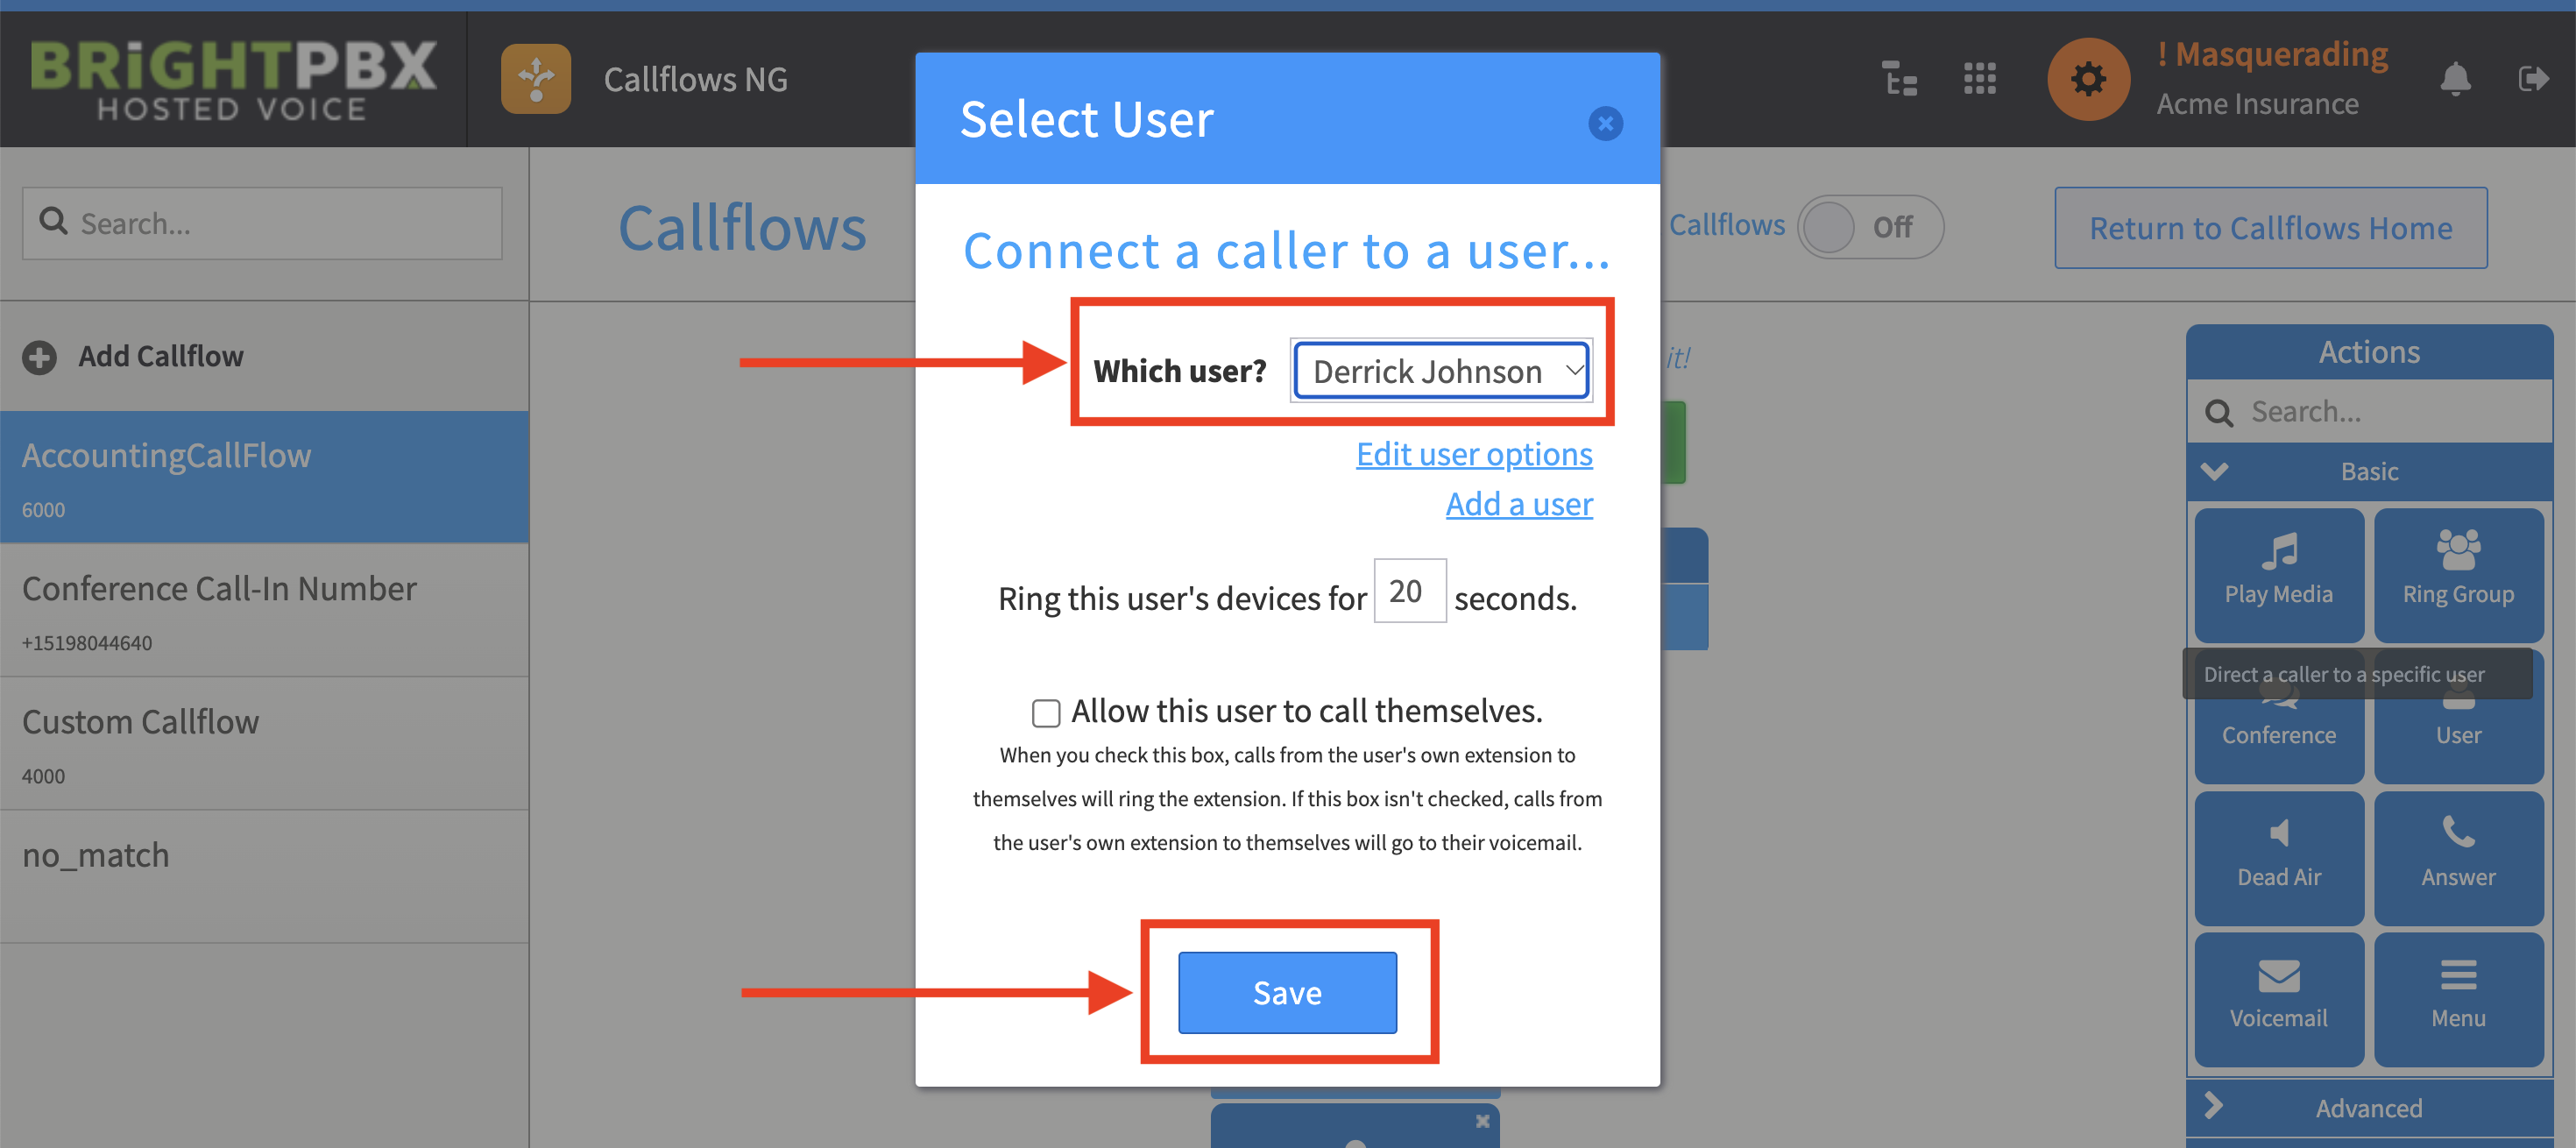
Another box will immediately popup. Choose the user and click Save
-
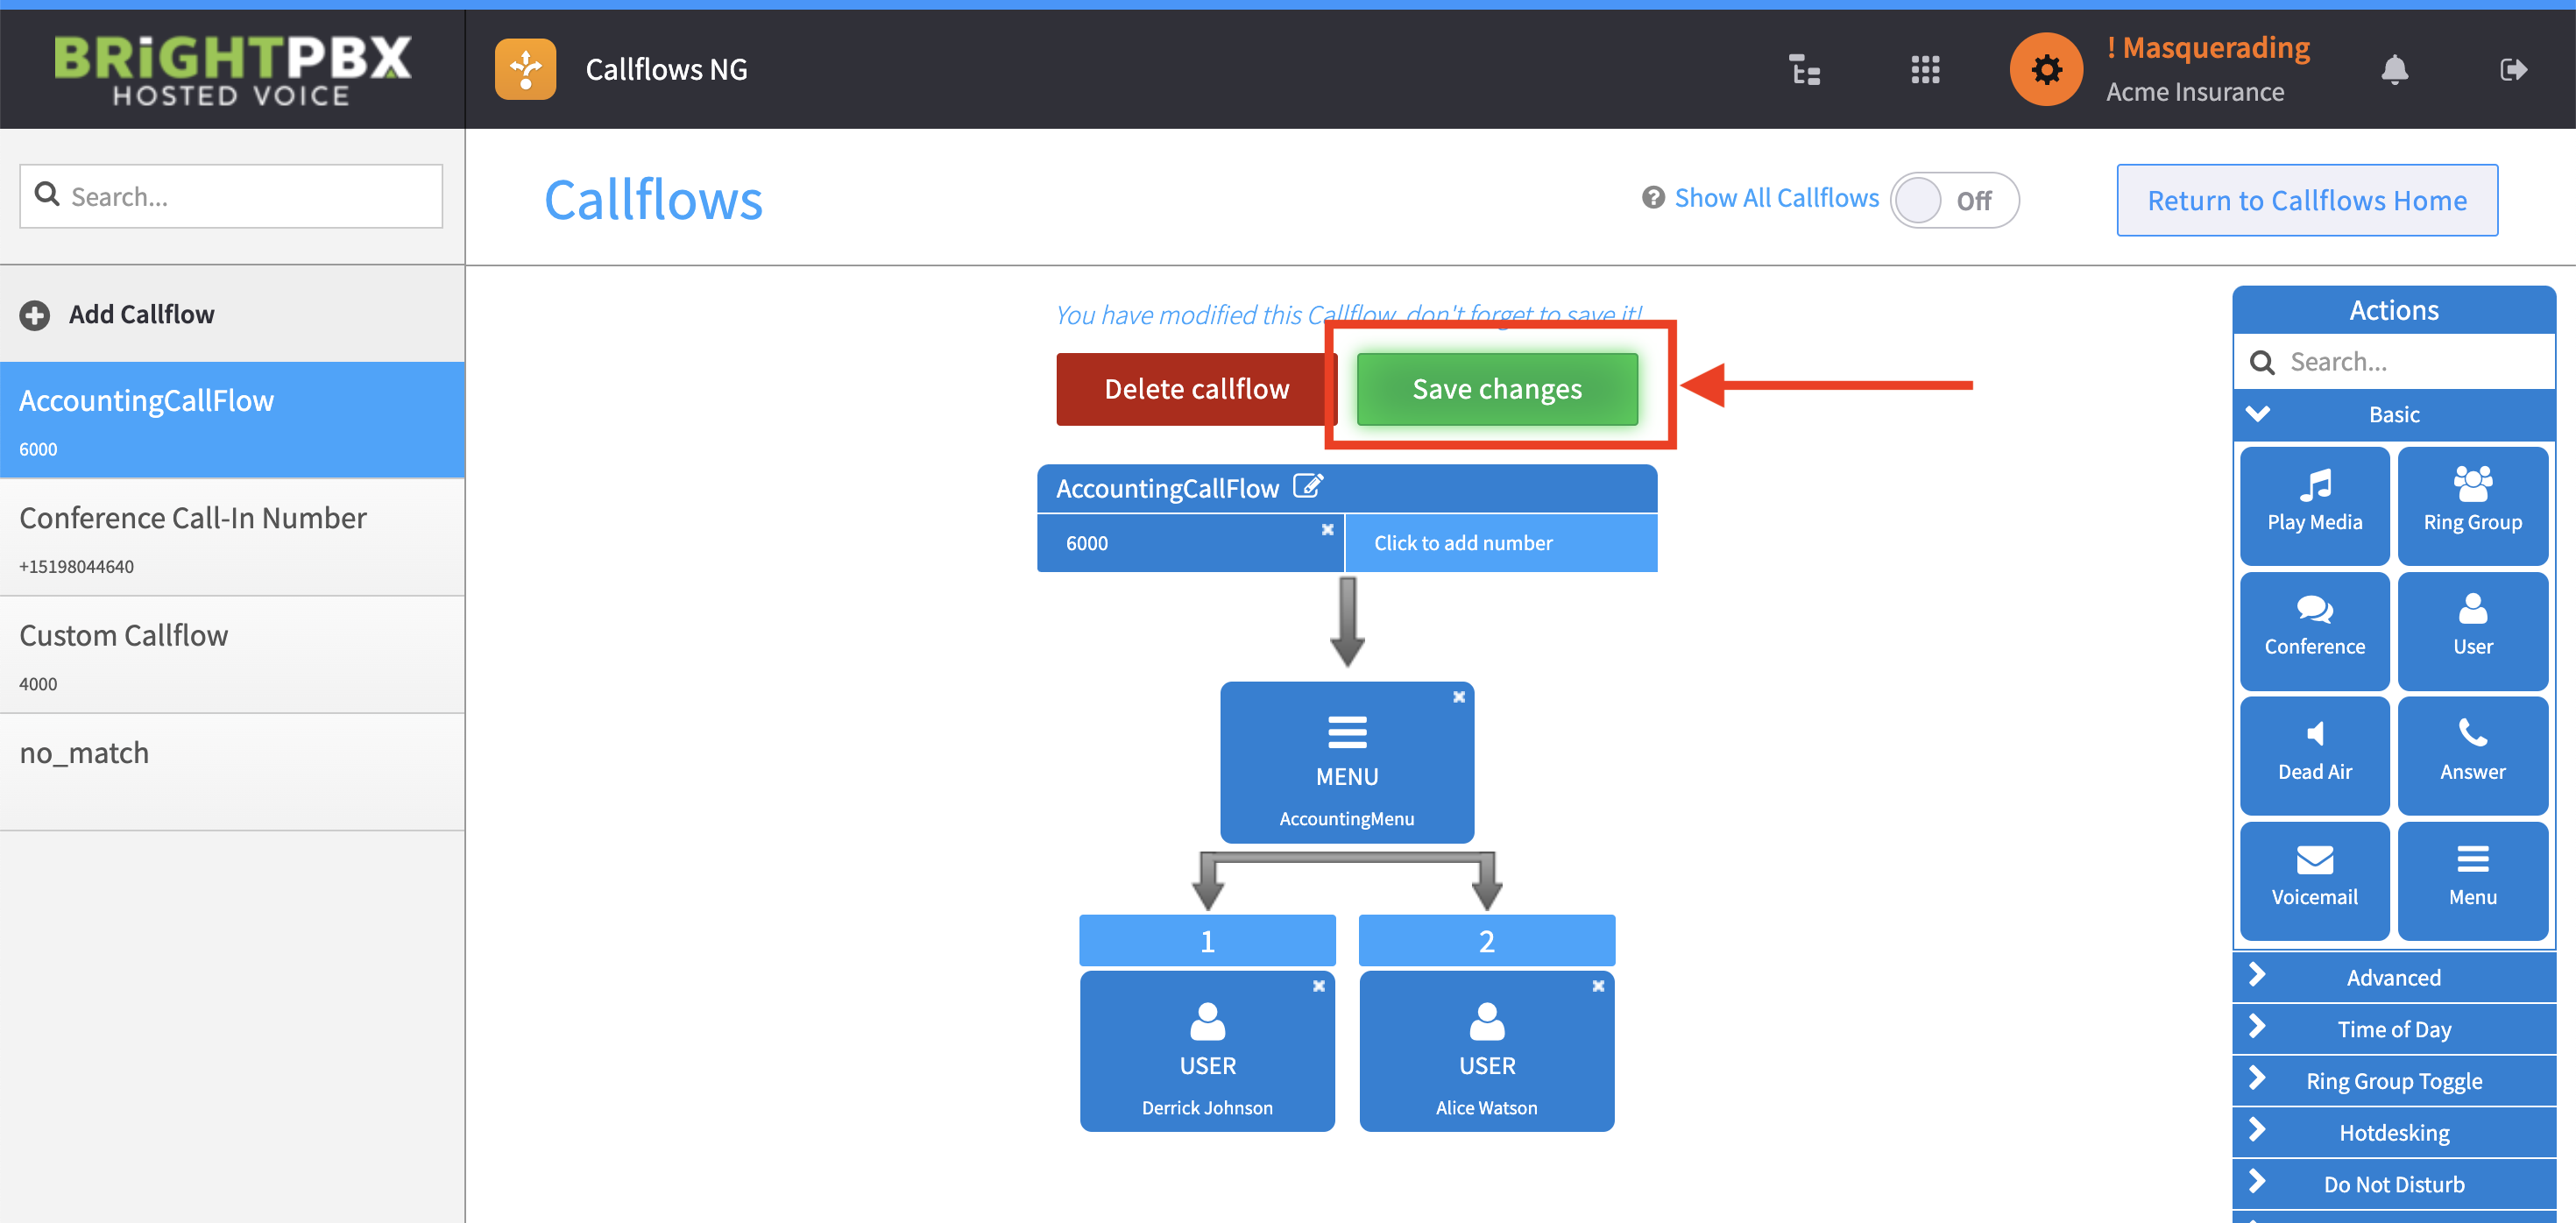
Repeat this process for as many users as you’d like. In this example, we’re using two users. When you’re all done adding users, click Save changes to save your Callflow.
Use the callflow in Smart PBX
Section titled “Use the callflow in Smart PBX”-
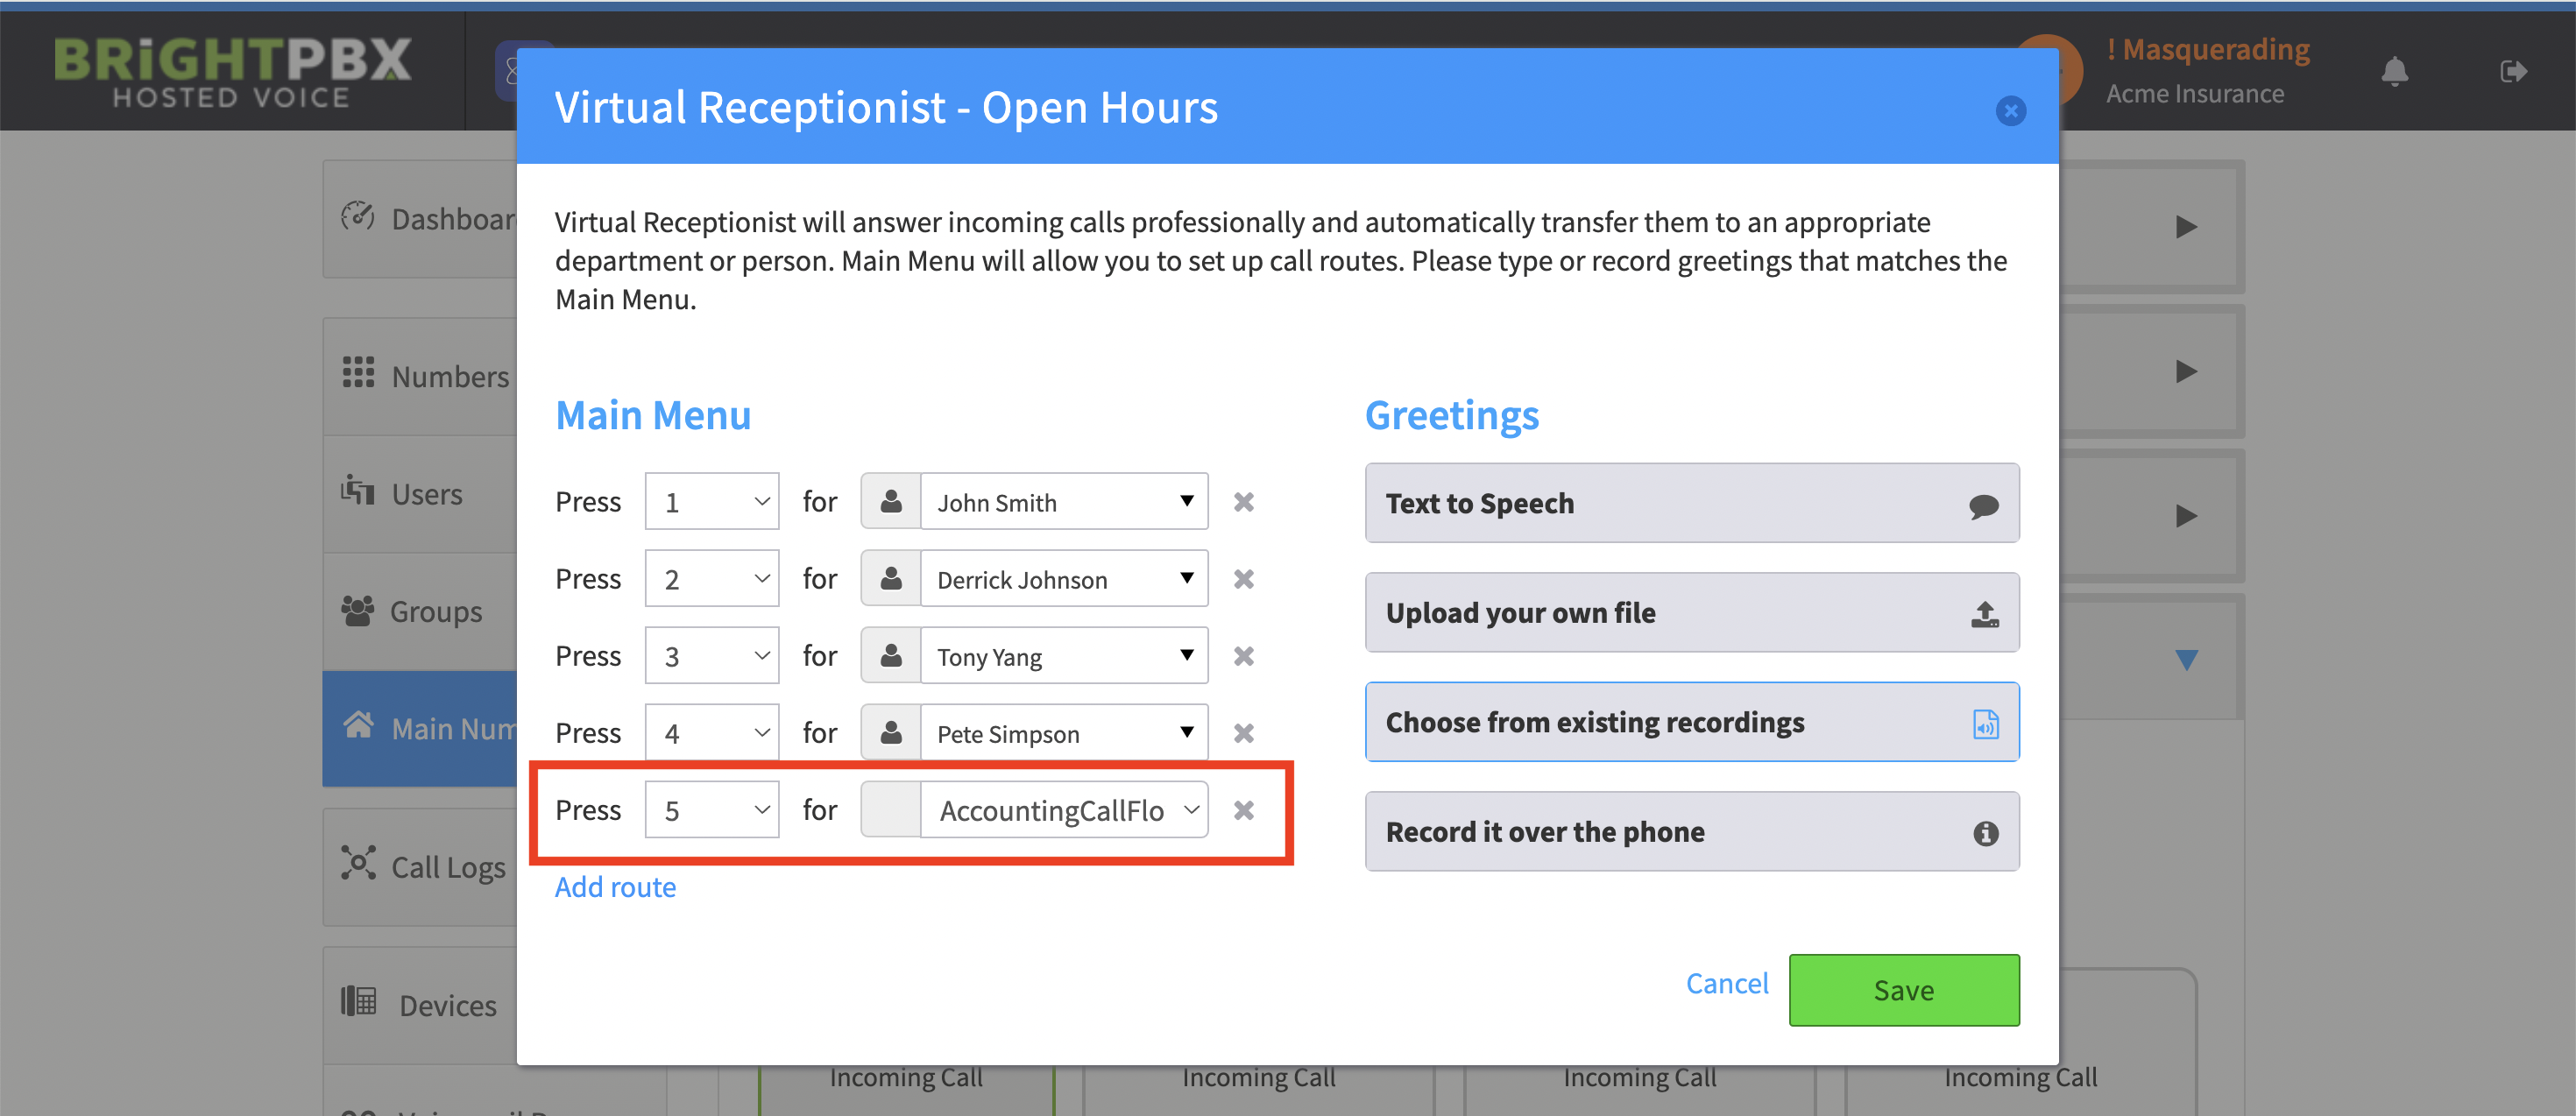
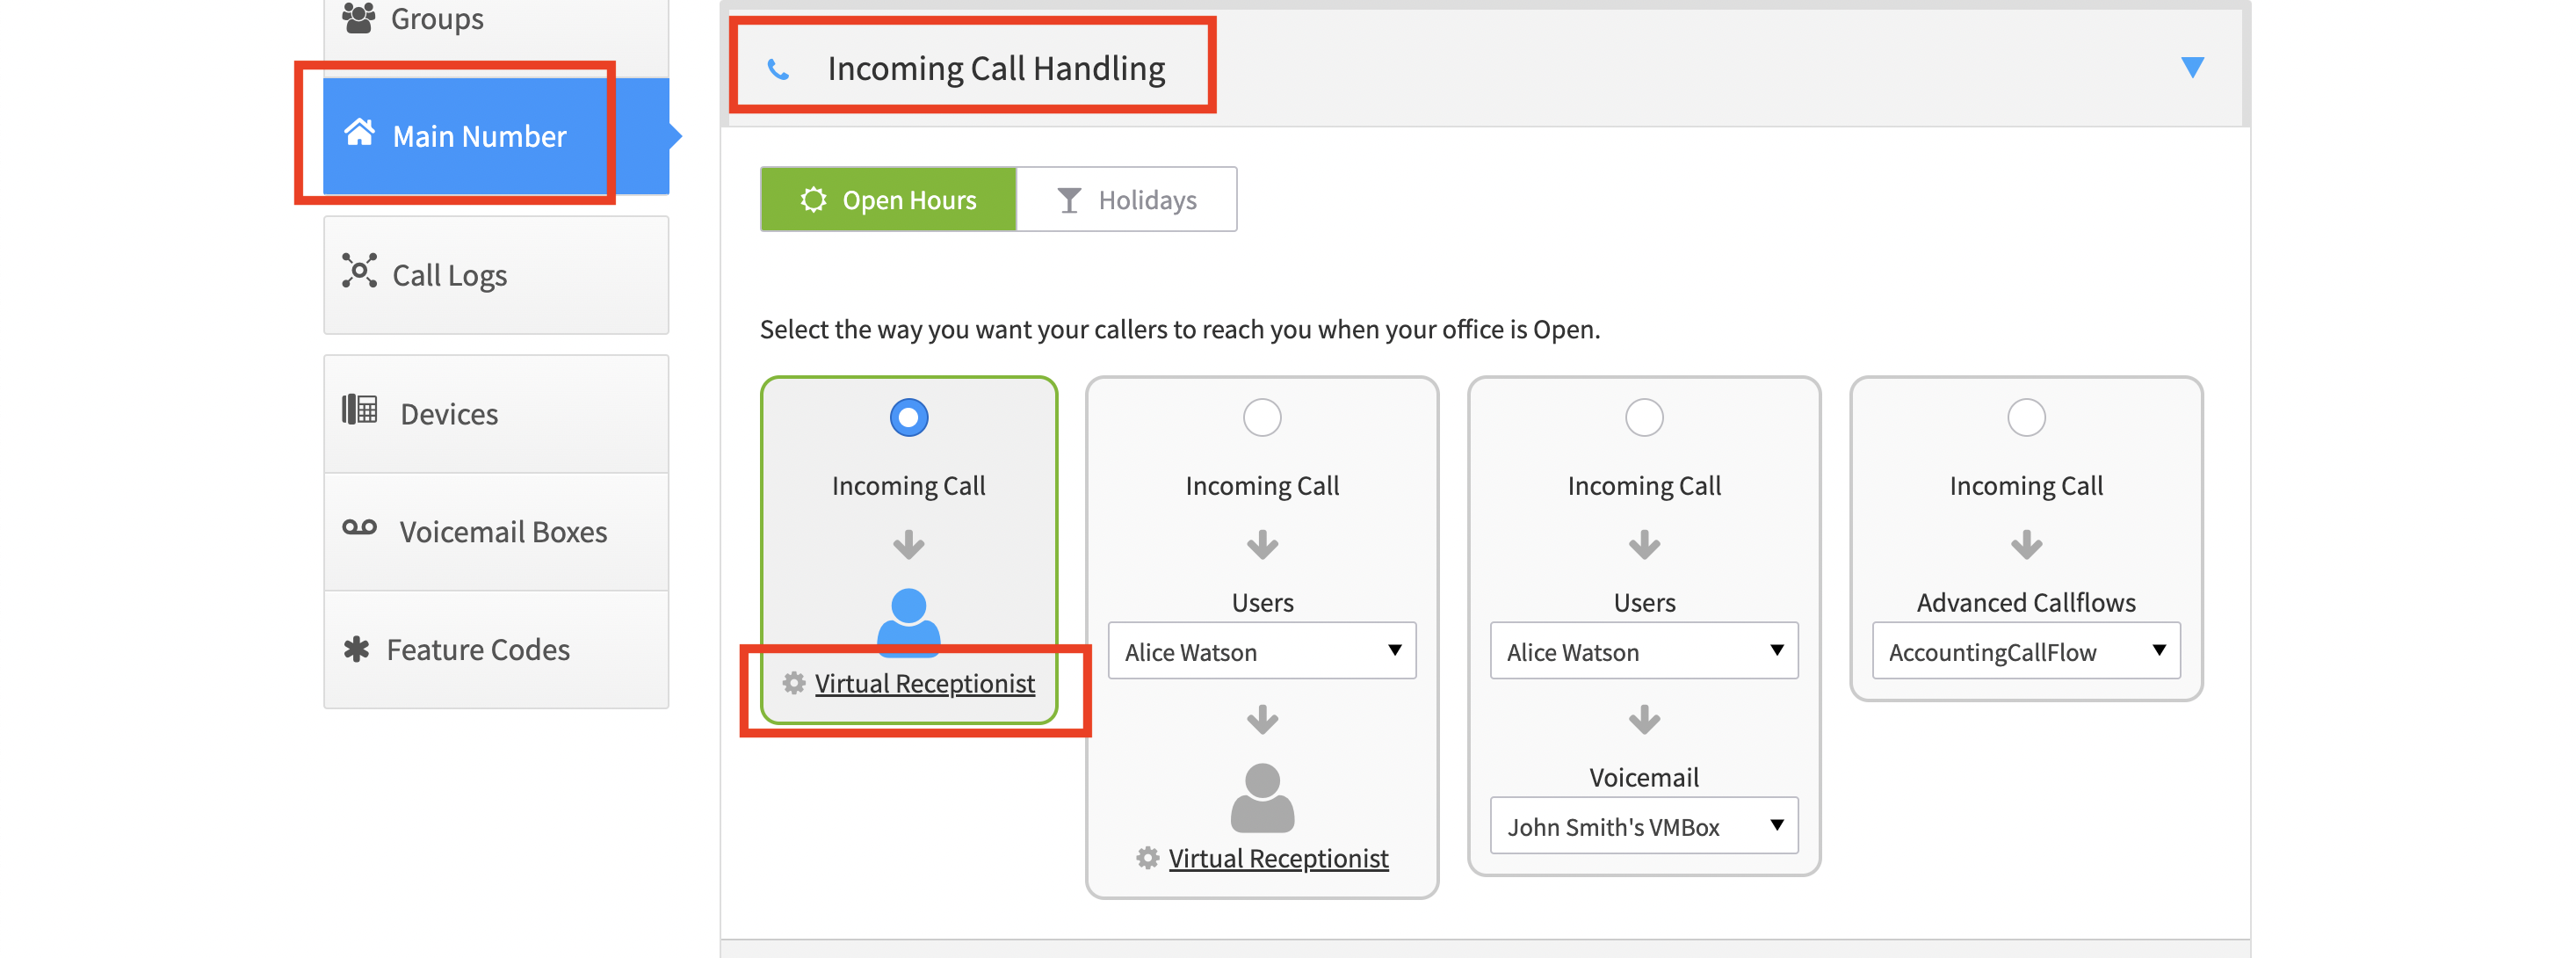
You’re now ready to use your Callflow in Smart PBX. Open Smart PBX > Main Number > Incoming Call Handling. Choose the first open, and click Virtual Receptionist.
-
When you’re configuring the Virtual Receptionist, it will appear as one of the selectable items in the menu dropdown (under the Advanced Callflows heading)