Provisioning Polycom Series
-
Add the device to Smart PBX
-
Reset to factory settings. On the phone, navigate:
Step Selection a Menu b 3: Settings c 2: Advanced (password 456)d 1: Admin Settings e 5: Reset to Defaults f 5: Reset To Factory Settings -
Obtain the phone’s IP address. Press Menu > Status > Platform > Phone, and scroll down to a line such as
IP: 10.10.9.88. -
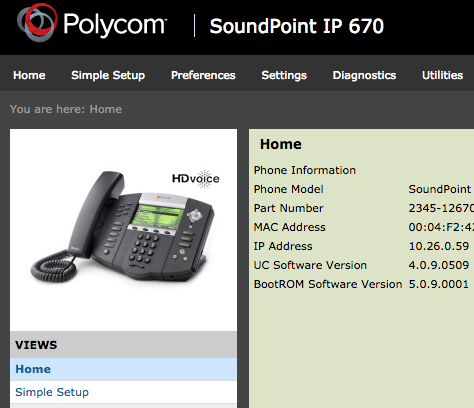
Enter the IP address in your browser. The default password is
456.
-
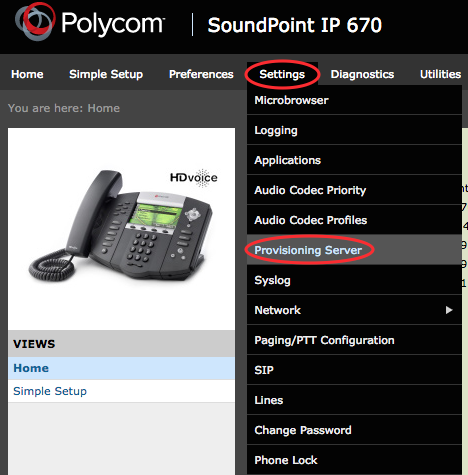
Click Settings in the top tab and then select Provisioning Server
-
Configure auto-provisioning with these exact values:
Field Value Server Type HTTPServer Address p.zswitch.brightpbx.caTag SN to UA EnableServer User, Server Password, File Transmit Tries, Retry Wait Leave unchanged 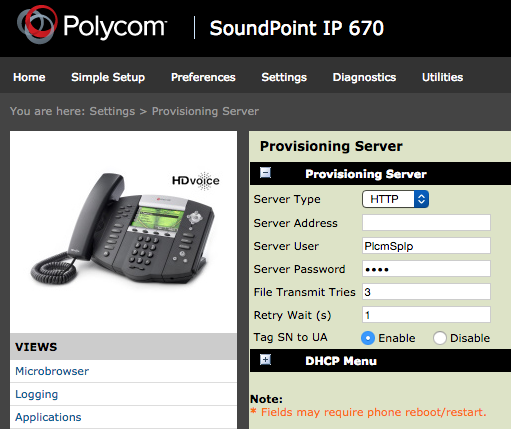
Save your changes. The phone should reboot — if it does not, reboot it manually.