Submitting a port request
-
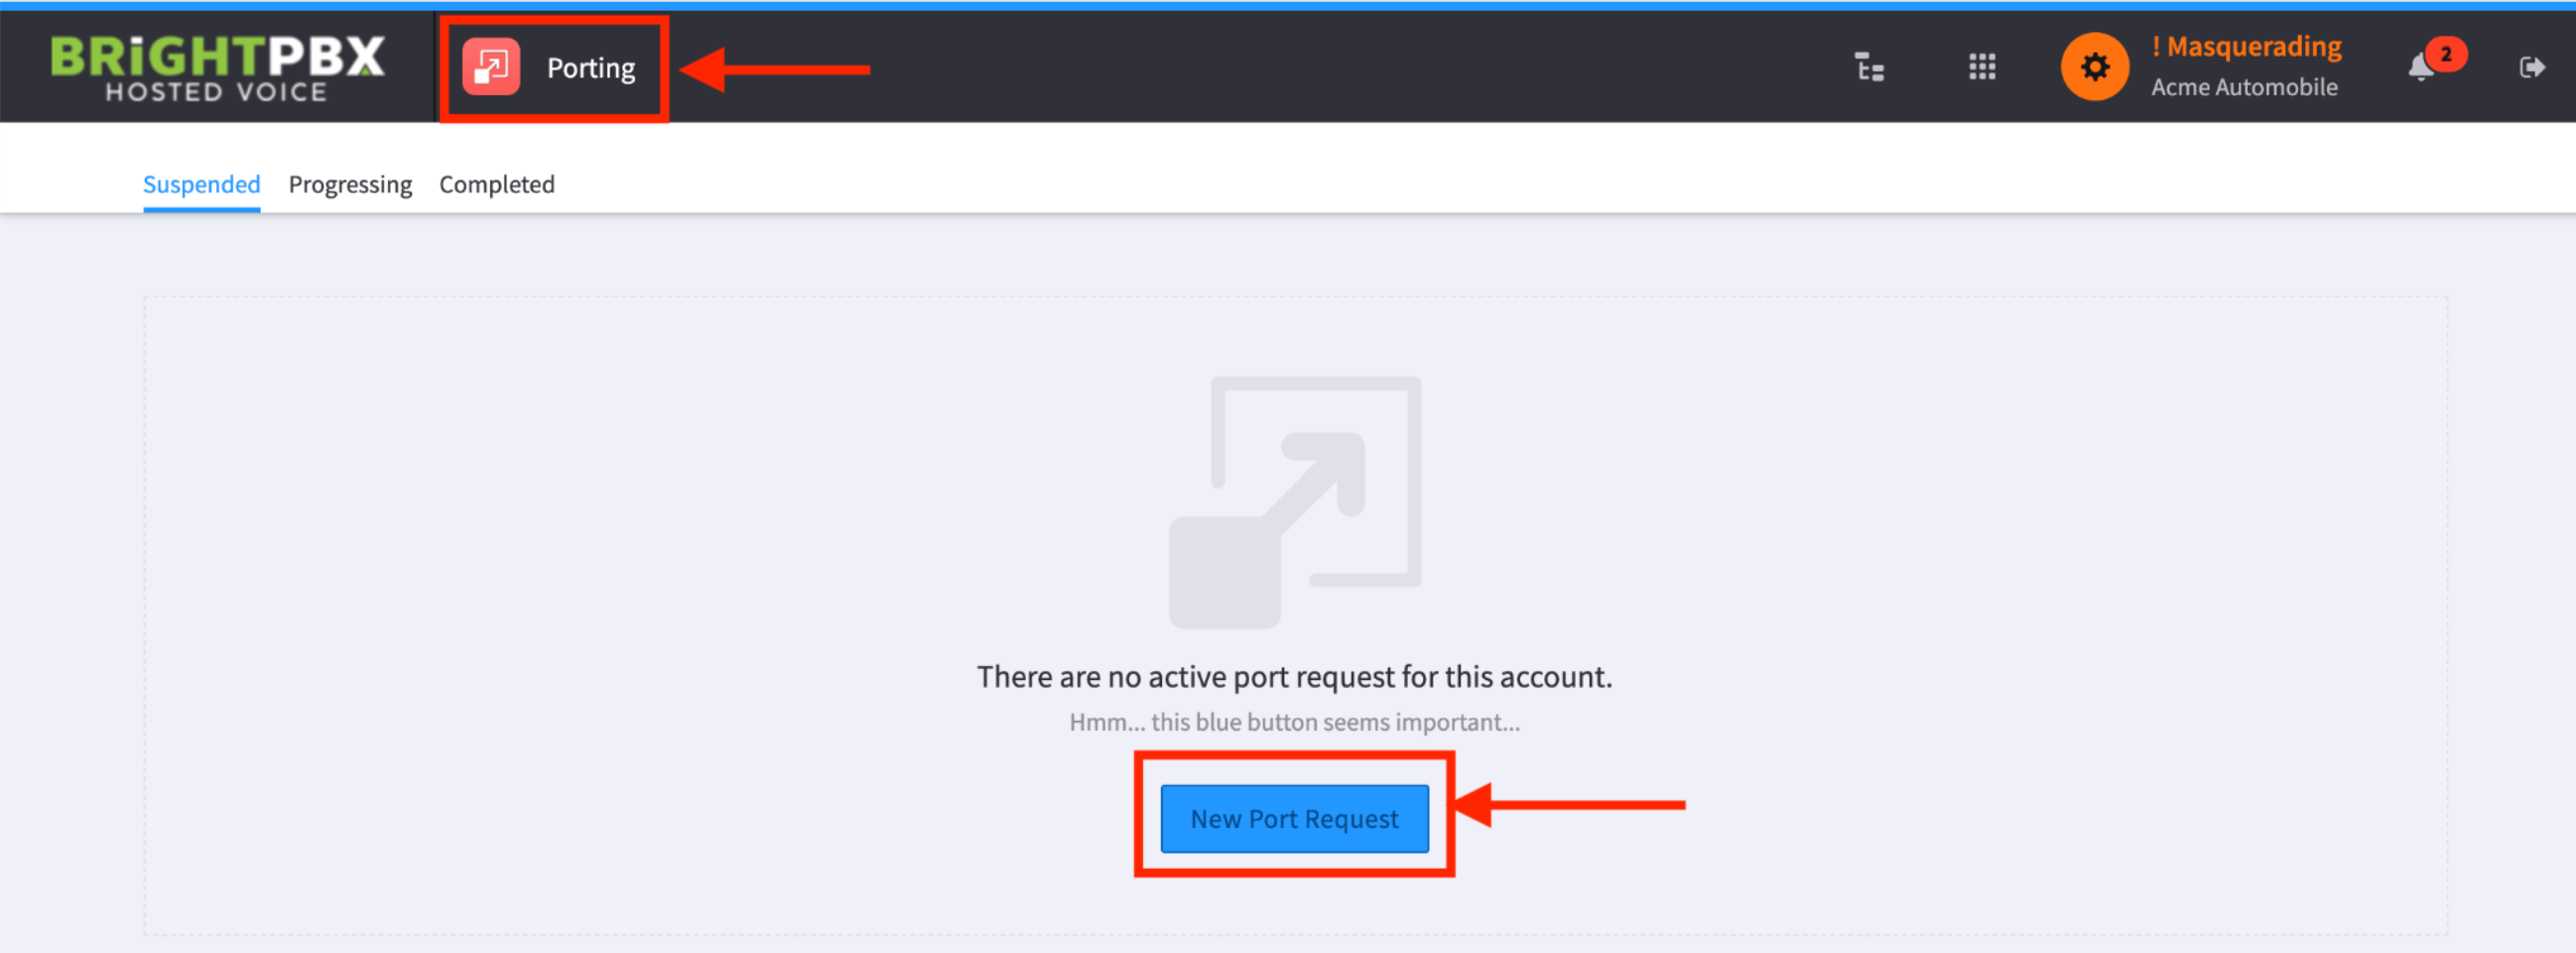
Open the Porting app, and choose New Port Request
-
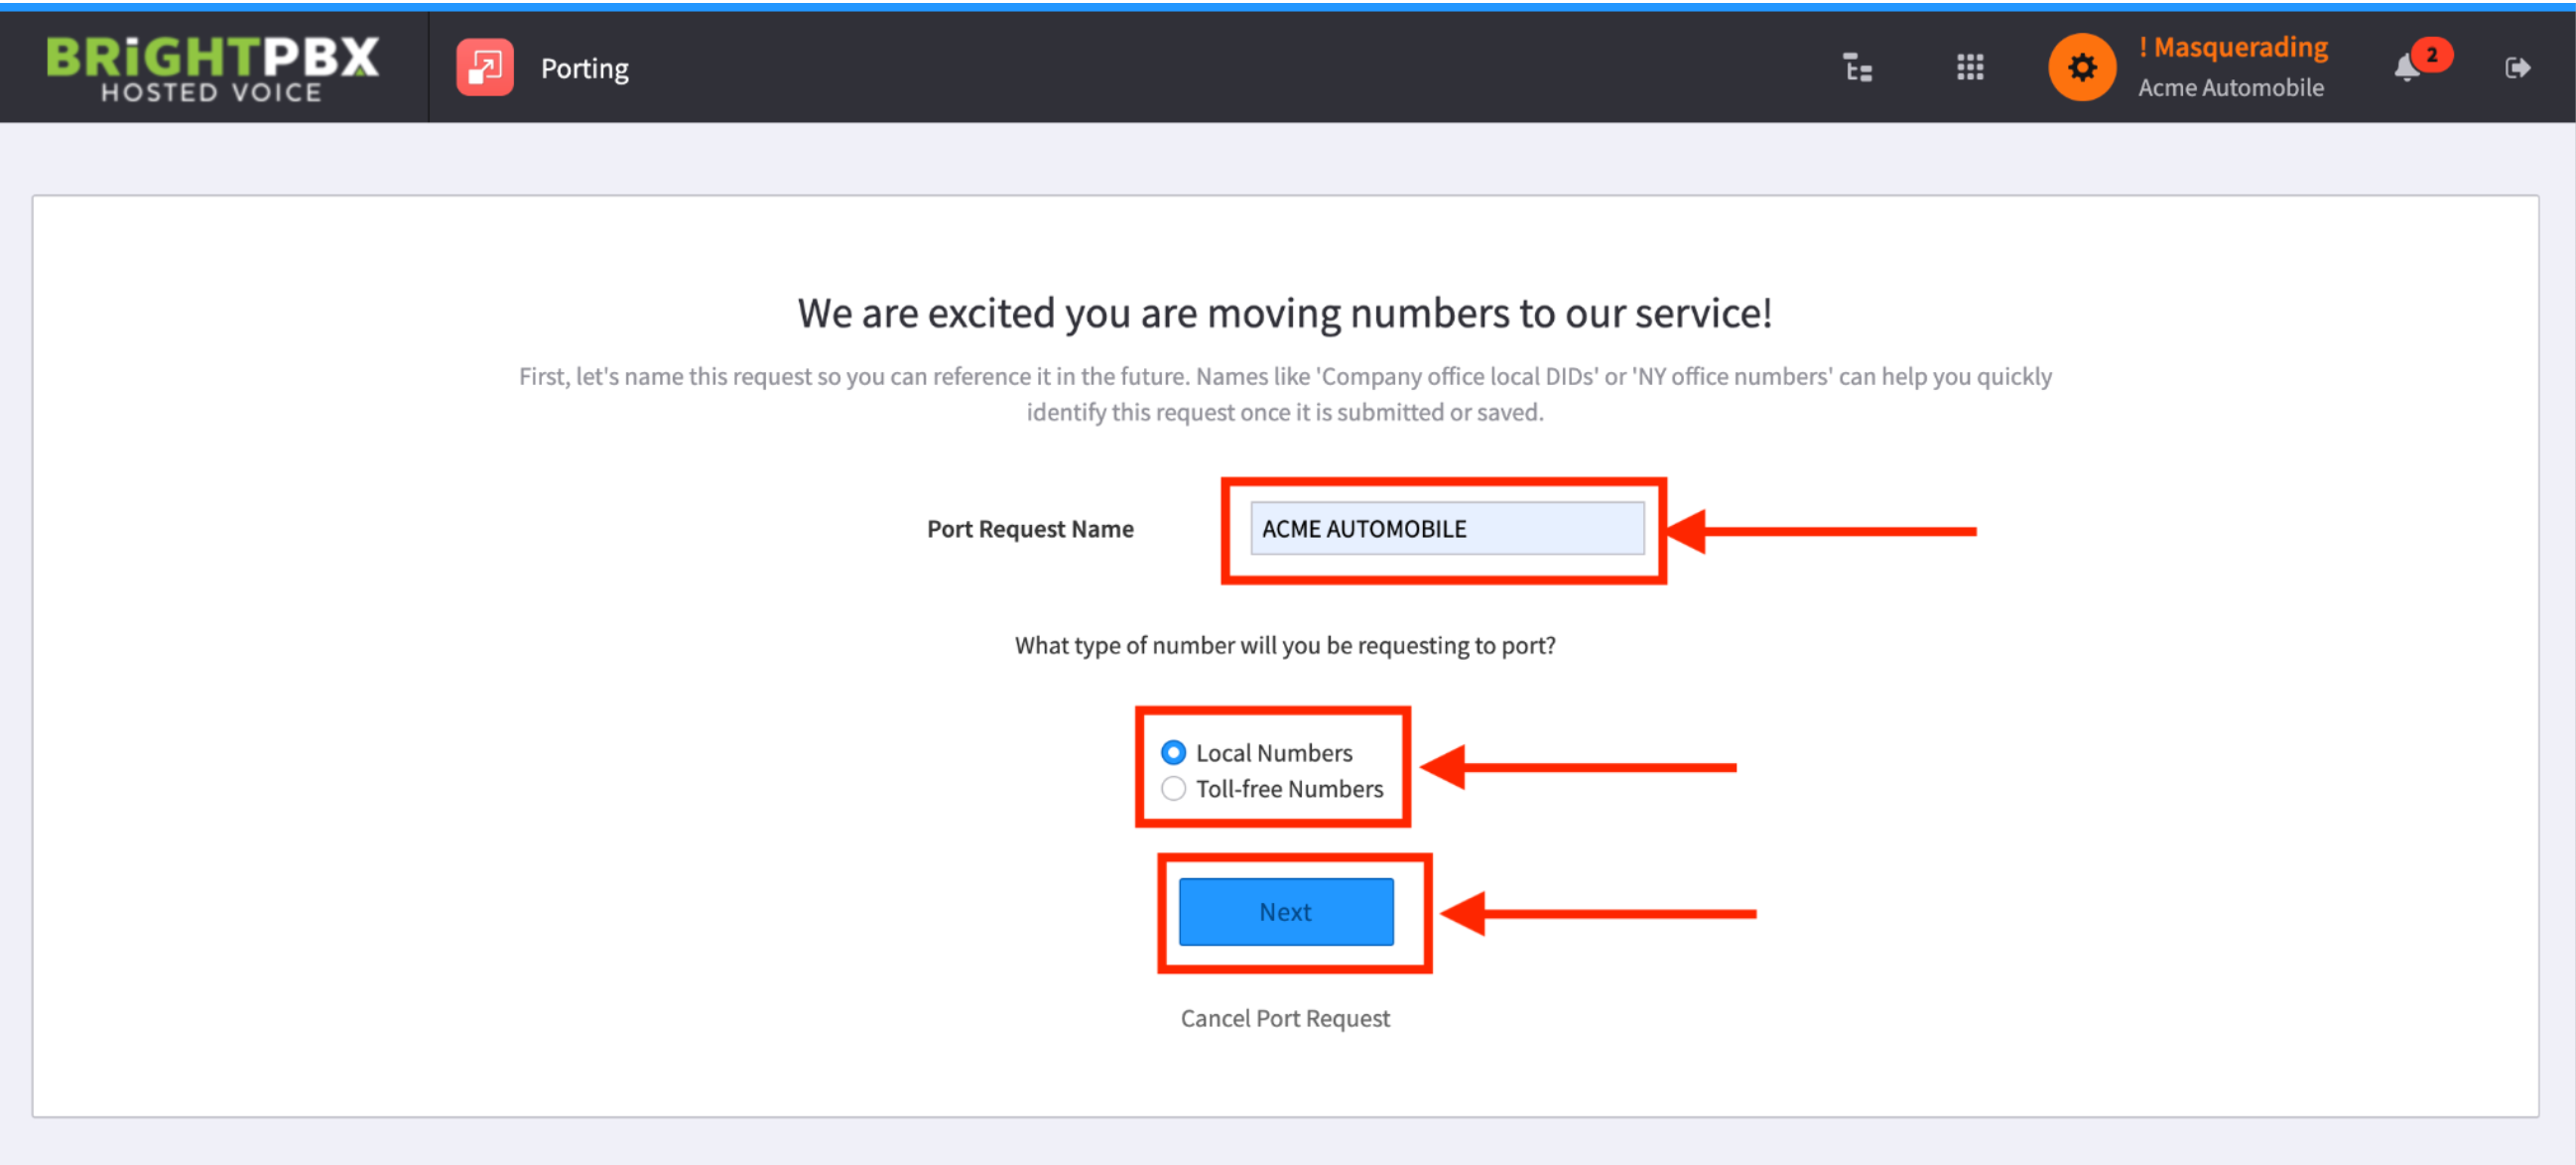
For Port Request Name, enter your customer’s company name. Choose the type (local or toll free), and click Next.
-
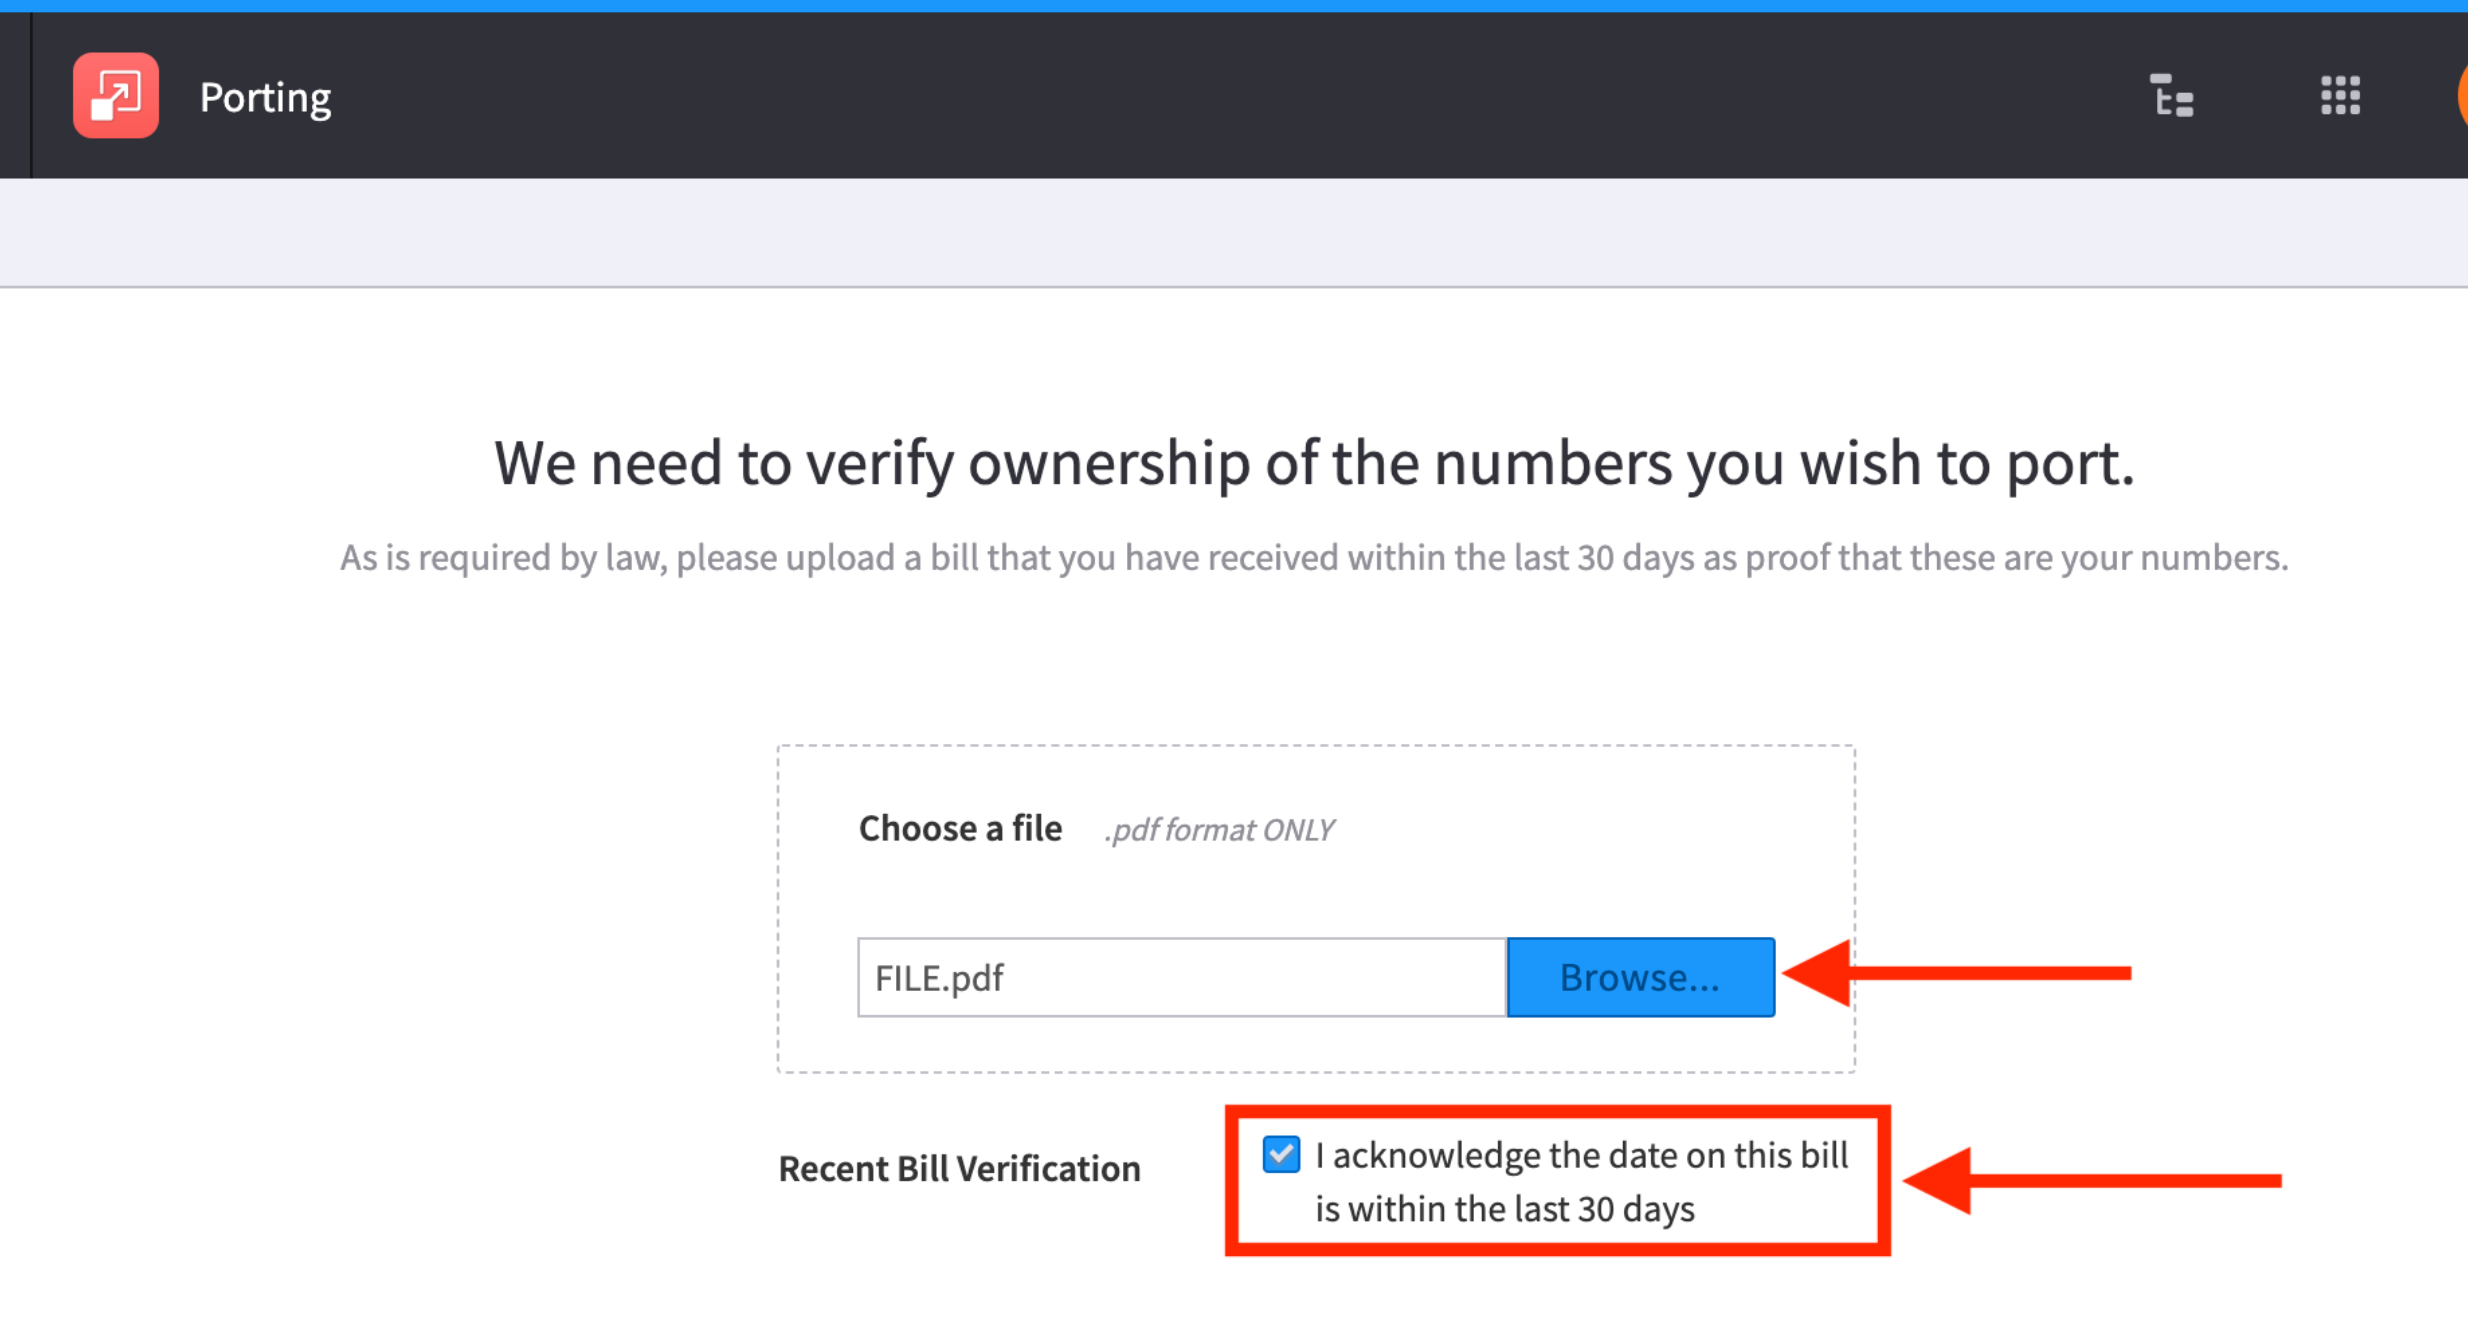
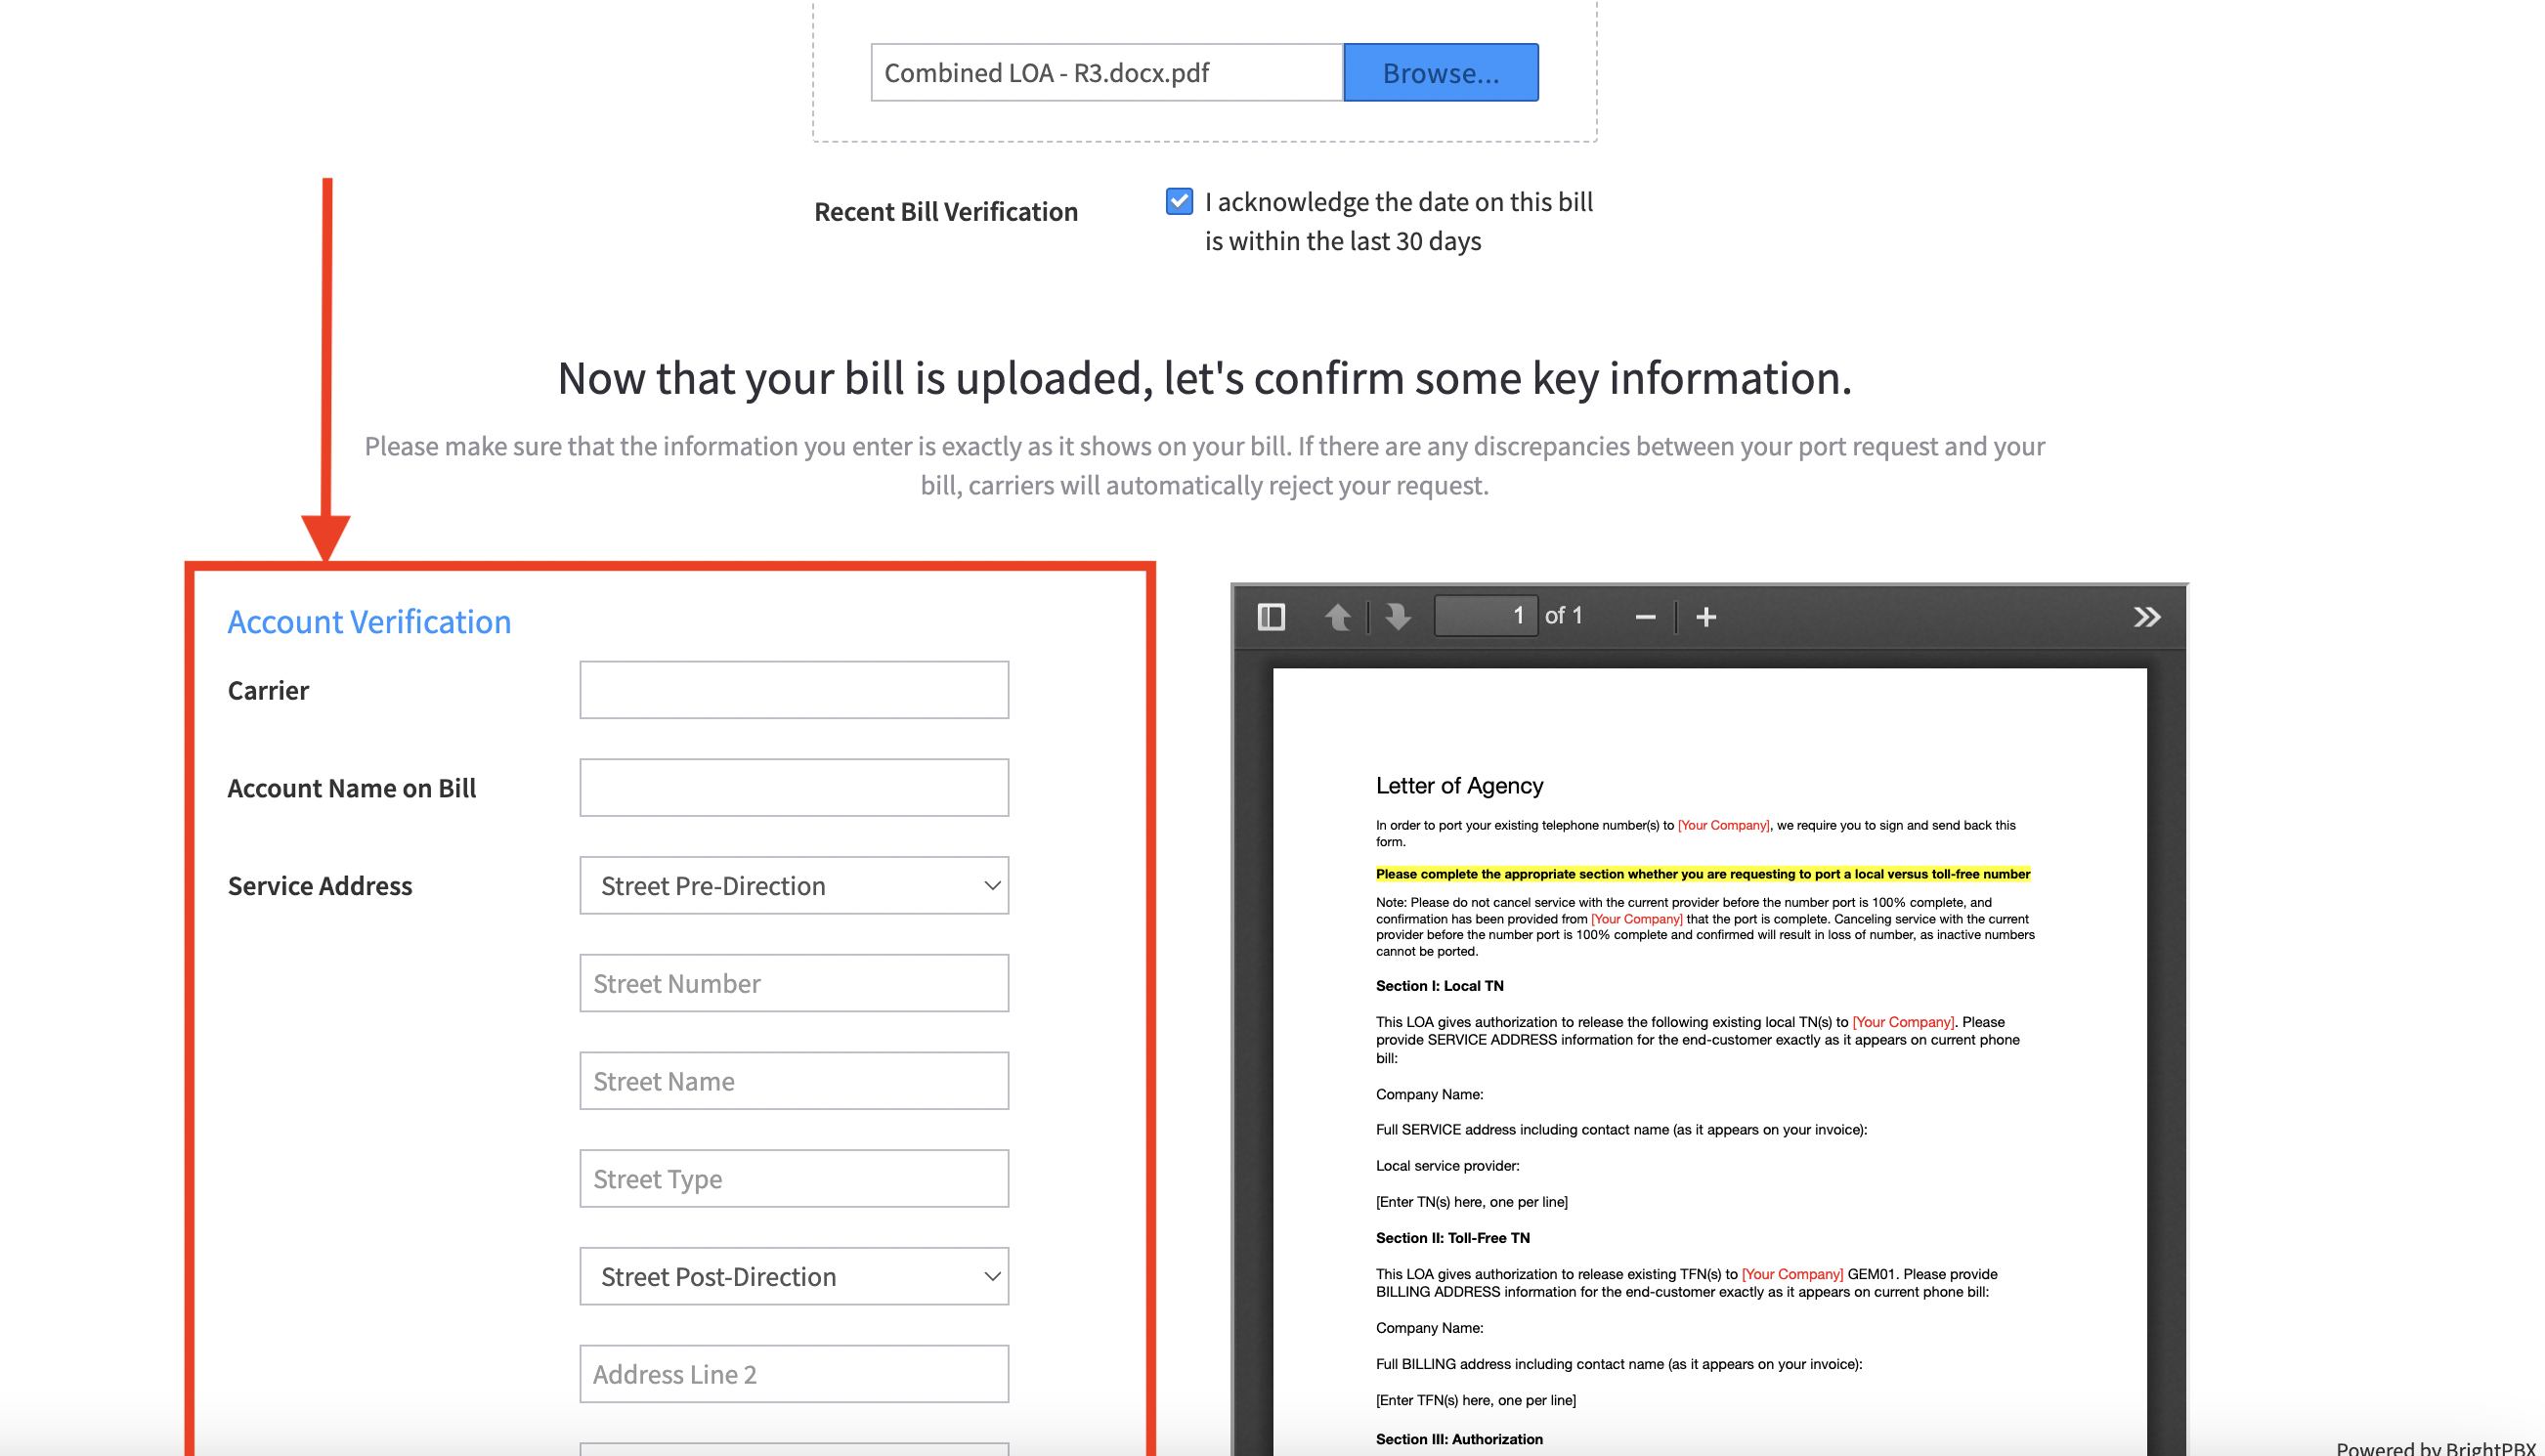
Upload a phone bill for the numbers you are porting, and check the box underneath
-
Once you check the box, a set of fields appears. Fill these out exactly as they appear on the phone bill, then click Next - Select Numbers at the bottom of the page.
-
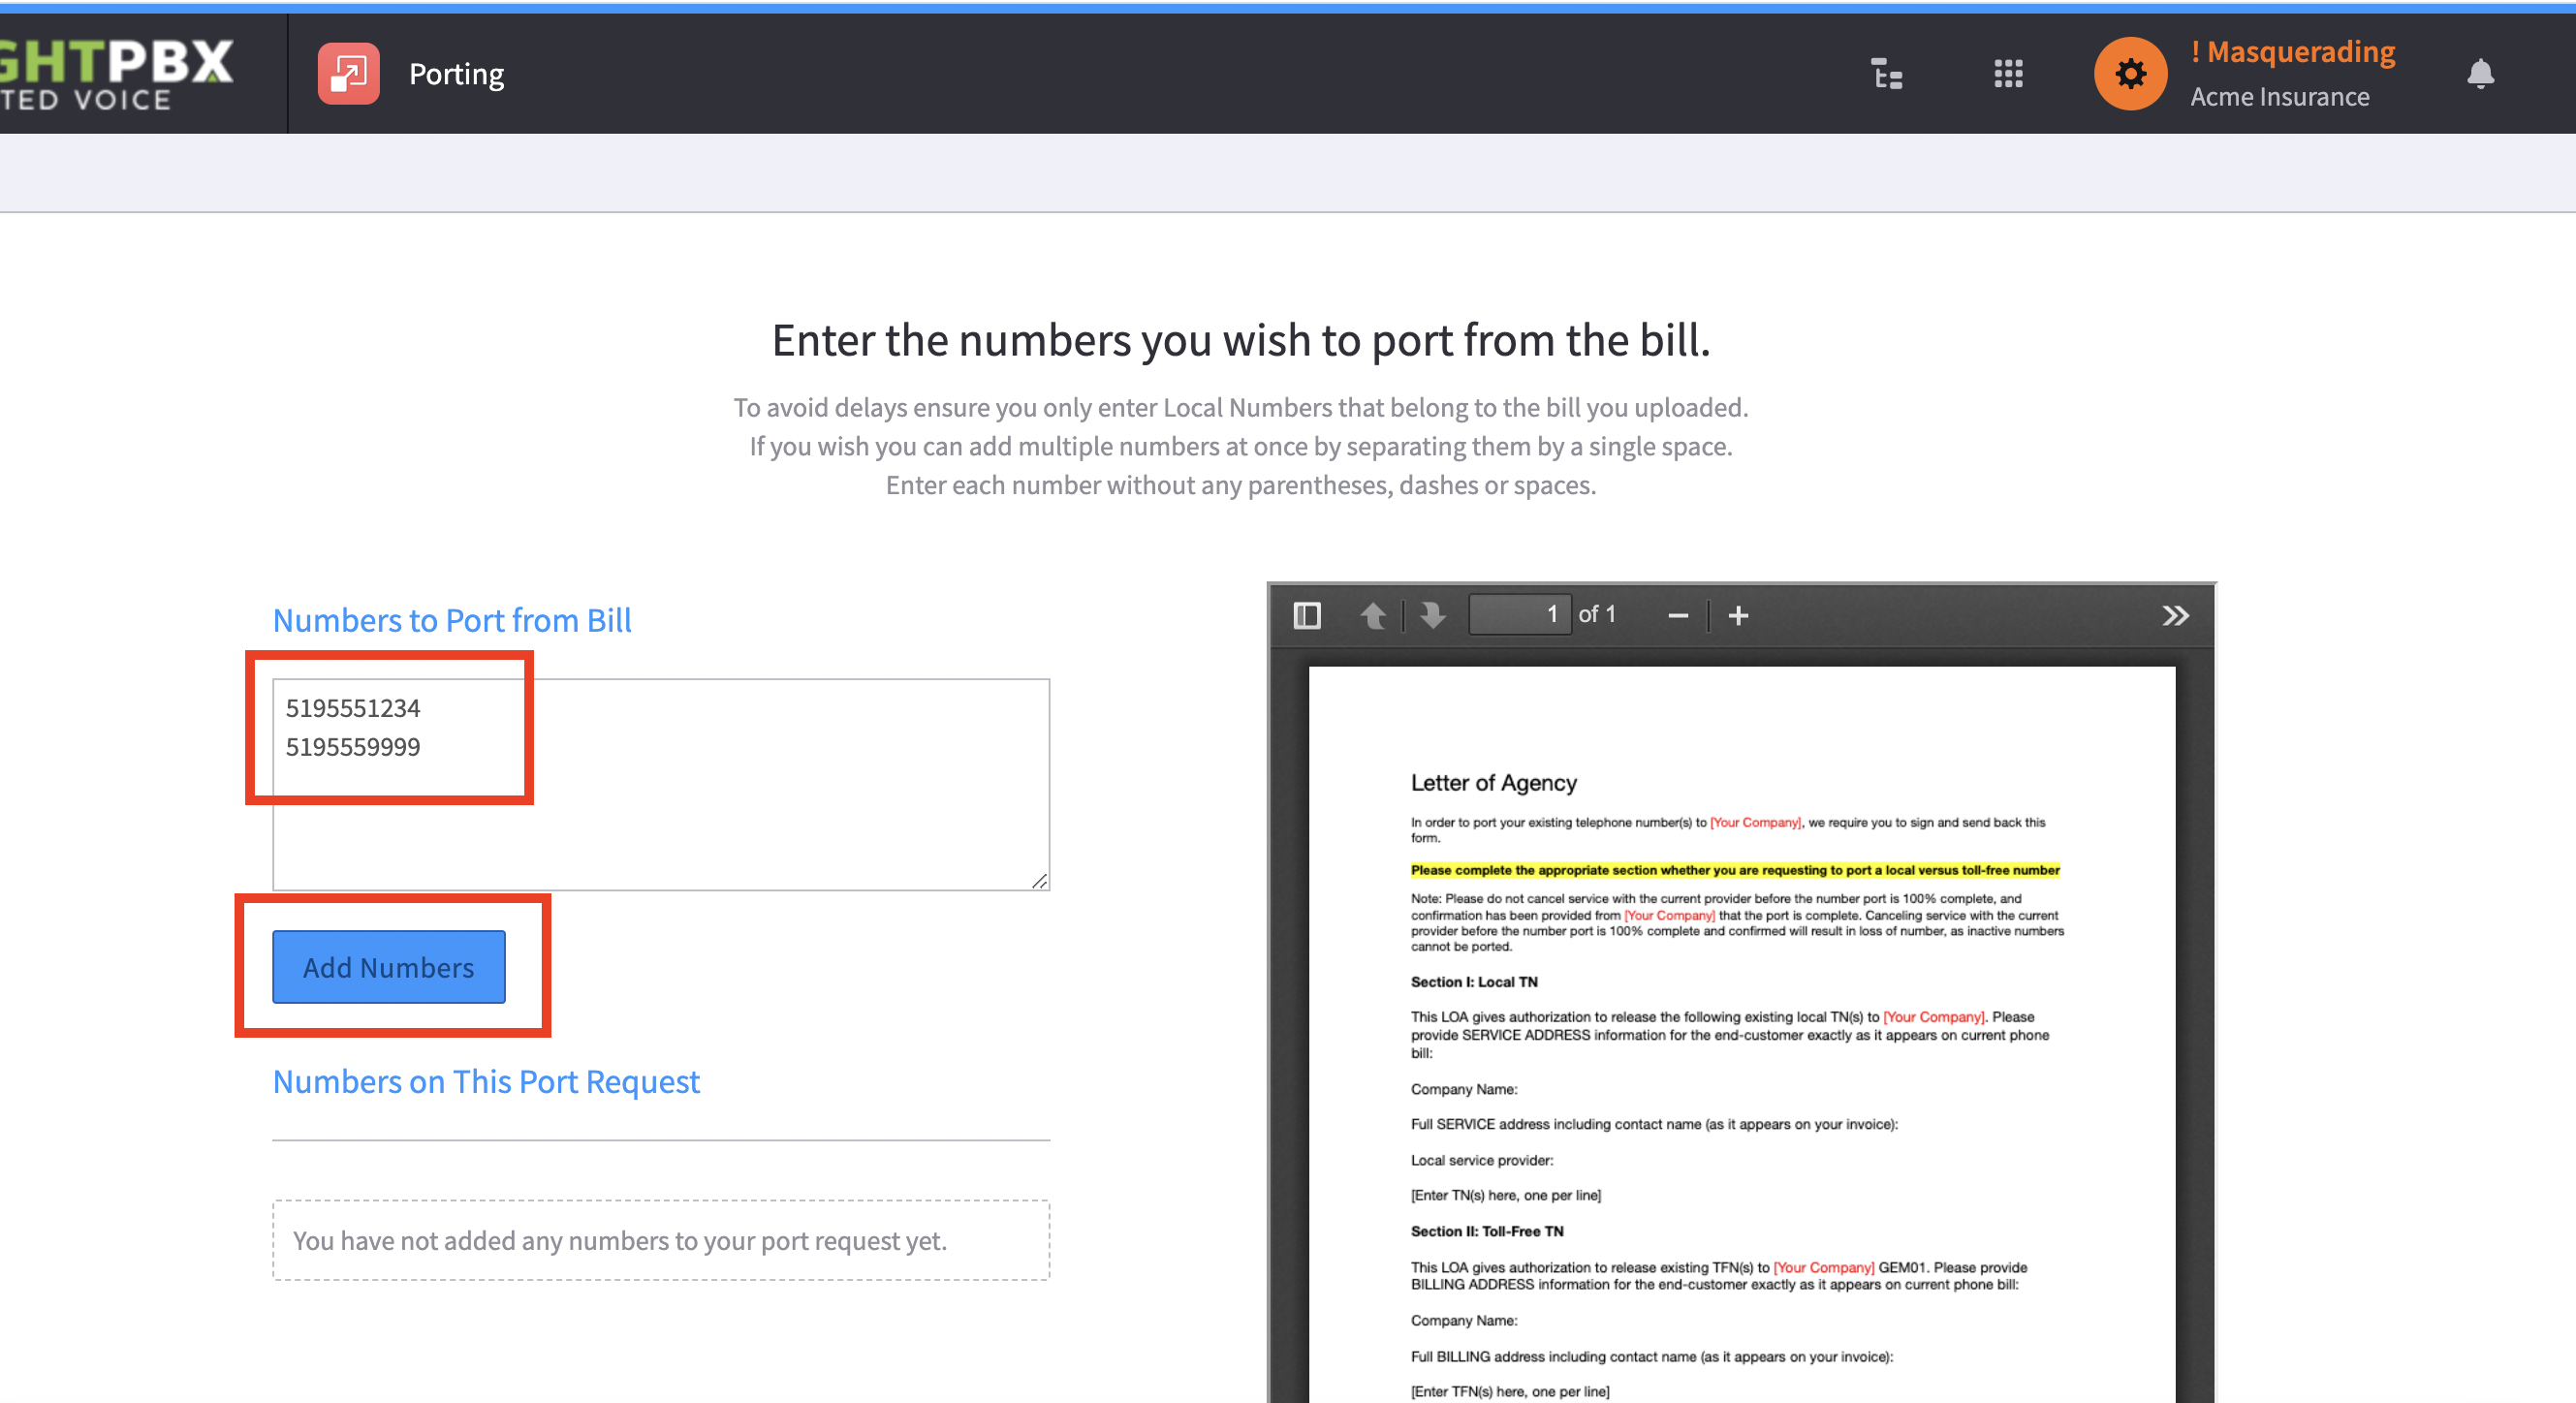
Enter the phone numbers to port, one per line, and click Add Numbers
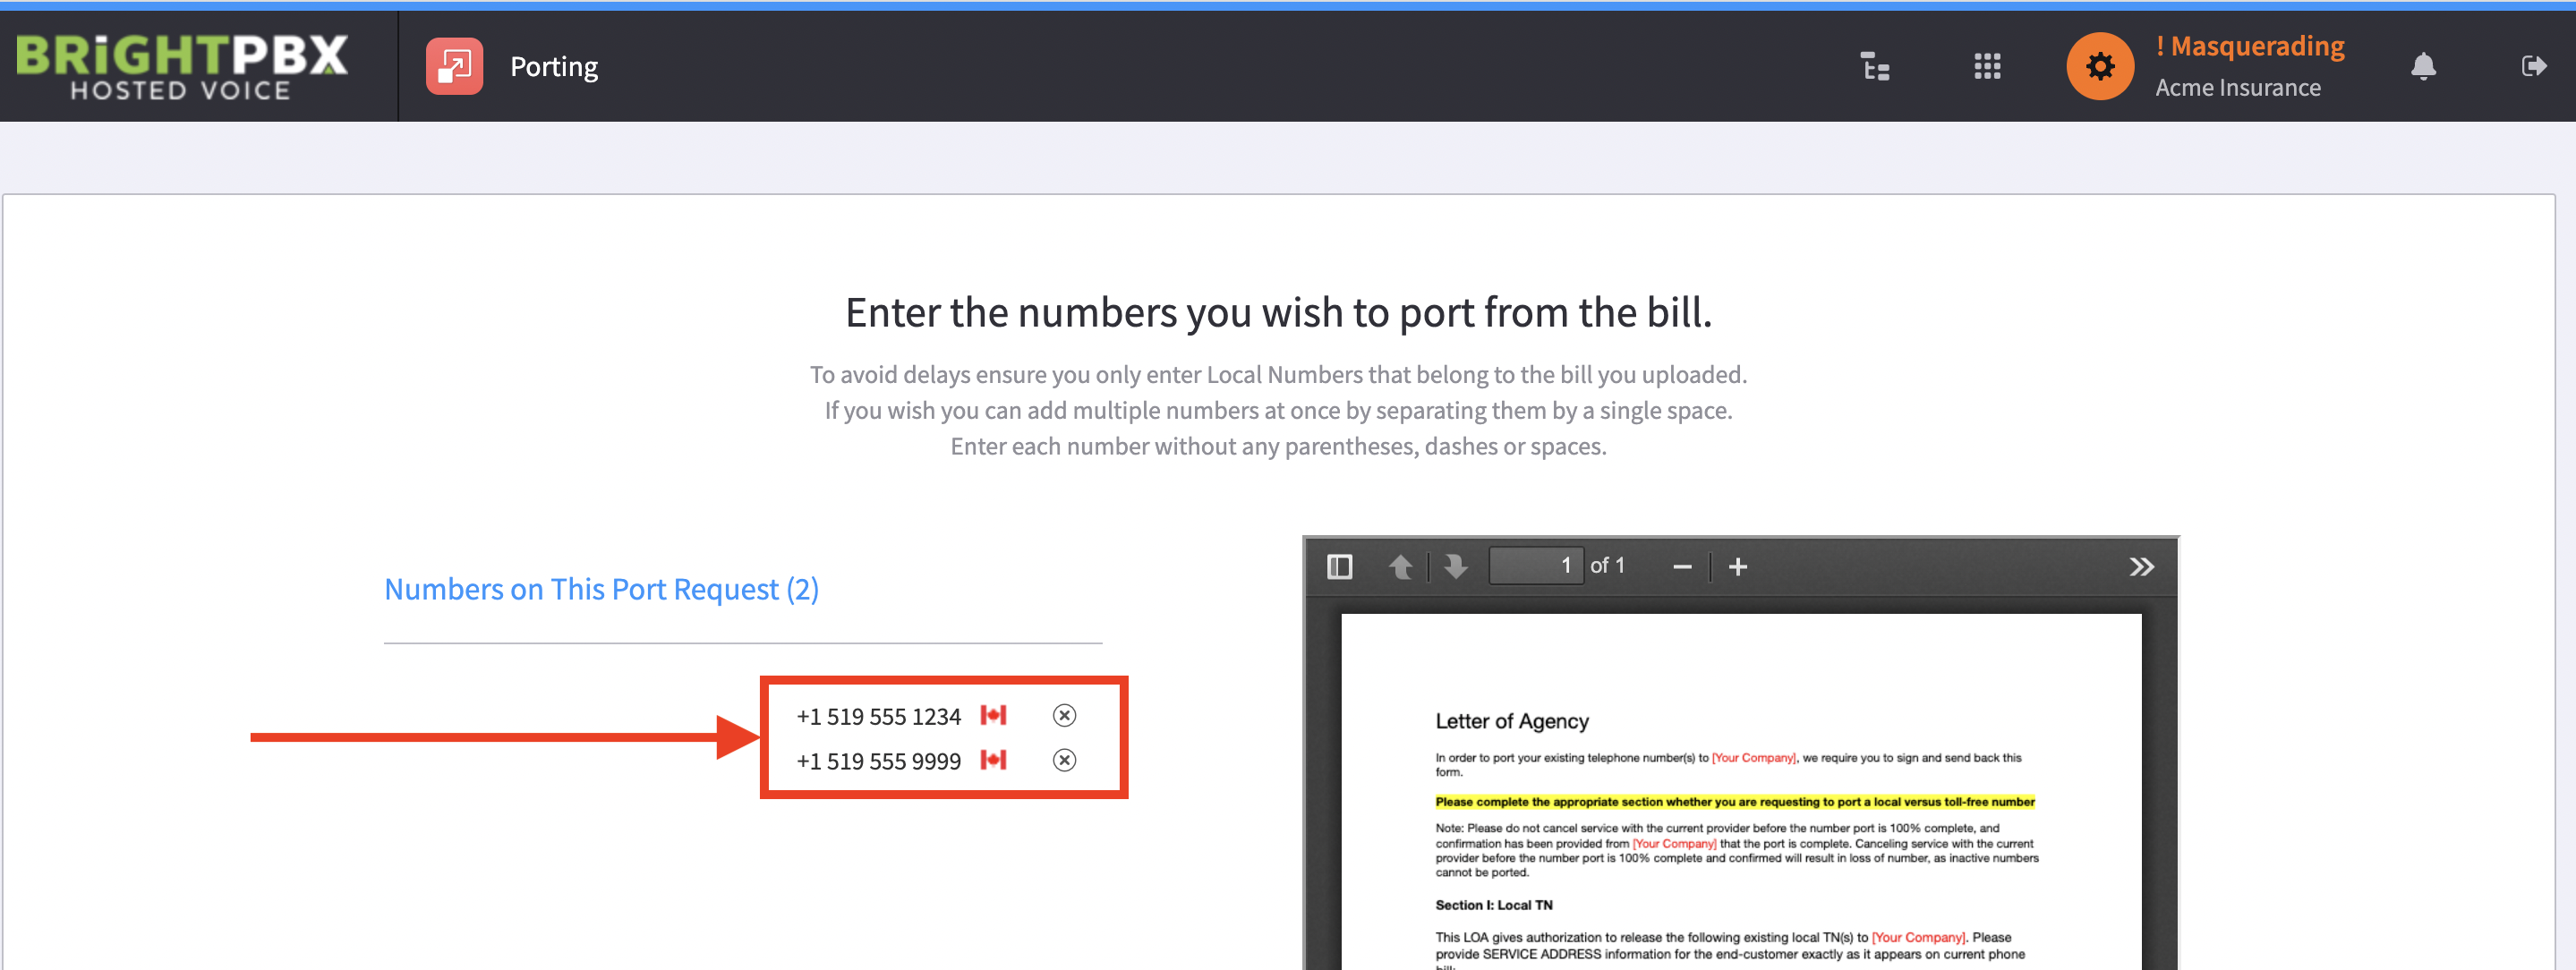
They will then show as added in the section below.
-
Click Next - LoA Form at the bottom of the page

-
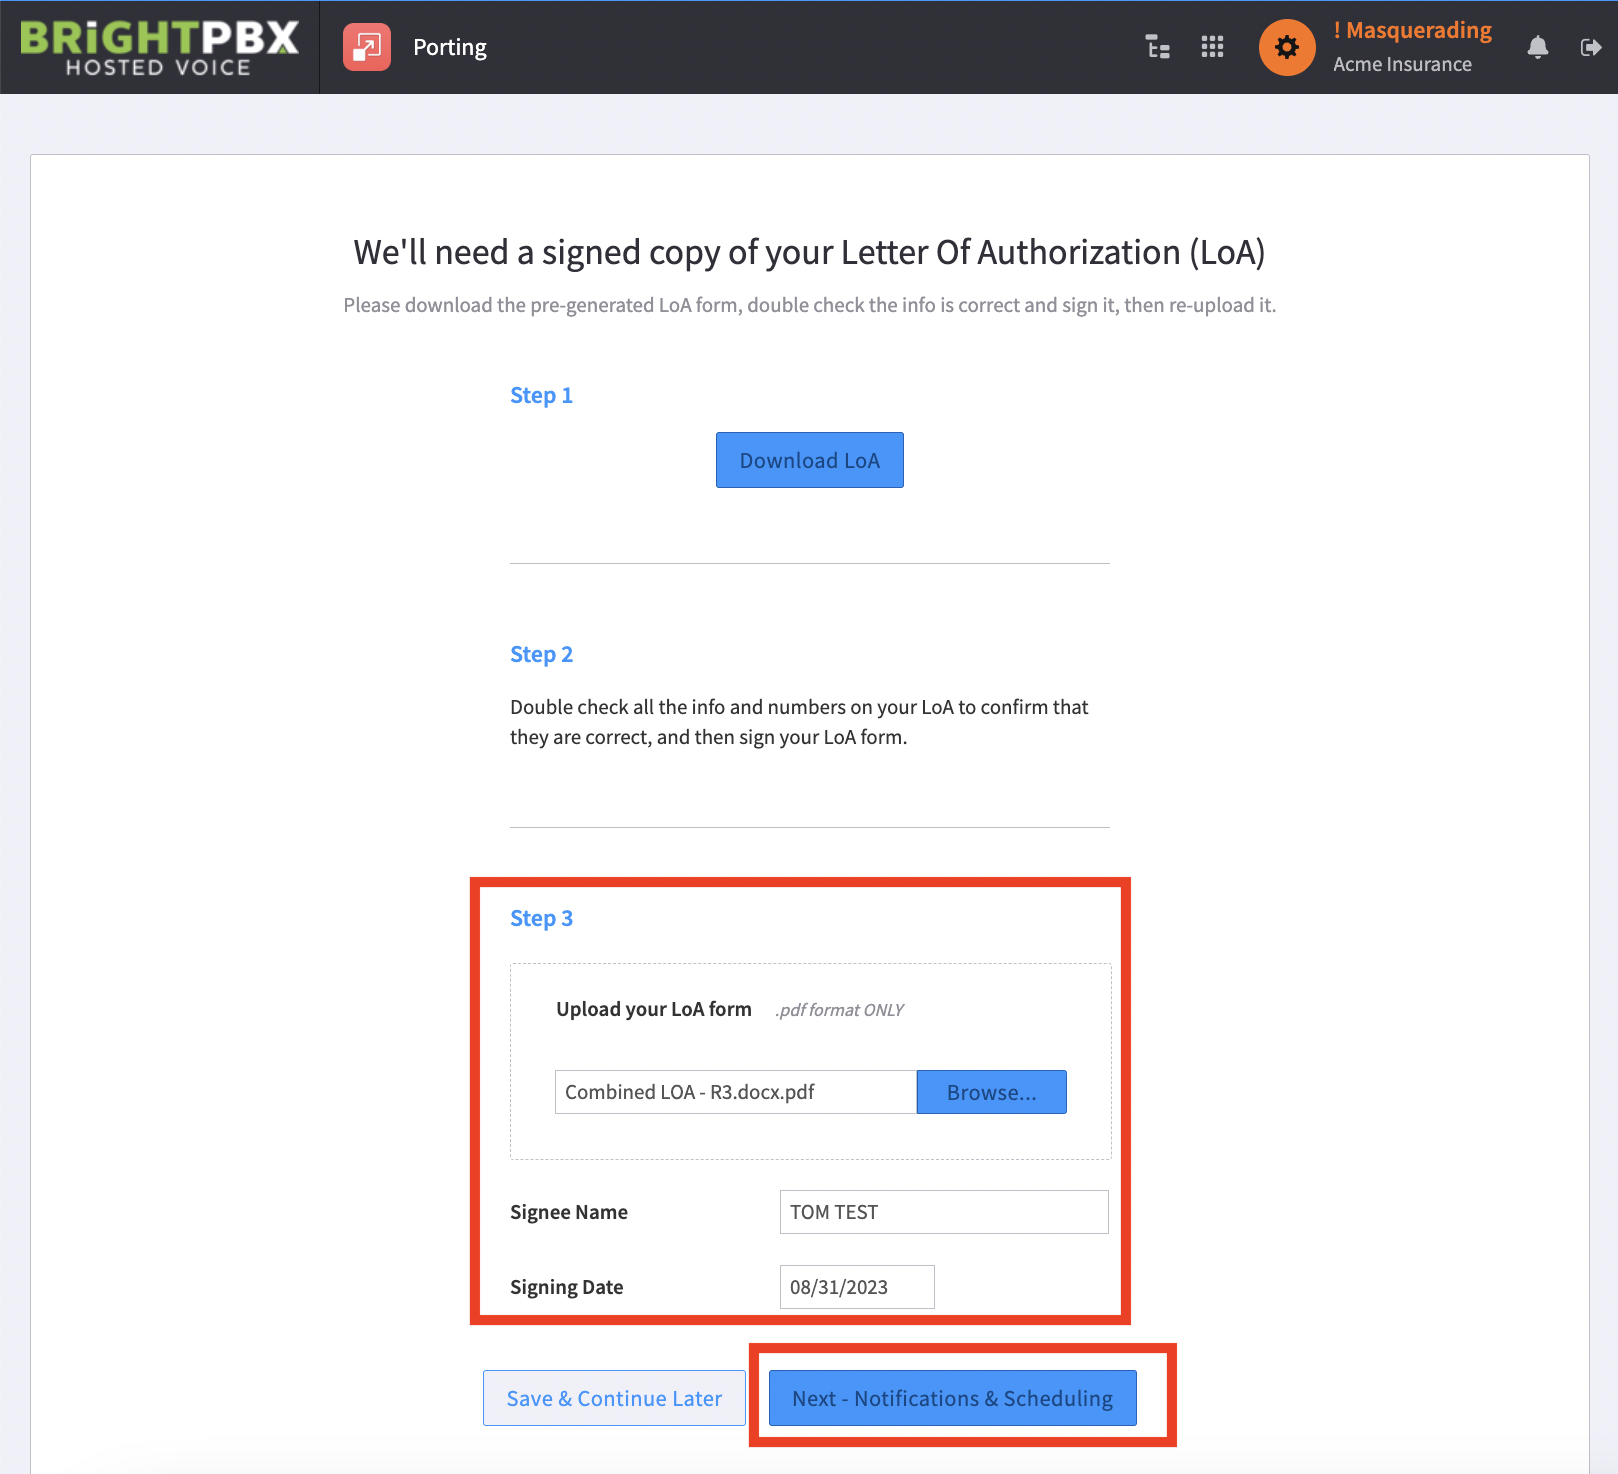
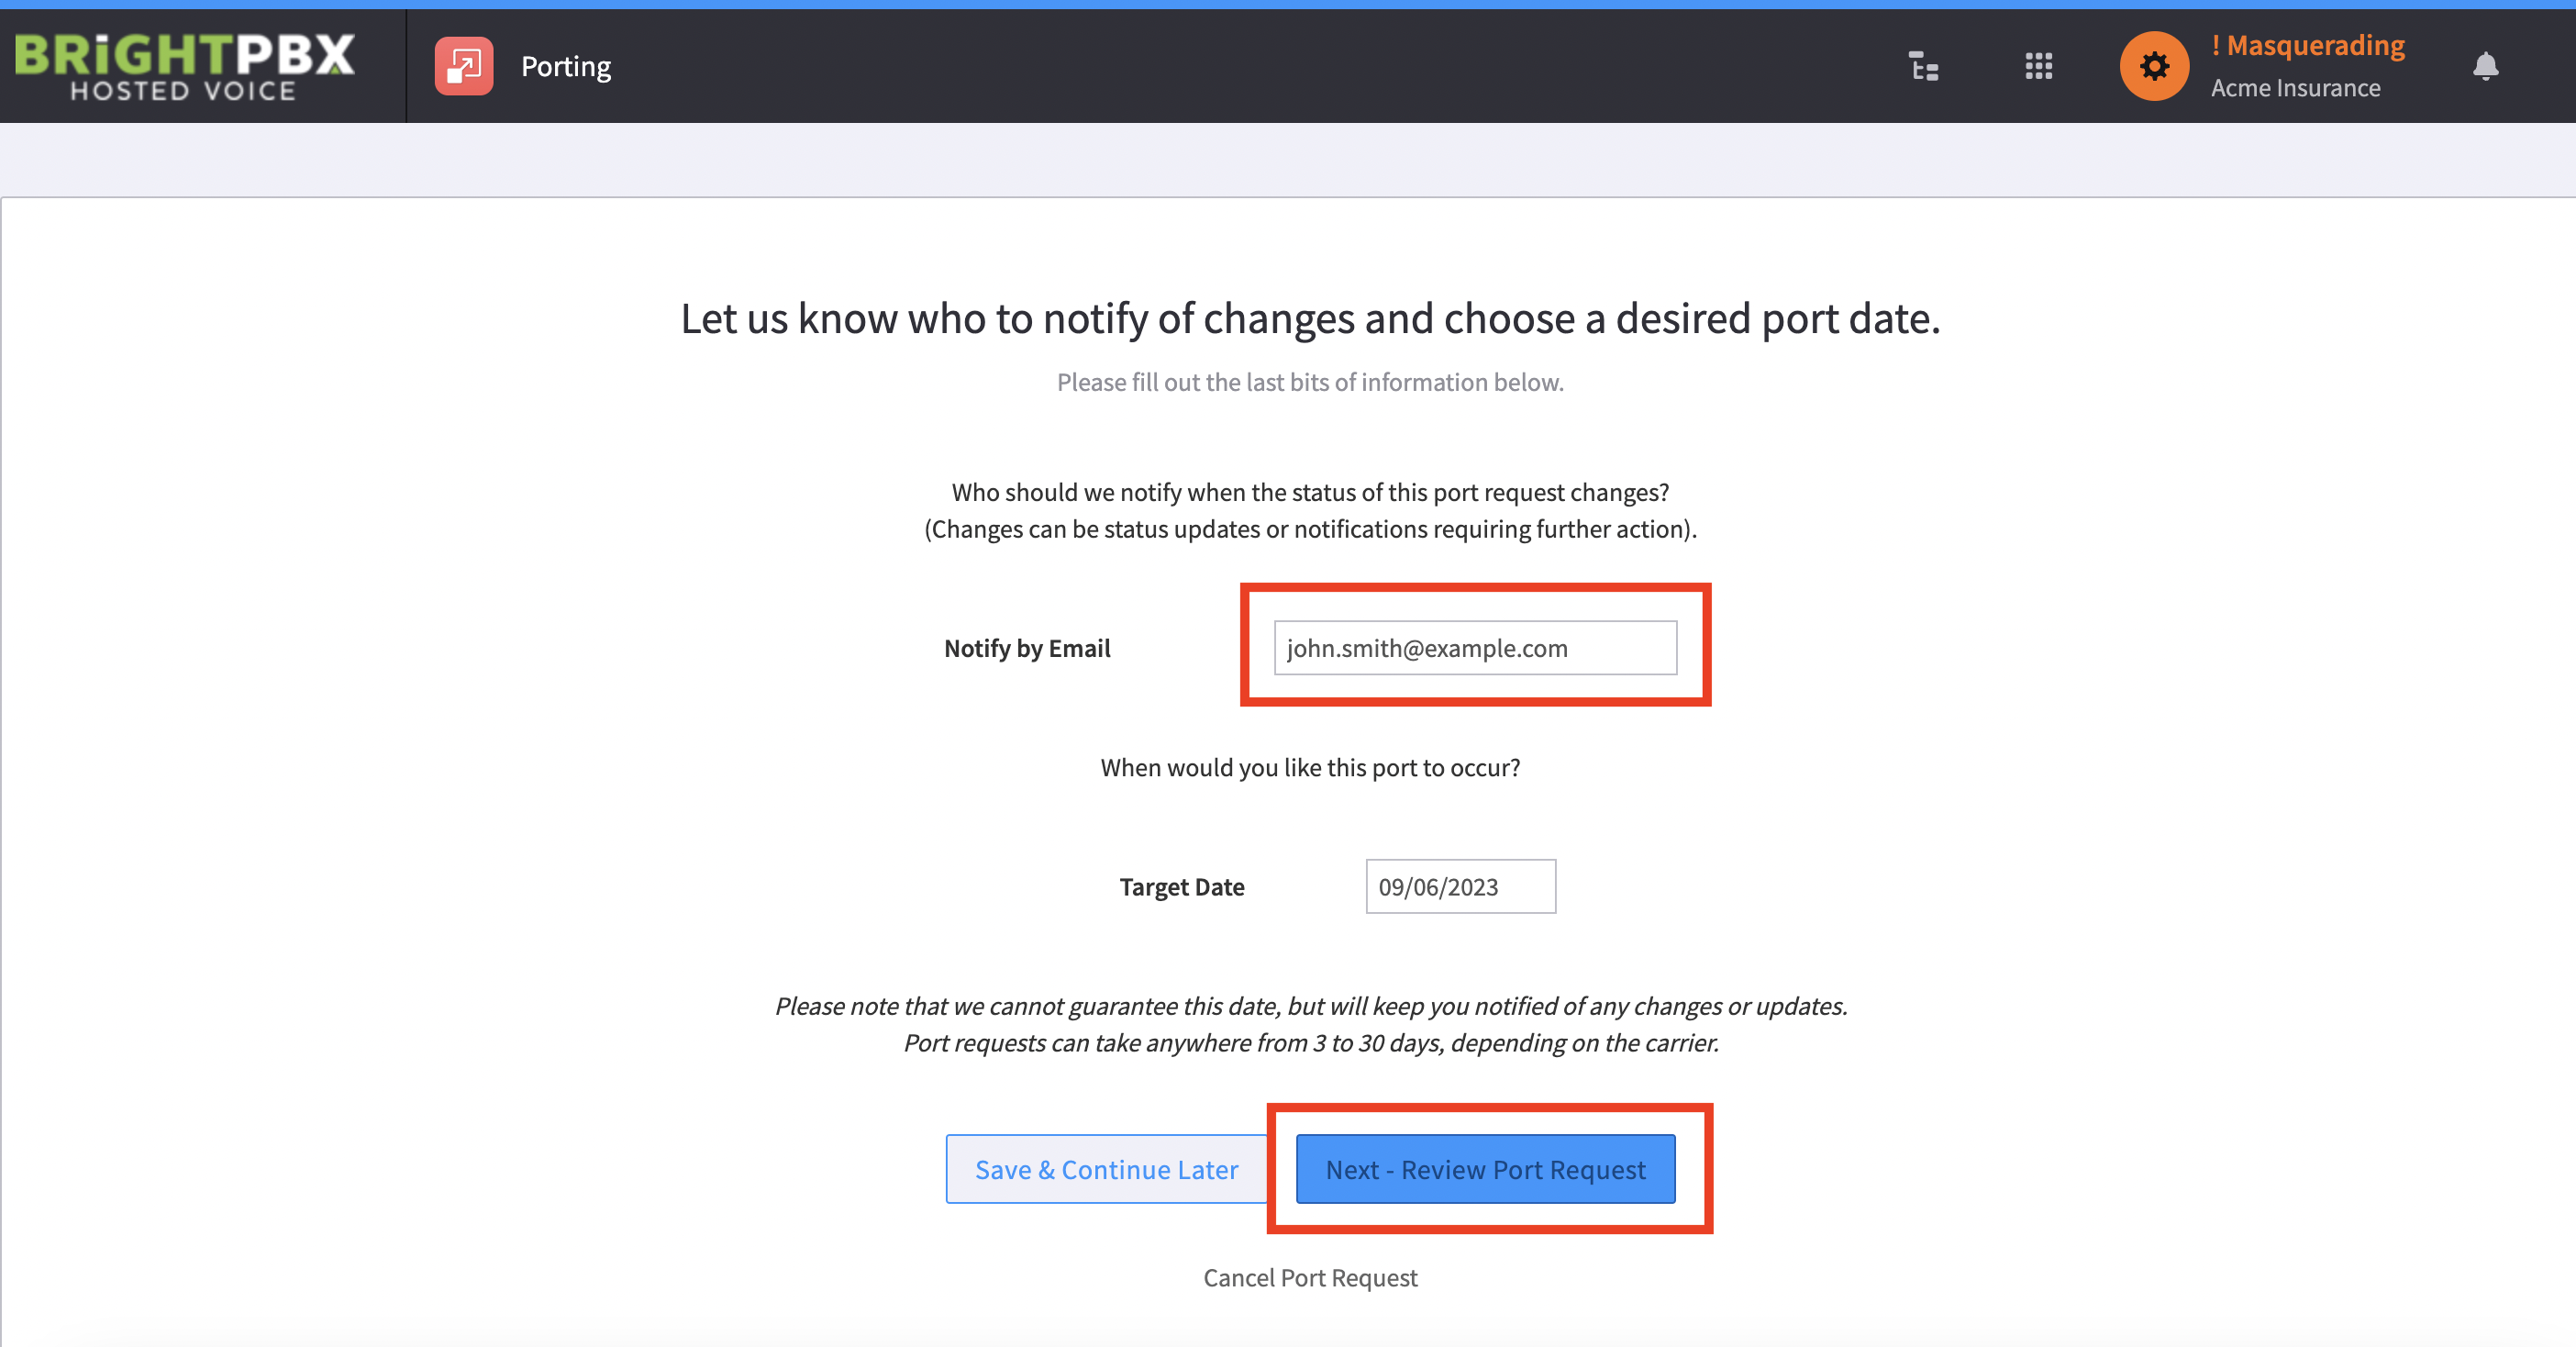
Upload the LoA form, provide the signee name and date, then click Next - Notifications & Scheduling
-
Choose a notification email to receive status updates on the port
-
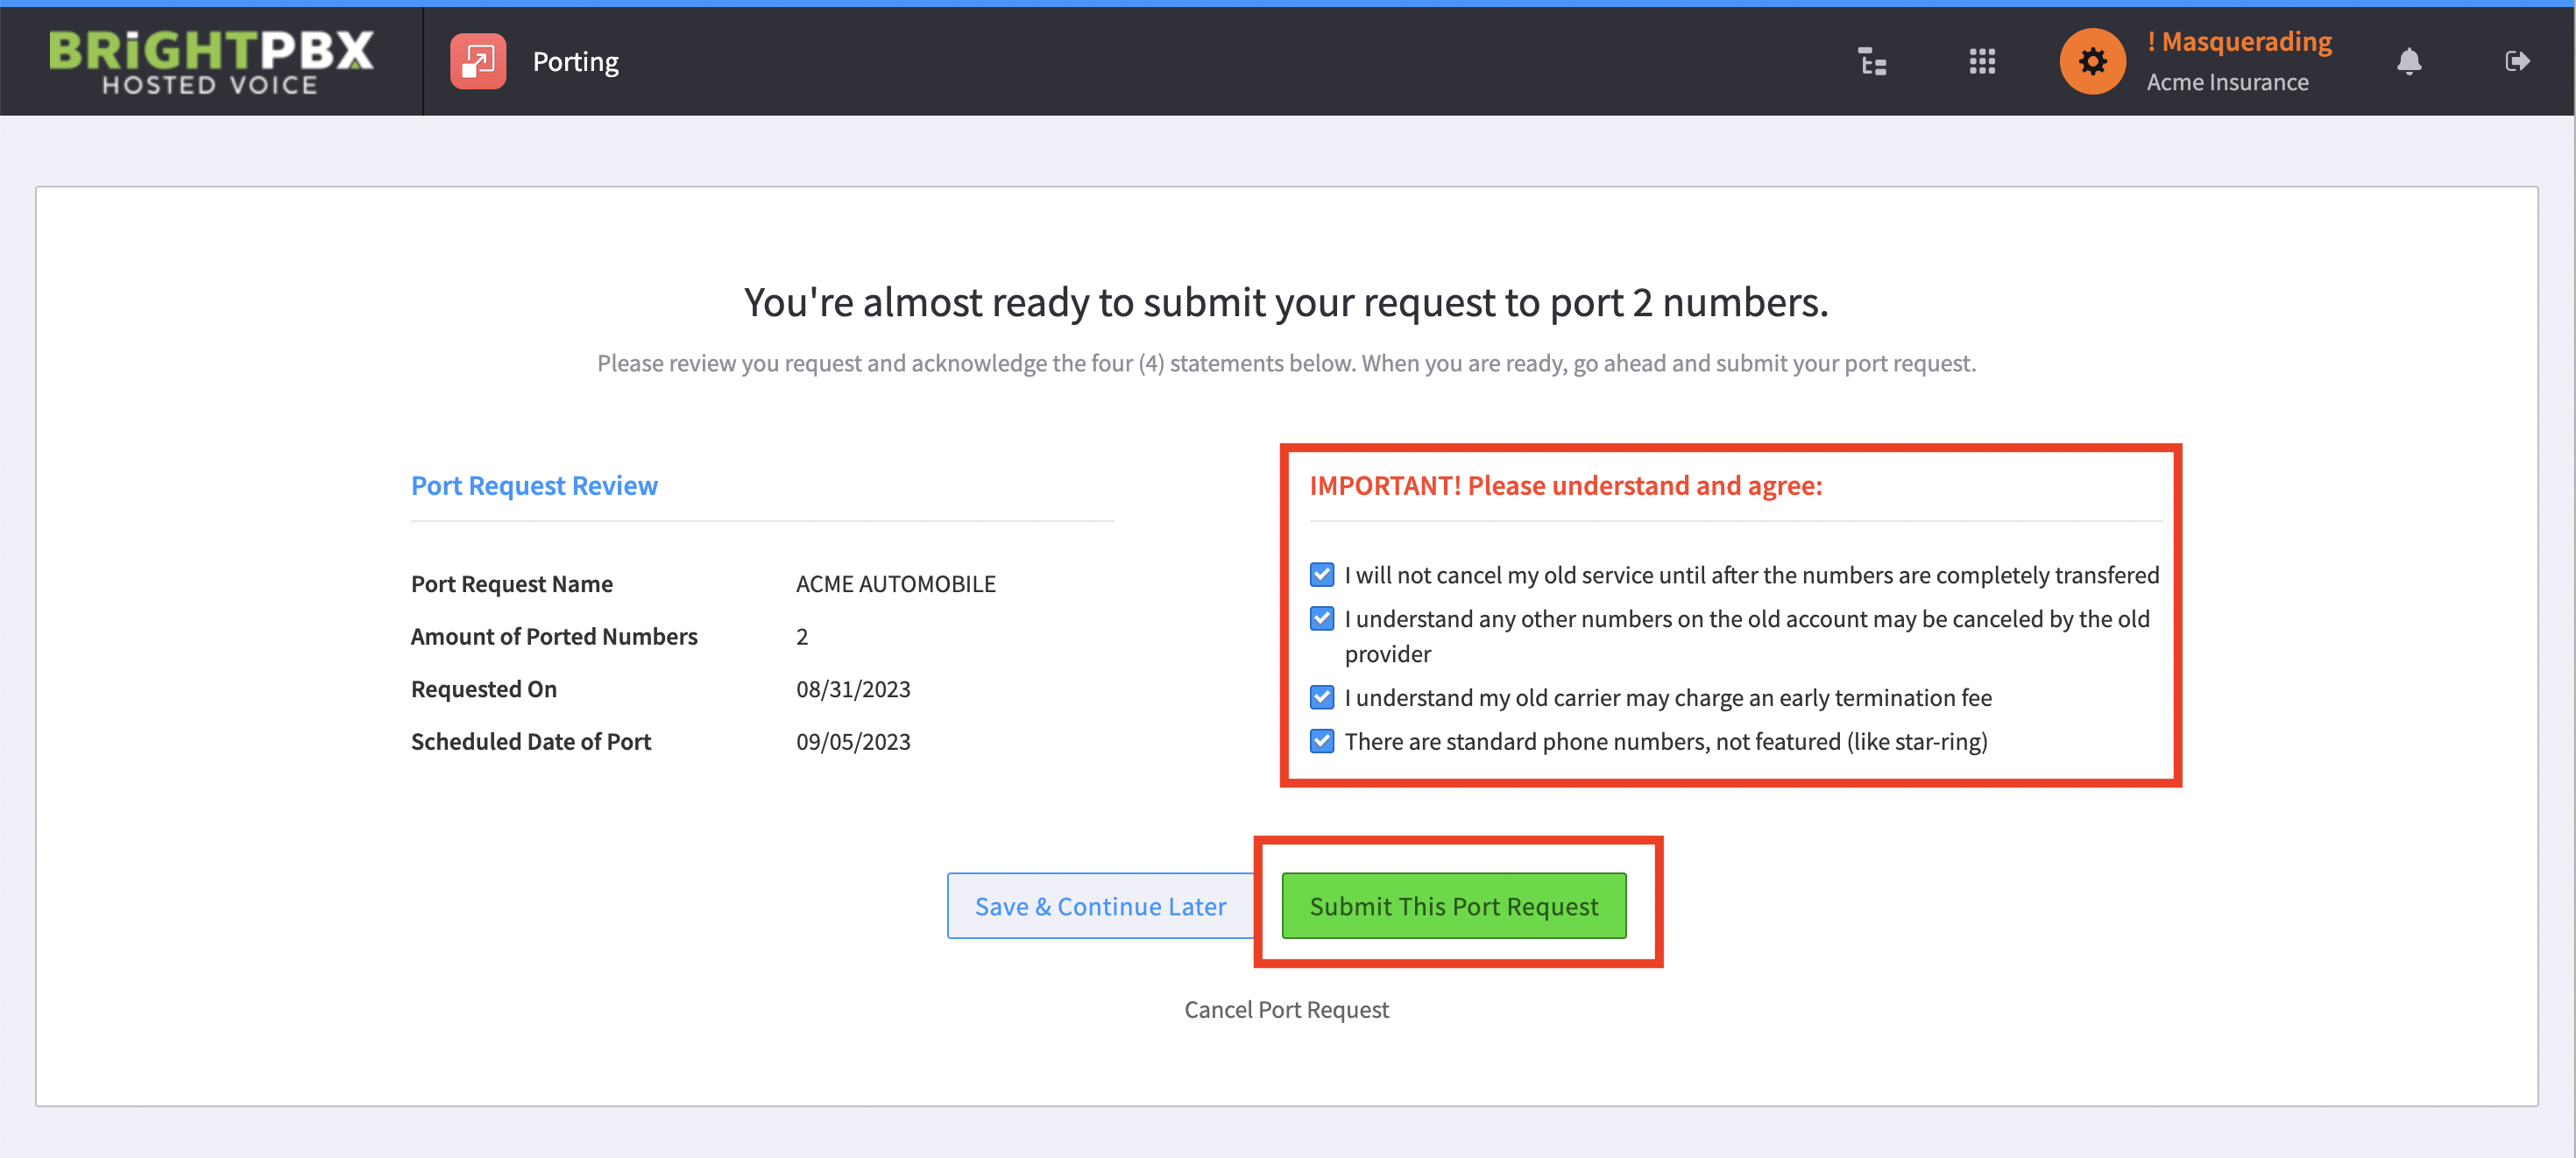
Finally, confirm the questions surrounding the port and click Submit This Port Request