Provisioning Grandstream GXP21xx Series
-
Add the device to Smart PBX
-
Factory reset your Grandstream device. Push the centre button on the directional pad, navigate to System, then choose Factory Reset.
-
Obtain the phone’s IP address. Push the centre button on the directional pad and choose Status > Network Status. You should see a line such as
IPv4: 10.10.9.88. -
Log into the web interface. Enter the IP address in your browser. On first login the default username is
adminand the password isadmin. -
Configure auto-provision details. Most of the information is already pre-populated. Go to Maintenance, then Upgrade and Provisioning on the drop-down menu, and set:
Field Value Config Server Path our provisioning URL Upgrade via HTTPFirmware Server Path leave empty 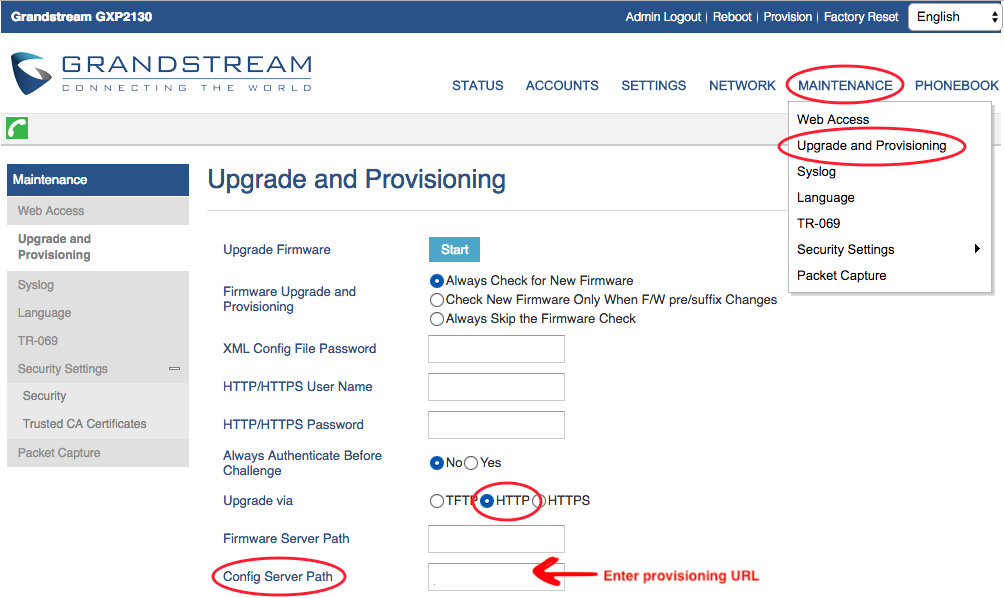
-
Click Save and Apply at the bottom of the page
-
Then click Provision at the top of the page

-
This may take a few minutes, but if done correctly you will notice the device reboot as it goes through the initial provisioning phase